How to Make a Certificate of Achievement Online with CertFusion
Creating a Certificate of Achievement online has never been easier. Whether you're a teacher, event organizer, HR manager, or course creator, CertFusion lets you design, customize, and deliver professional certificates in minutes — no graphic design skills needed.
This step-by-step guide walks you through the entire process of creating beautiful certificates using CertFusion's Template Designer.
Why Use CertFusion for Your Certificates?
CertFusion is purpose-built for certificate creation, offering everything you need in one platform:
- Ready-made professional templates
- Visual drag-and-drop editor
- Custom branding options
- Automatic certificate IDs and QR code verification
- Bulk certificate generation
- One-click email delivery
- Integrations with Zoom, Webex, Typeform, Tally, Google Form, Kit, and Zapier
Step-by-Step: Creating a Certificate of Achievement in CertFusion
Step 1: Access the Template Designer
Log into your CertFusion account and navigate to the Template Designer. The designer consists of six main sections accessible from the left sidebar:
- Texts — Add and manage text elements
- Objects — Upload and manage images/graphics
- Properties — Configure dynamic data fields
- QR Code — Add verification QR codes
- Background — Set the certificate background
- Templates — Choose from pre-built designs
The right side of the screen displays a live preview of your certificate, where you can click any element to select and edit it.

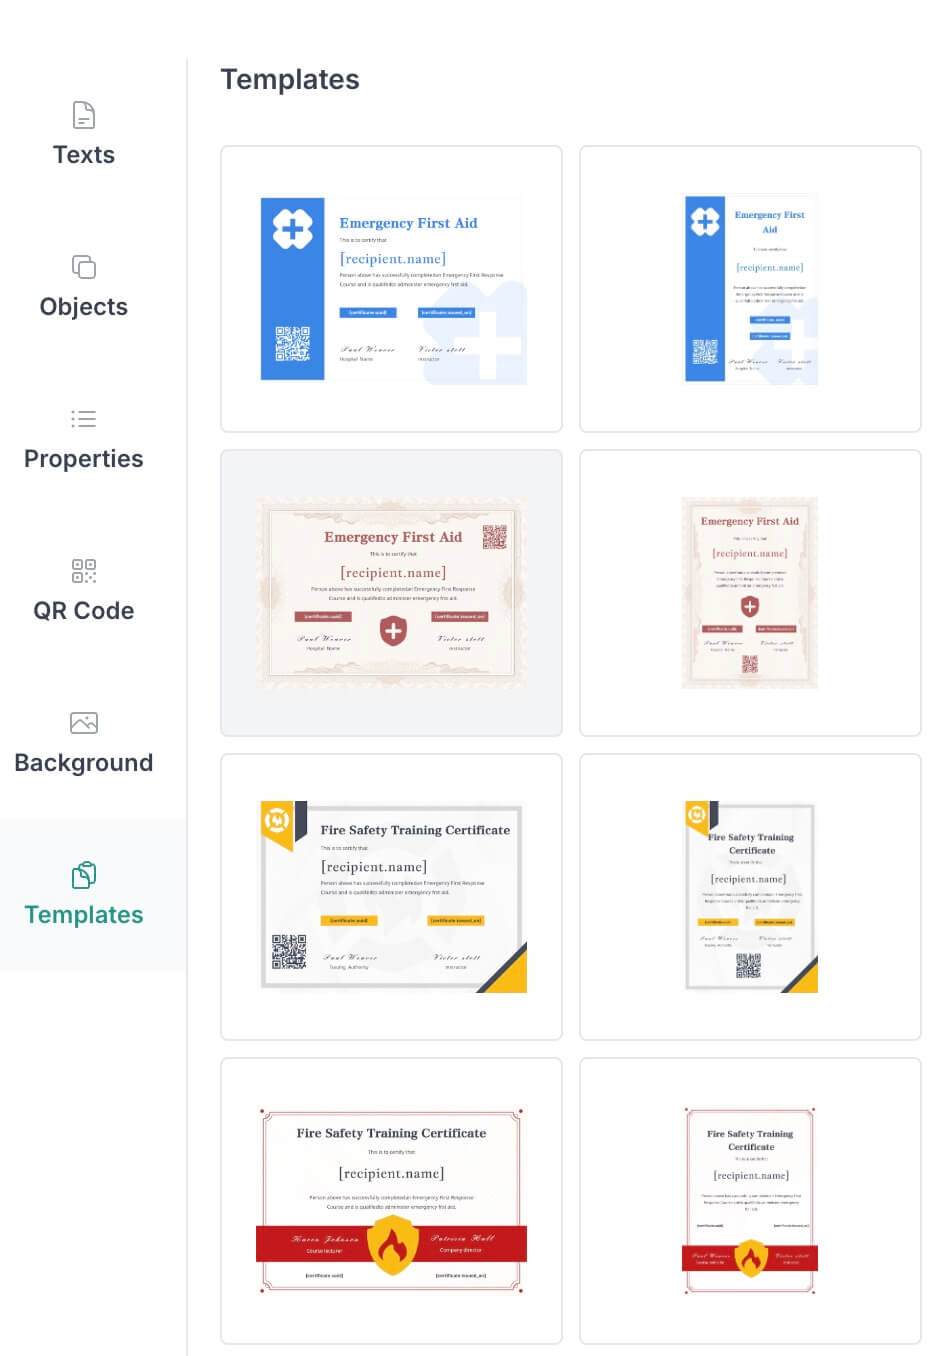
Step 2: Choose a Starting Template
Click on the Templates section in the sidebar to browse pre-designed certificate layouts. CertFusion offers templates for various purposes:
- Academic certificates (schools, seminars)
- Corporate awards (employee recognition)
- Training and workshop completions
- Professional development programs
- Special achievements and milestones
Click any template thumbnail to apply it to your certificate. This will set up the background, text elements, and standard property placeholders automatically.
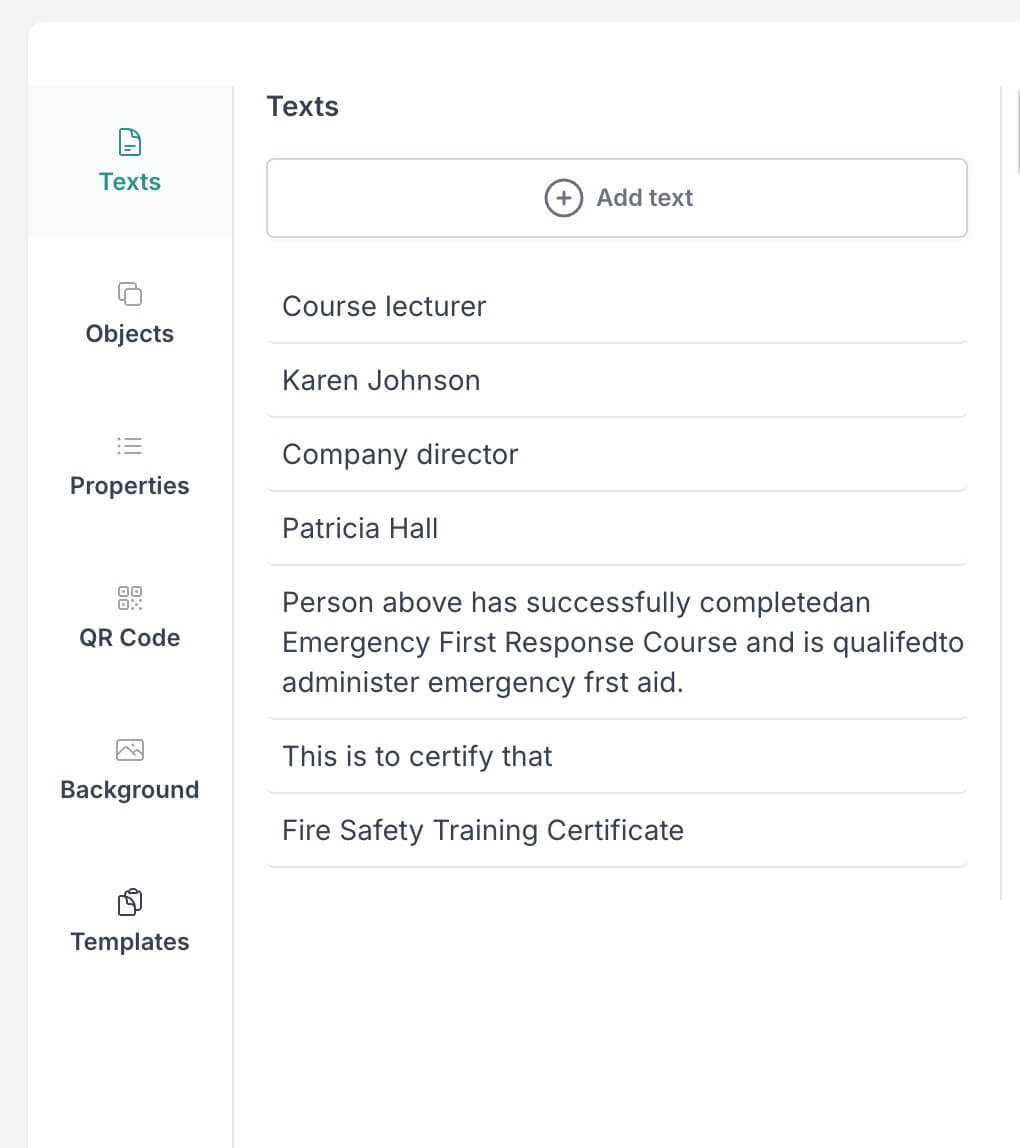
Step 3: Customize the Text Fields
Navigate to the Texts section to manage all text elements on your certificate. A standard Certificate of Achievement typically includes:
- Title — "Certificate of Achievement," "Award of Excellence," etc.
- Recipient's name — This will be a dynamic field
- Achievement description — What the certificate recognizes
- Organization name — Your company or institution
- Issue date — When the certificate was awarded
- Signatory details — Names and titles of authorizers
Click the "+ Add text" button to insert new text elements. Select any existing text on the canvas to edit it. The toolbar at the top provides formatting options including font size, font family, weight, alignment, and styling (italic, underline).
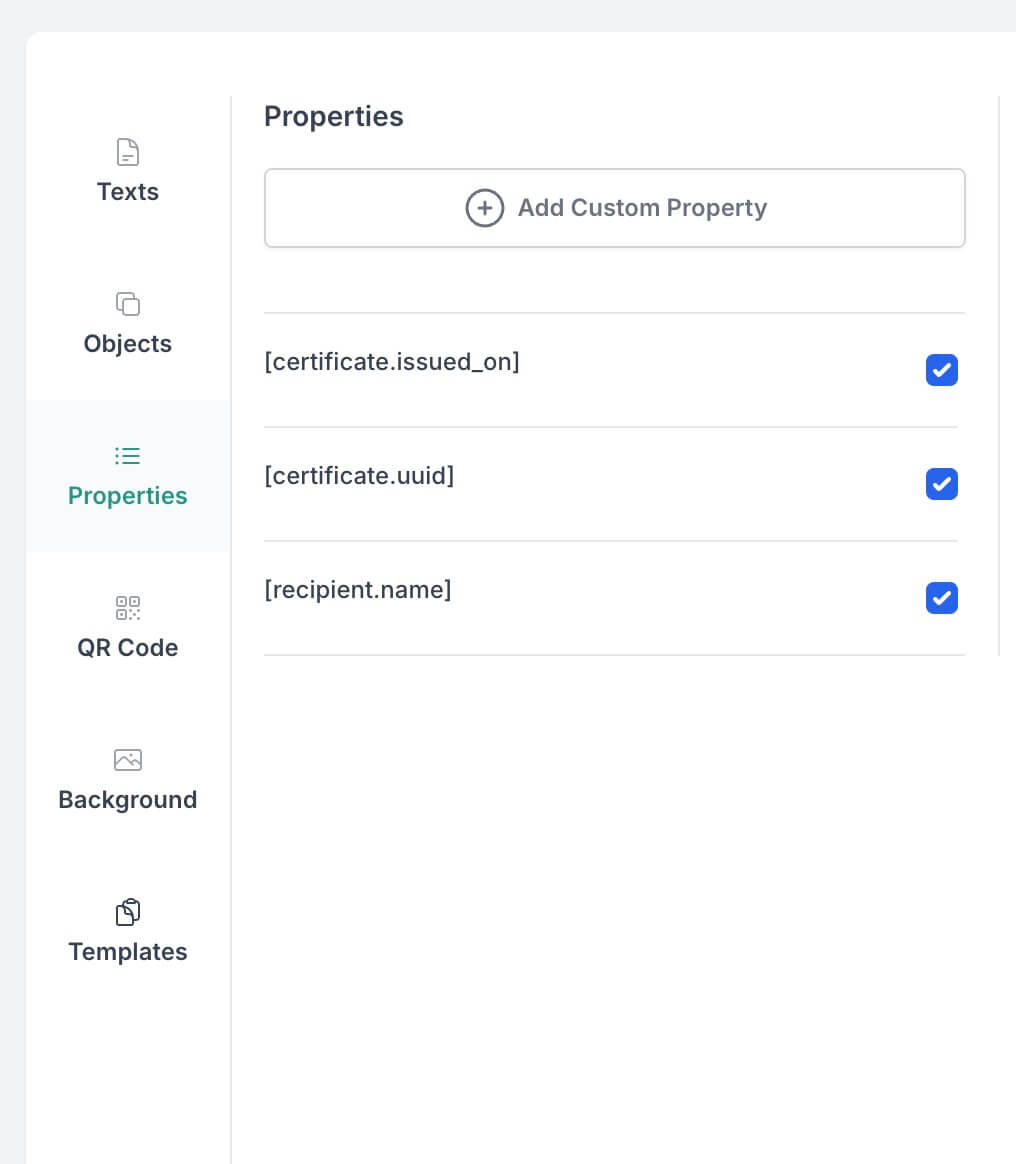
Step 4: Set Up Dynamic Properties
Properties are dynamic fields that automatically populate with data when certificates are generated. Navigate to the Properties section to configure them.
CertFusion provides three built-in properties:
| Property | Description |
|---|---|
[certificate.issued_on] |
The date when the certificate was issued |
[certificate.uuid] |
A unique identifier for verification |
[recipient.name] |
The name of the certificate recipient |
Click "+ Add Custom Property" to create additional dynamic fields such as:
- Course names or codes
- Completion dates
- Score or grade information
- Instructor names
- Credit hours
Custom properties follow the format [custom.propertyname] and can be inserted anywhere in your template text.
Step 5: Add Your Branding
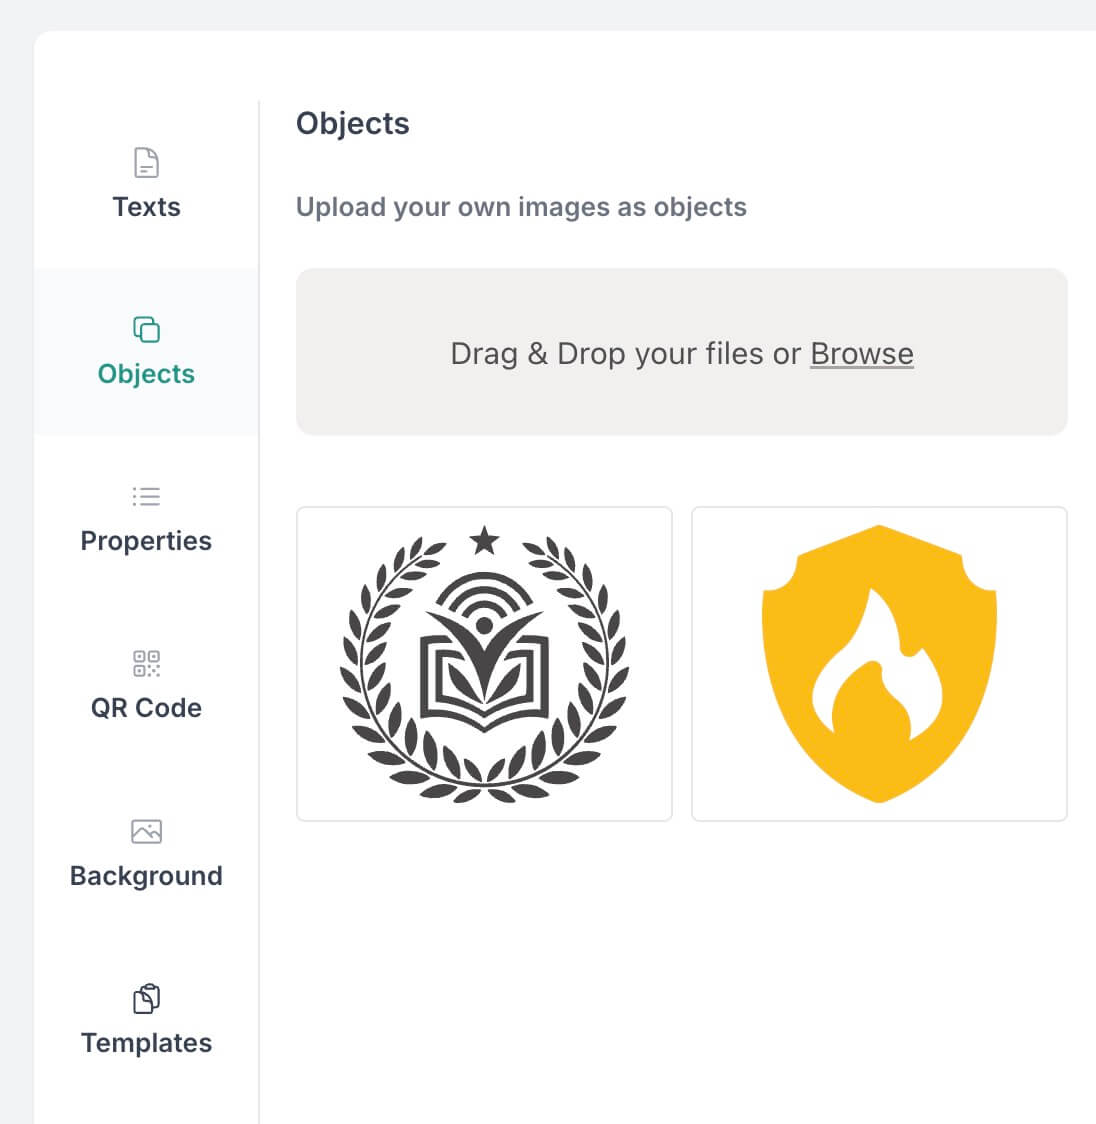
To make your certificate look professional and on-brand, navigate to the Objects section to upload your visual elements:
- Organization logo — Drag and drop or click "Browse" to upload
- Signature images — Add pre-signed signature graphics
- Certification seals or badges — Include official emblems
- Decorative graphics — Enhance the visual appeal
Once uploaded, your images appear in a gallery for easy reuse. Click any object to add it to your certificate, then resize and position it using the corner handles.
Step 6: Set the Background
Navigate to the Background section to establish the visual foundation of your certificate.
For best results, use images with these recommended dimensions:
| Orientation | Dimensions |
|---|---|
| Portrait | 2480 × 3508 pixels |
| Landscape | 3508 × 2480 pixels |
Drag and drop your background image or click "Browse" to upload. The background will immediately appear in your certificate preview.
Design tips:
- Use subtle patterns or borders that don't compete with text
- Ensure sufficient contrast between background and text colors
- Leave central areas relatively plain for text readability
- Consider decorative borders or guilloche patterns for a professional look

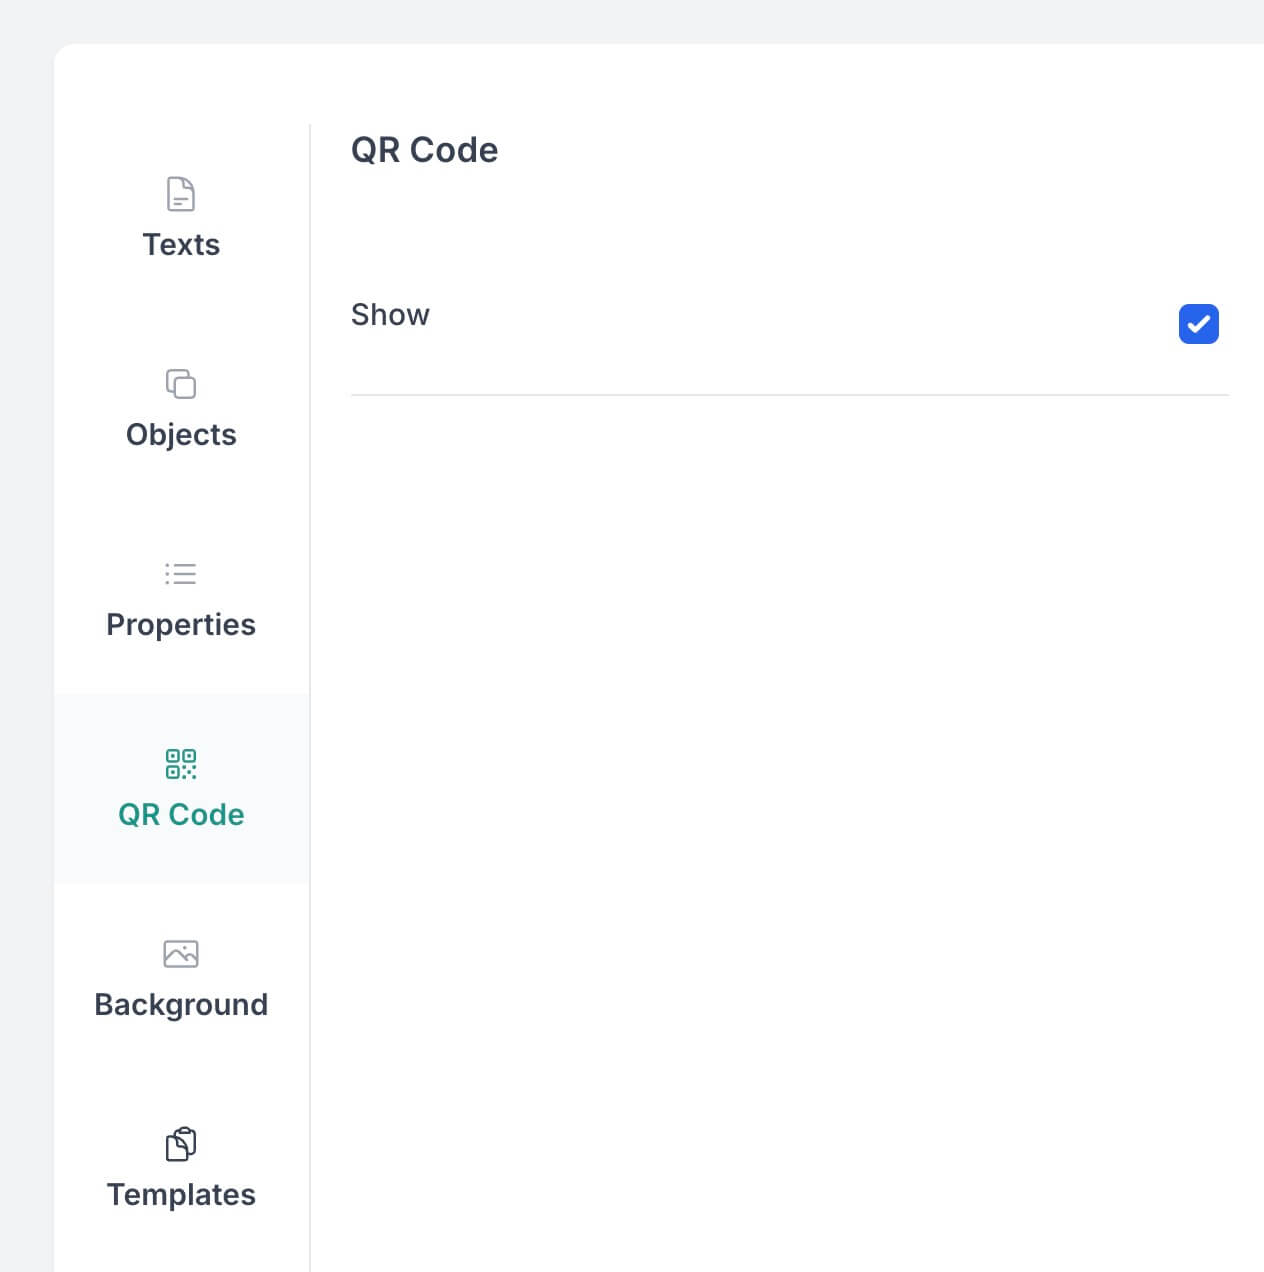
Step 7: Add QR Code Verification
Navigate to the QR Code section and toggle the "Show" checkbox to enable QR code verification on your certificate.
The QR code automatically links to the certificate's verification page using its unique UUID. When scanned, anyone can instantly verify the certificate's authenticity.
Best practices:
- Place the QR code in a corner where it won't obstruct important information
- Ensure minimum size of 100×100 pixels for easy scanning
- Test scanning on generated certificates to verify functionality
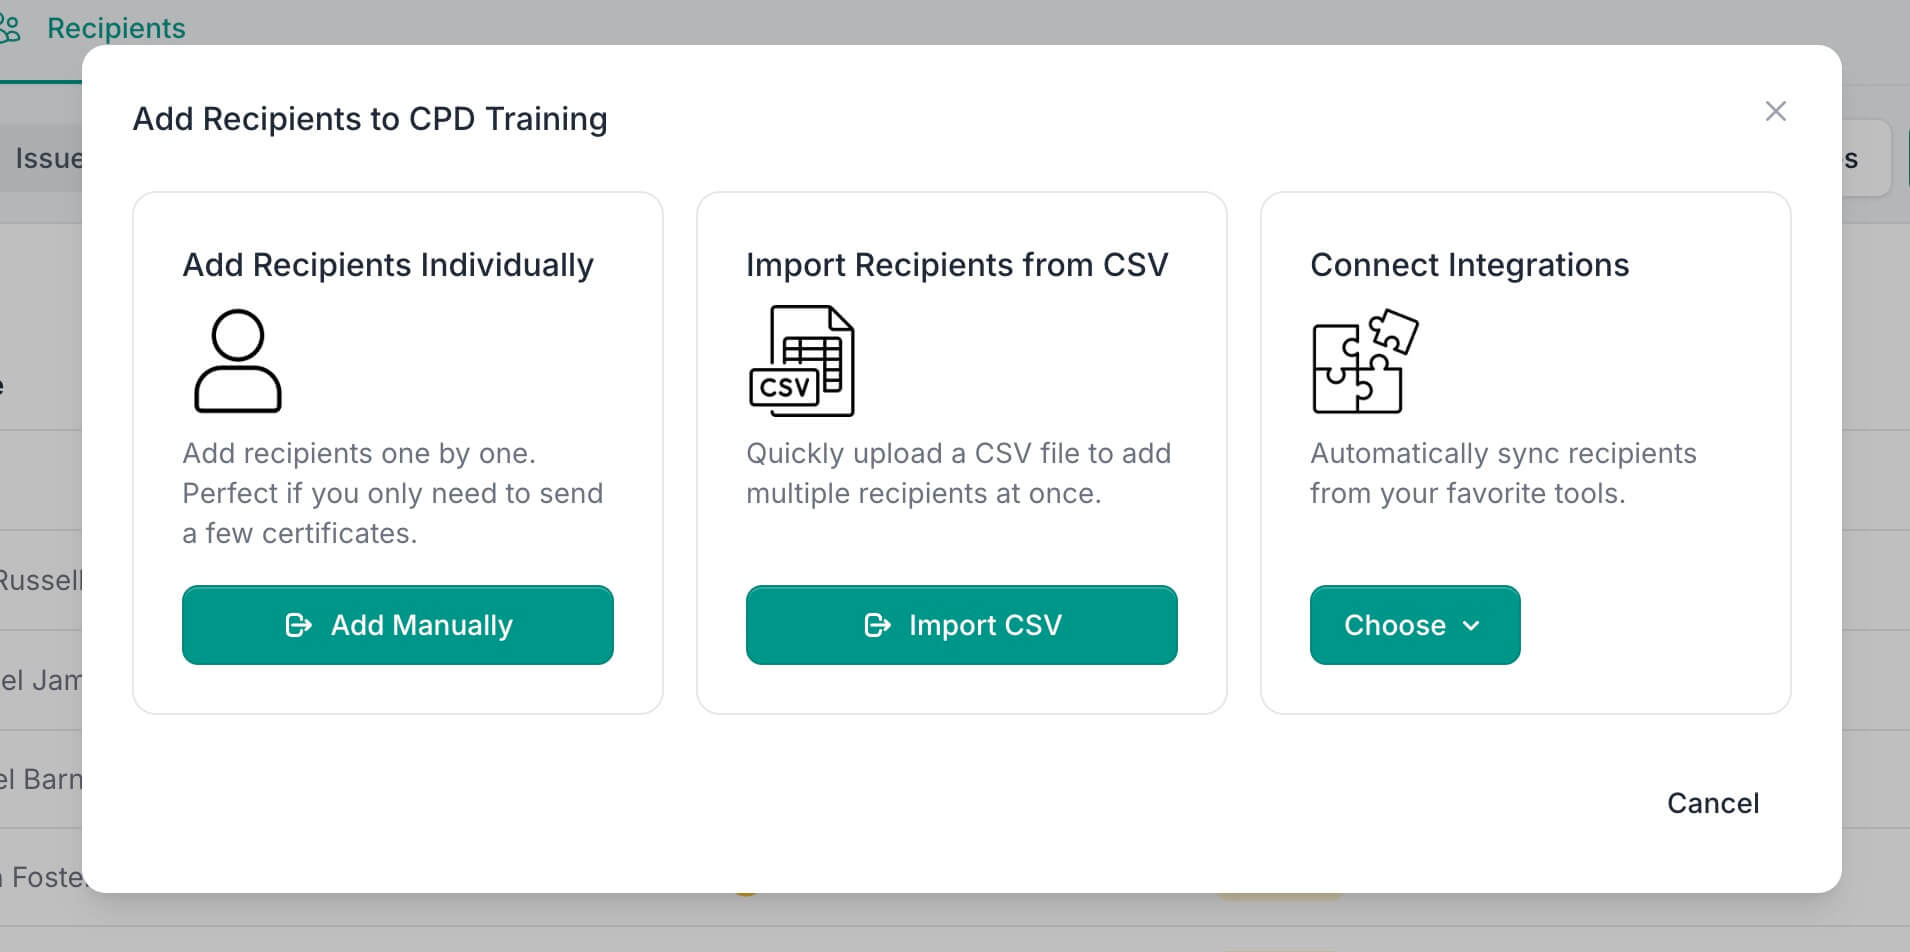
Step 8: Add Recipients
Once your design is complete, switch to the Recipients tab at the top of the page to add the people who will receive certificates.
Click the Add Recipients button to choose how you want to add recipients:
Add Recipients Individually
- Click Add Manually to enter recipients one by one
- Perfect if you only need to send a few certificates
Import Recipients from CSV
- Click Import CSV to upload a spreadsheet
- Quickly add multiple recipients at once
Connect Integrations
- Click Choose to select from available integrations
- Automatically sync recipients from: Zoom, Webex, Typeform, Tally, Google Form, Kit, or Zapier
Once added, recipients appear in a list showing their name, email, status, and date added. Use the filter buttons (All, Pending, Issued) to view specific groups, or search by name or email.
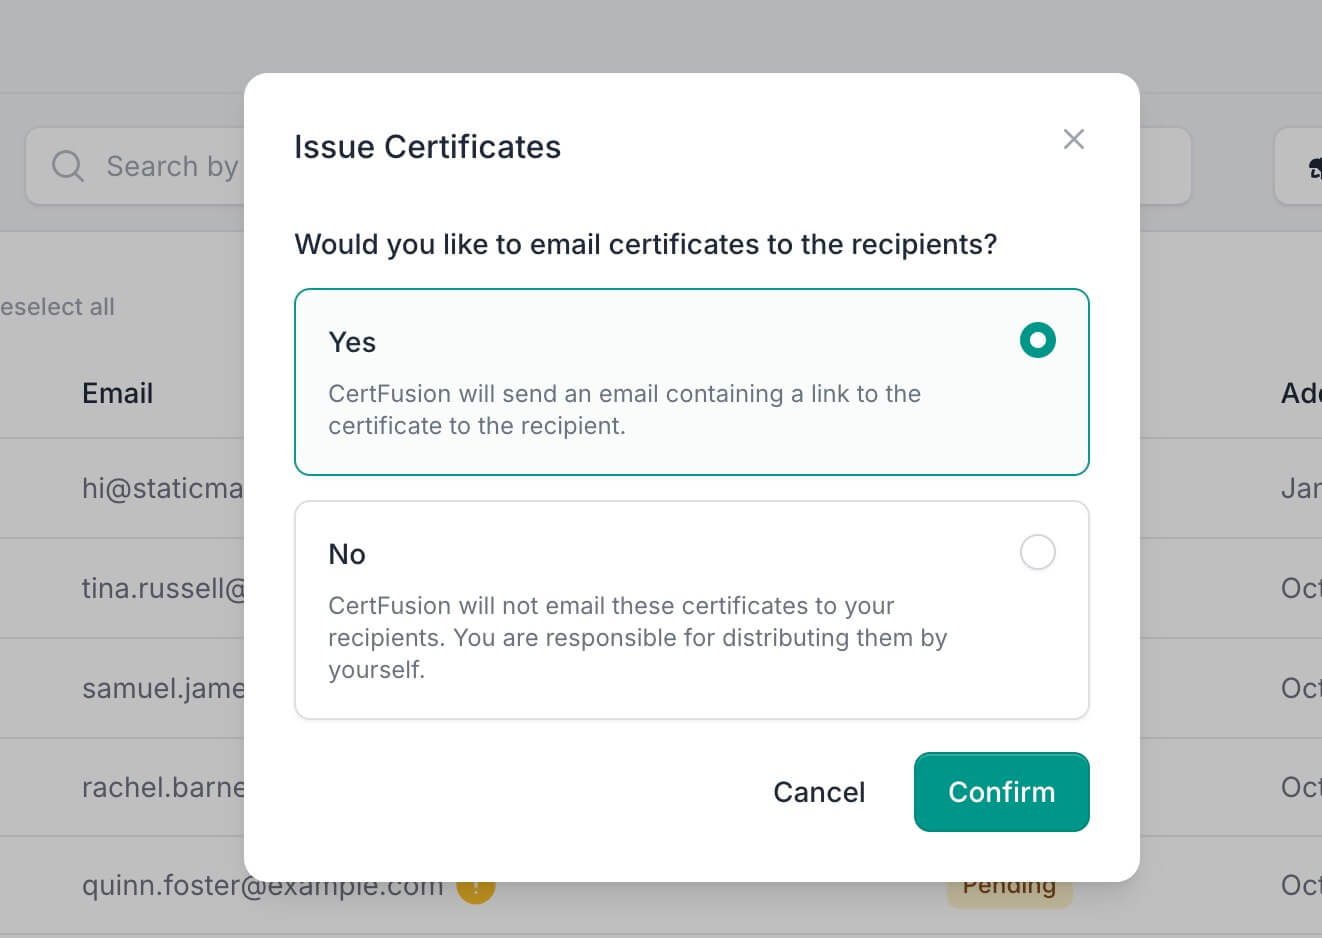
Step 9: Issue and Deliver Certificates
With your recipients added, you're ready to issue certificates:
- Select recipients by clicking the checkbox next to their names (or select all)
- Click the Issue Certificates button
- Choose your delivery option:
- Yes — CertFusion sends an email with a link to the certificate
- No — Certificates are generated but not emailed (you distribute them yourself)
- Click Confirm to issue
Recipients who have already received certificates will be automatically skipped.
Managing issued certificates:
After issuing, you can select recipients and use the bulk actions menu (•••) to:
- Export — Download certificate data
- Resend Email — Send the certificate email again
- Delete — Remove recipients from the list
The Status column shows Pending (yellow) for recipients awaiting certificates and Issued (green) for those who have received them.
Tips for Creating Great Certificates in CertFusion
-
Start with a template if you're unsure about design — they're professionally crafted starting points
-
Use visual hierarchy — Make the certificate title largest, recipient name prominent, and supporting text smaller
-
Test your properties by generating a sample certificate to ensure all dynamic fields populate correctly
-
Keep it readable by ensuring good contrast between text and background
-
Always include verification via QR code so recipients can prove authenticity
-
Save frequently as you work to avoid losing changes
-
Preview at full size to check how the certificate will look when printed or shared
Summary
Creating a Certificate of Achievement with CertFusion is quick and efficient. The Template Designer gives you complete control over every aspect of your certificate — from text and branding to dynamic properties and verification. Whether you're creating one certificate or thousands, CertFusion helps you design, verify, and deliver professional certificates in minutes.
Ready to get started? Log into CertFusion and open the Template Designer to create your first Certificate of Achievement today.
Table of Contents
Related Articles
Discover more insights and stories that might interest you