How to Generate E-Certificate from Typeform
If you collect participant data through Typeform, CertFusion can automatically generate and issue certificates for every submission. This guide shows you how to generate e-certificates from Typeform step by step.
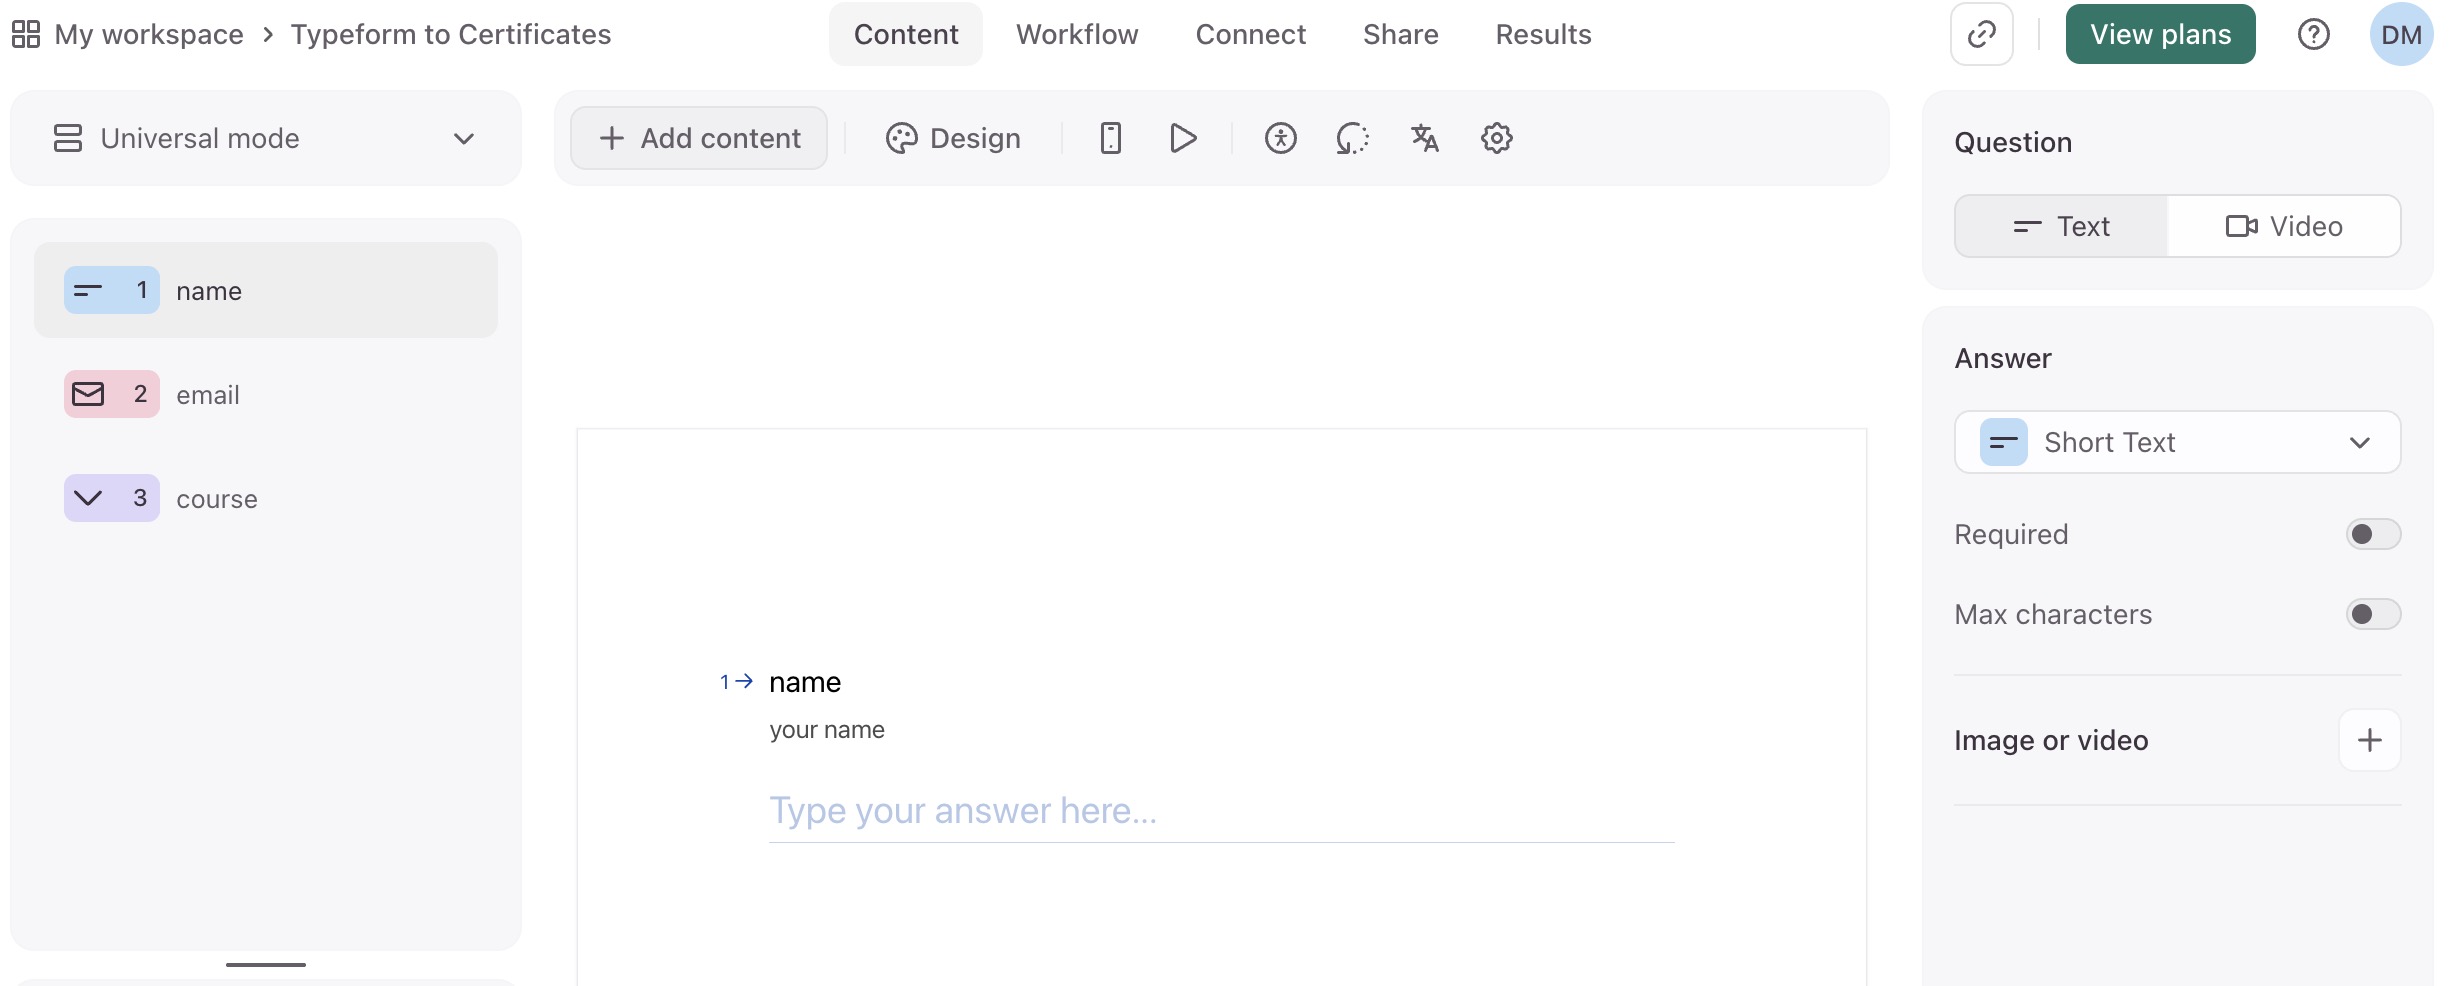
Step 1: Prepare Your Typeform
Before connecting to CertFusion:
-
Create a Typeform for your event, course, or training.
-
Include fields for at least:
- Name – participant’s full name
- Email – where the certificate will be sent
-
(Optional) Add extra fields if you want them on the certificate, such as:
- Course Name
- Completion Date
- Training Hours
- Instructor Name
Tip: Make Name and Email required fields to avoid missing data. 📖 Want more detail? See the official Typeform integration guide for field setup tips.
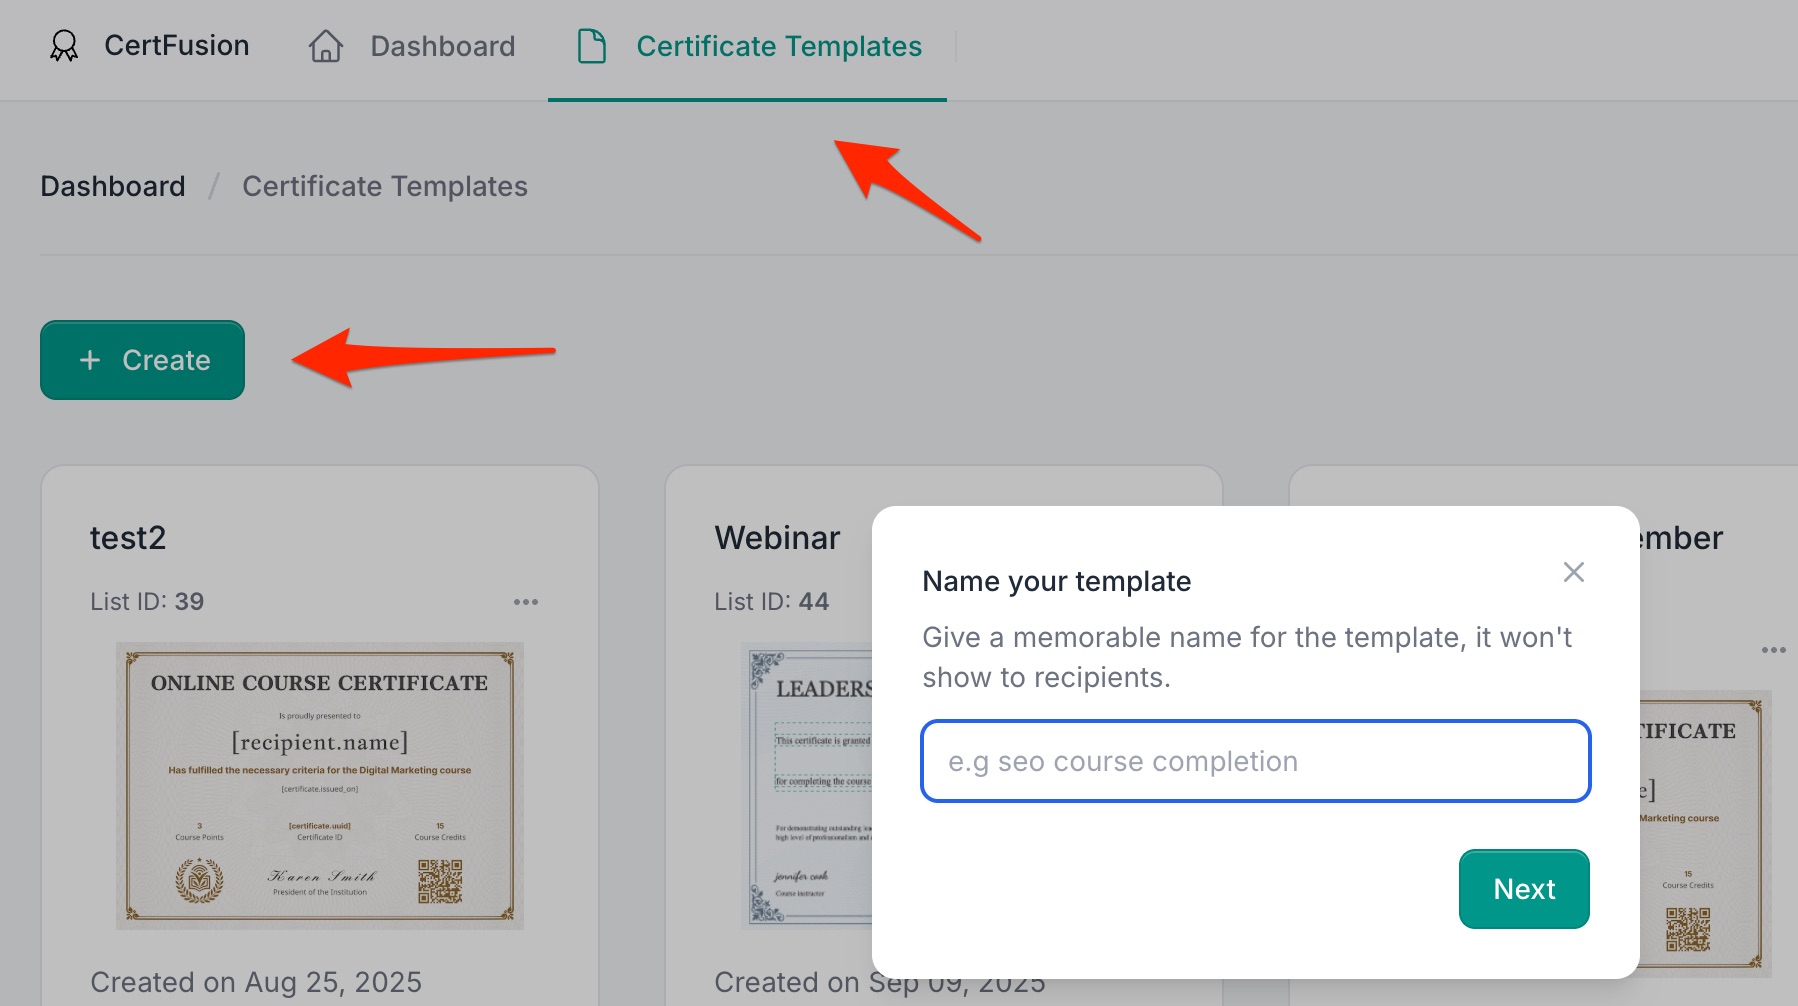
Step 2: Create or Select a Certificate Template
-
Log in to your CertFusion dashboard.
-
Go to Certificate Templates → select an existing template or click Create.
-
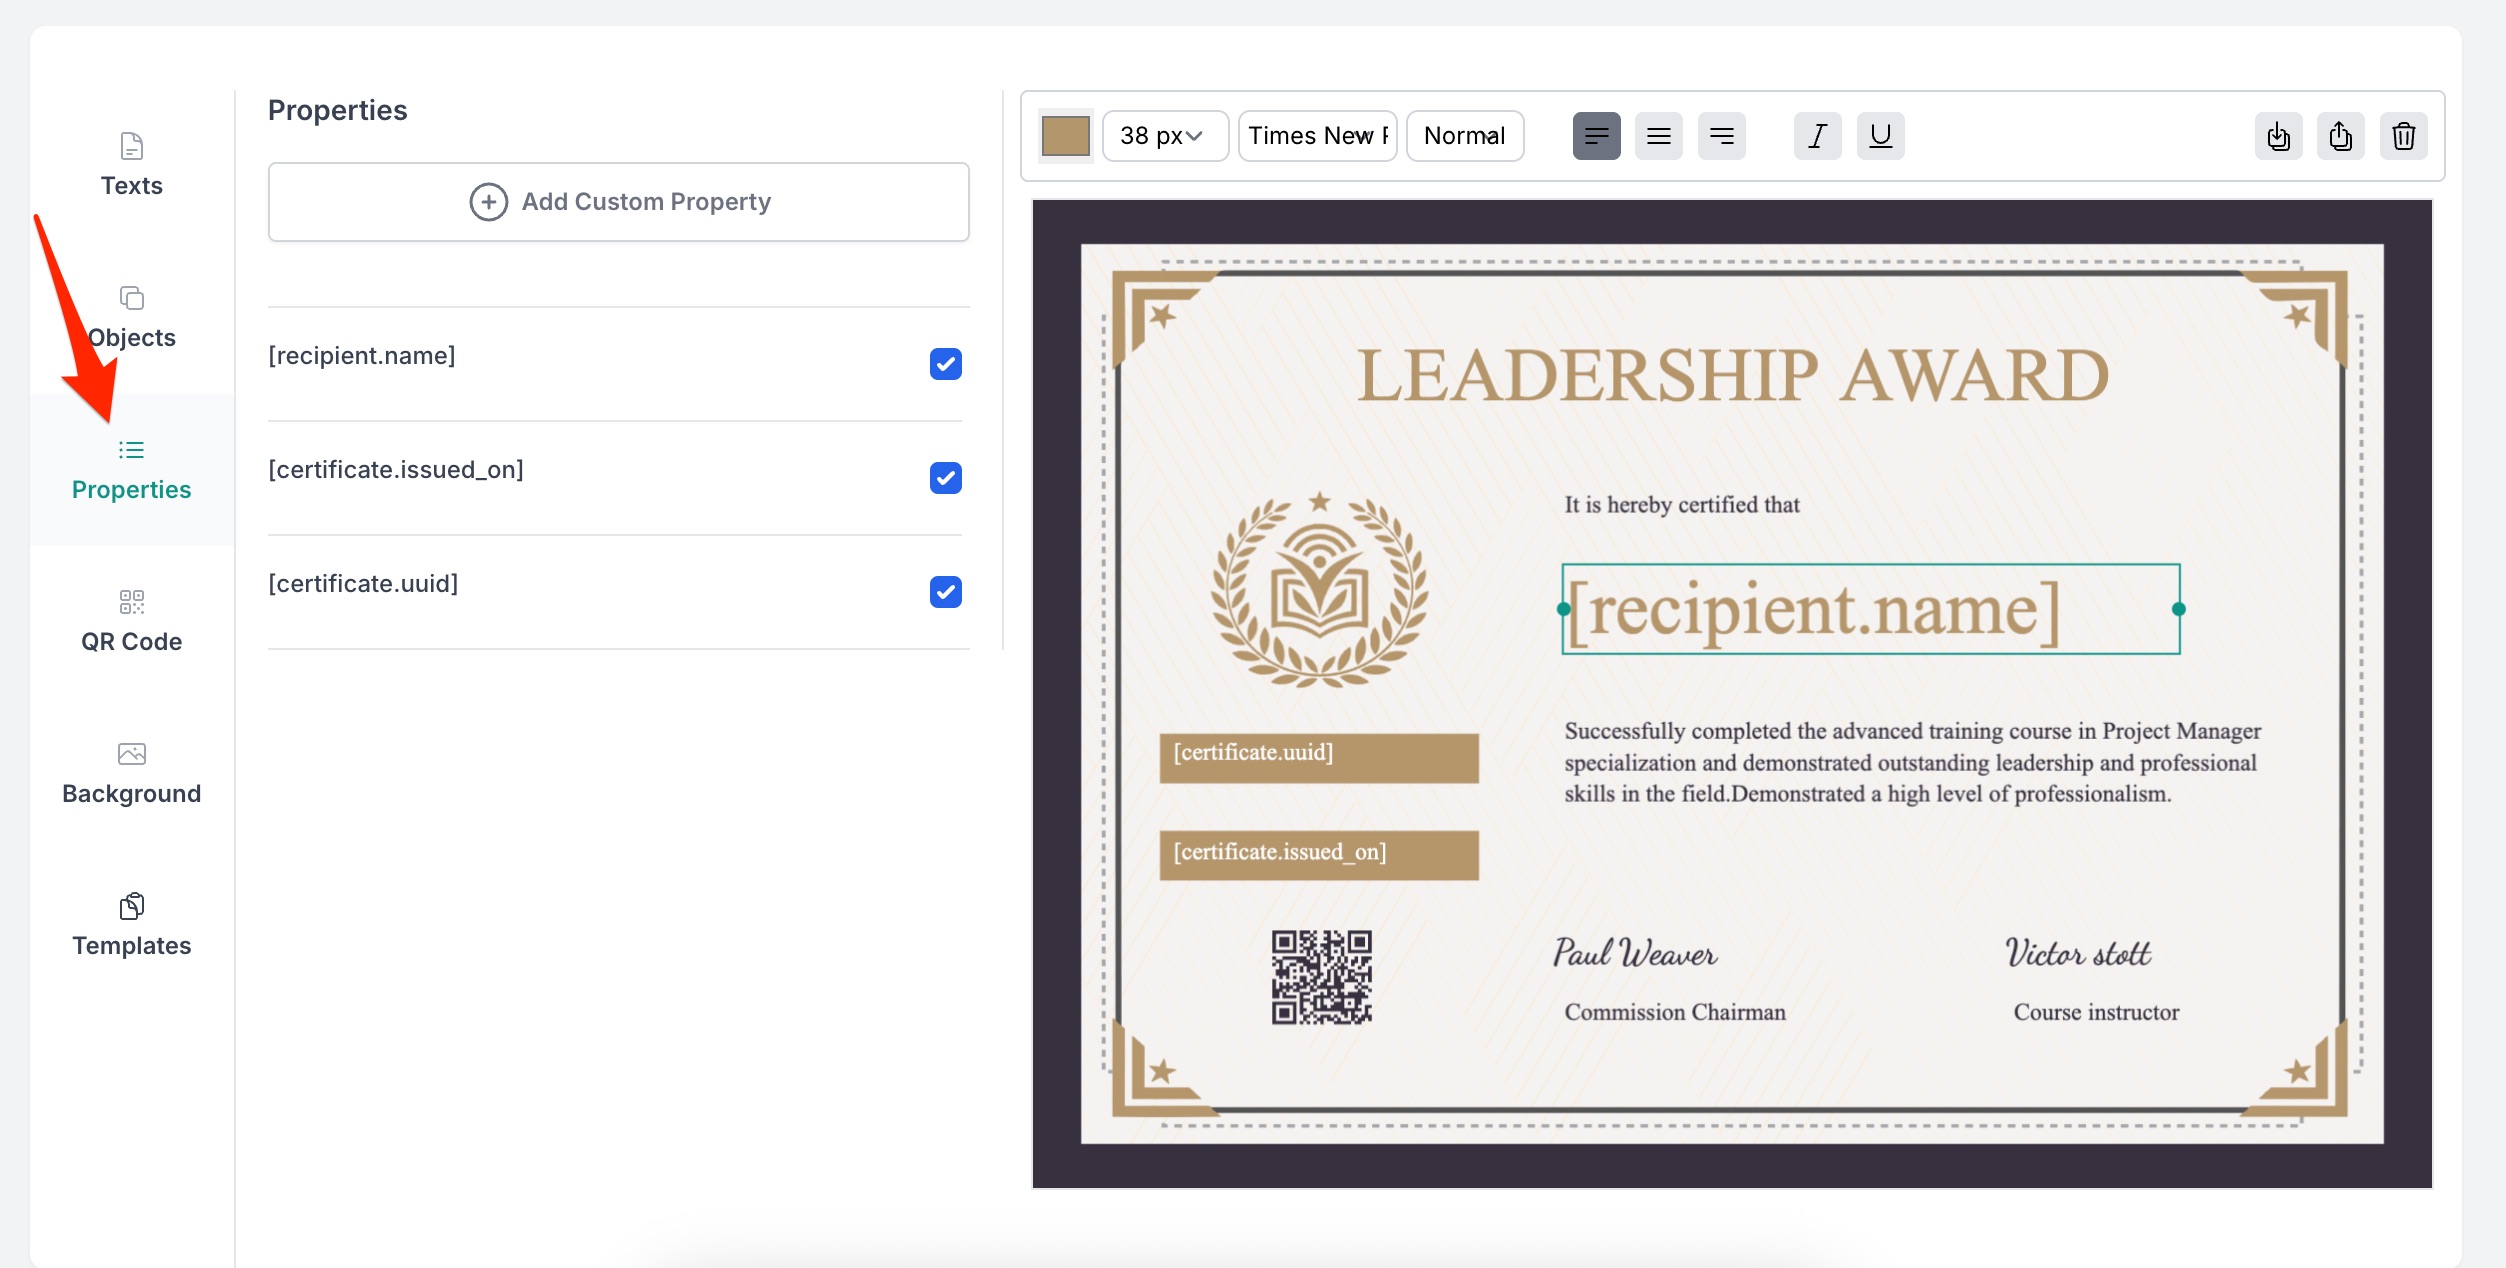
Add dynamic fields to your certificate:
- Recipient Name – mapped from the Typeform Name field
- Issued Date – automatically filled on certificate generation
- Certificate UUID – unique for each certificate, used for verification
Step 3: Connect Typeform Integration
- In CertFusion, go to Integrations → Typeform.
- Click Connect and log in to your Typeform account.
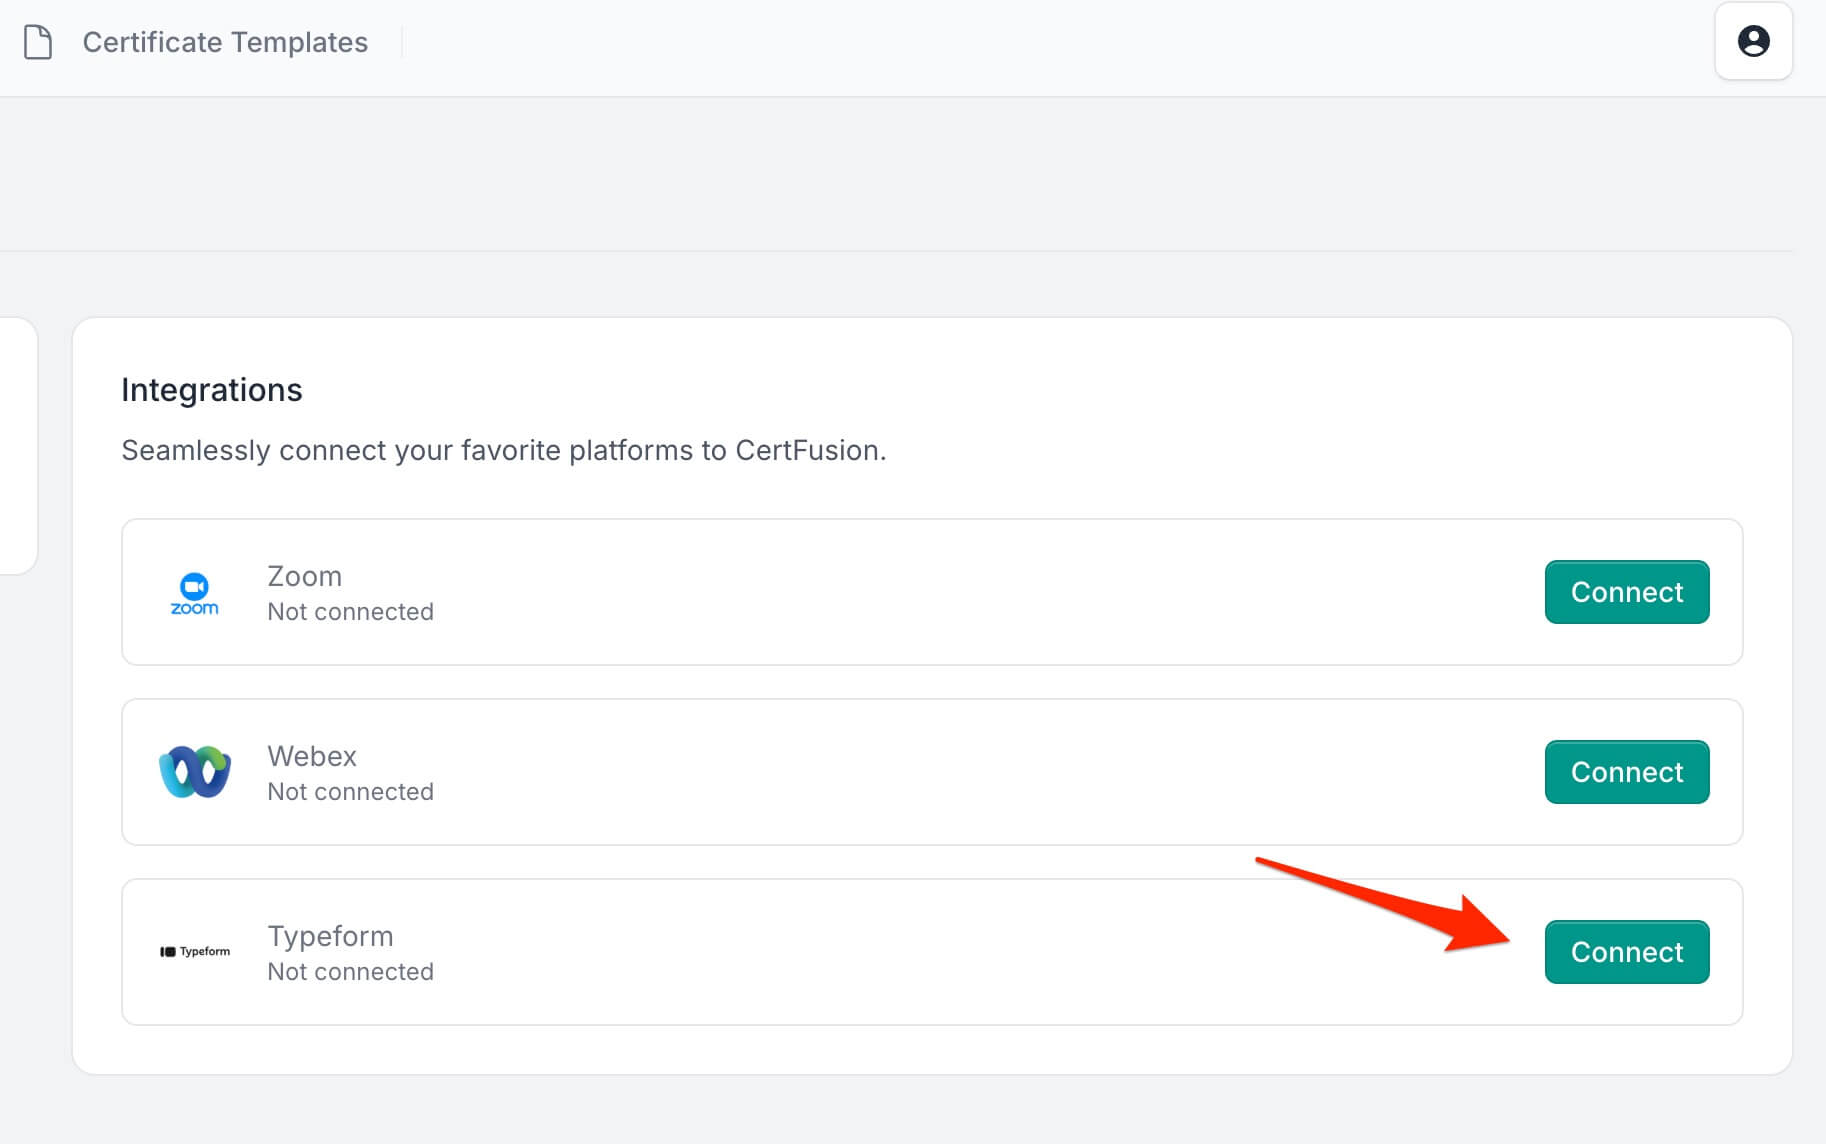
- Authorize CertFusion to access your Typeform forms.
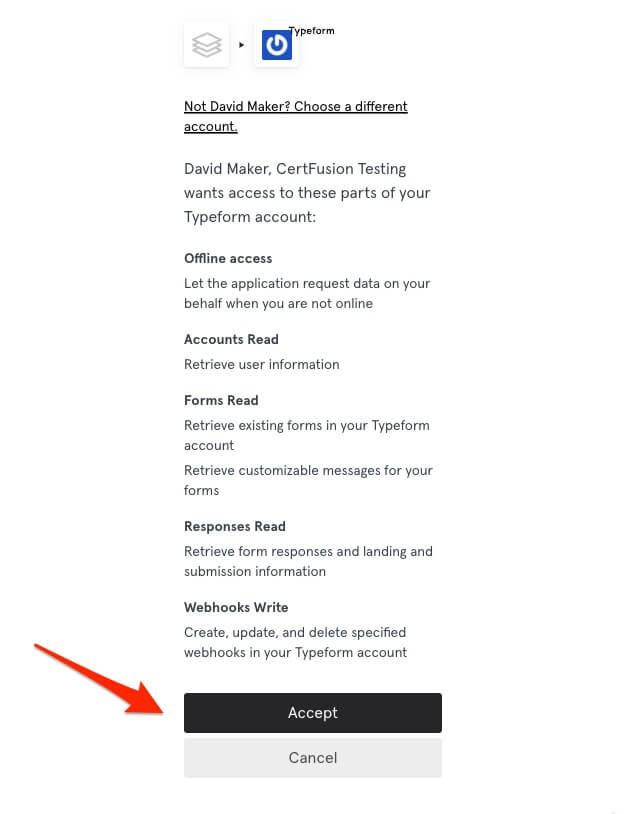
This creates a secure connection between CertFusion and Typeform so your forms can be used for certificate automation.
🔗 See more: Step-by-step connection walkthrough
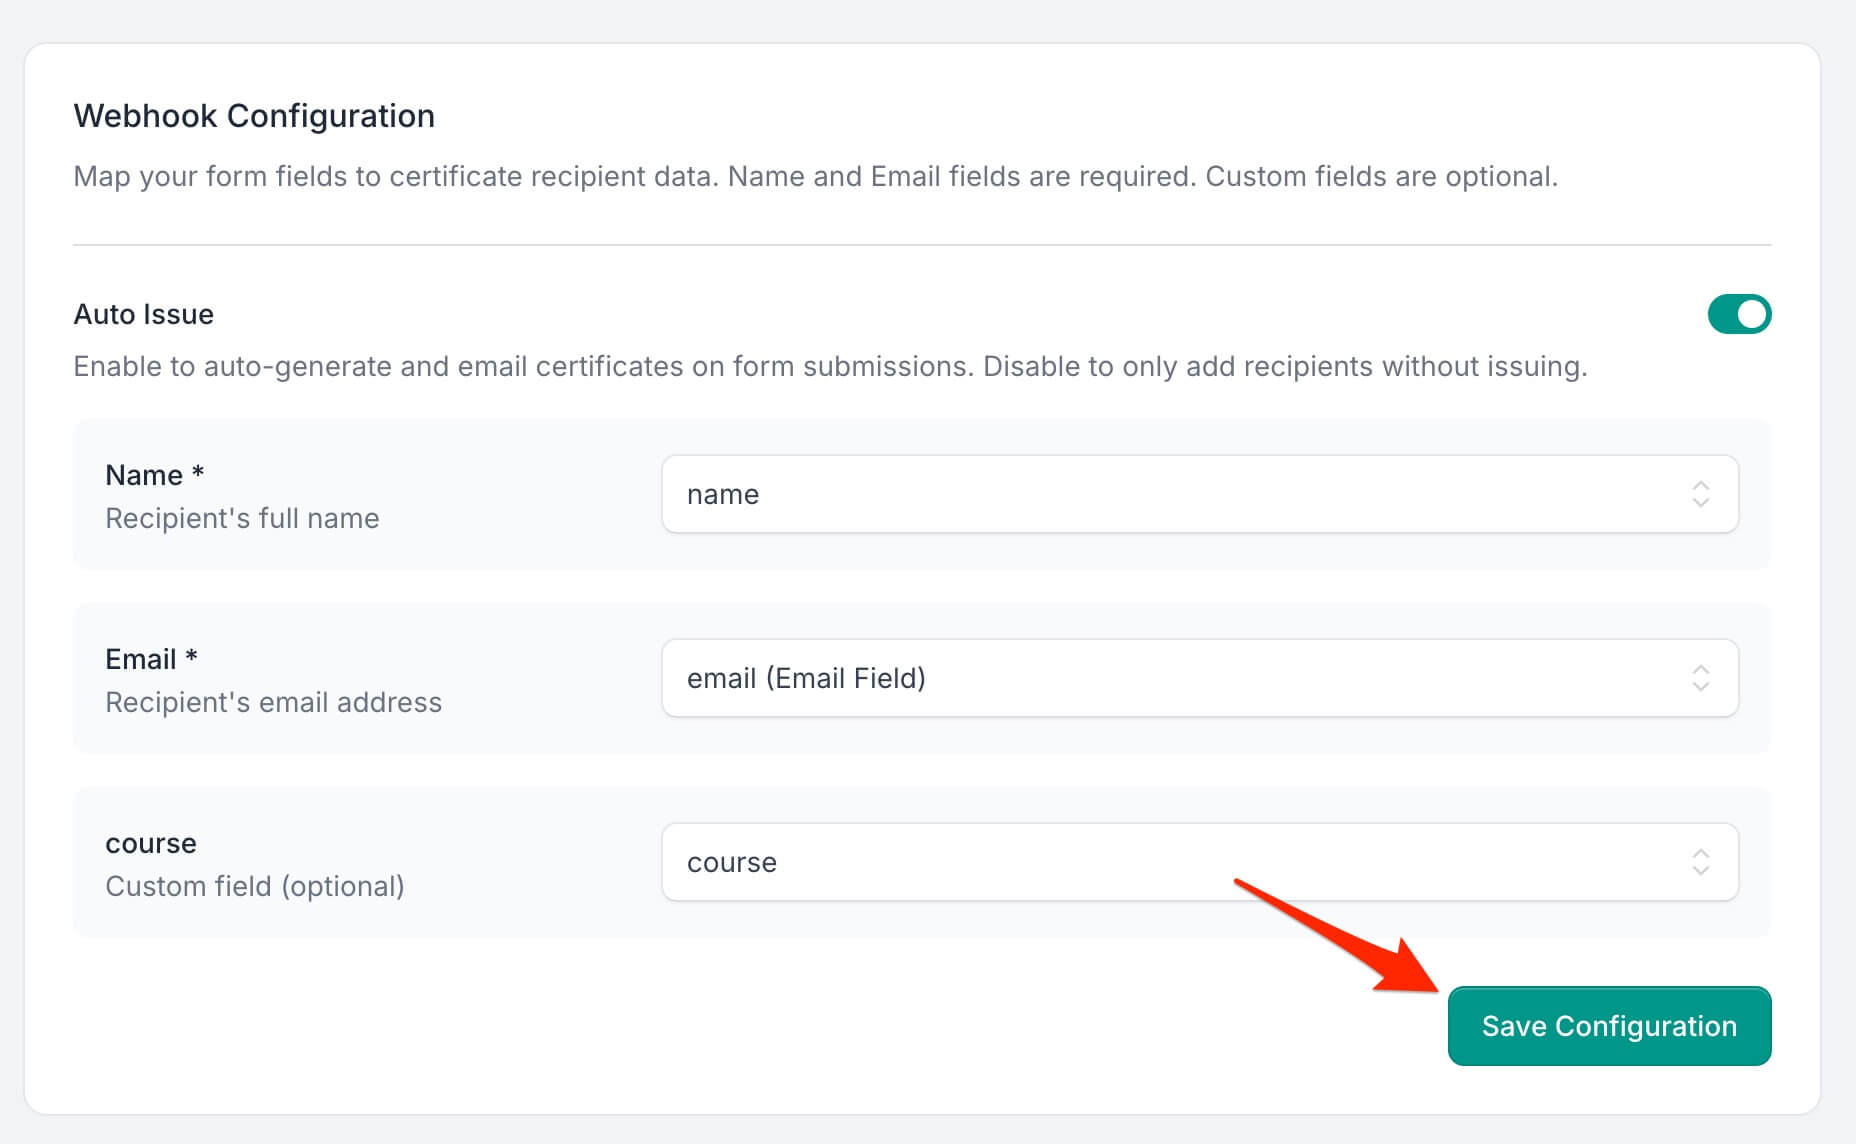
Step 4: Link Typeform to Your Certificate & Map Fields
-
Open the certificate template you want to use and go to its Recipients tab.
-
Click Integrate with Tools → Typeform.
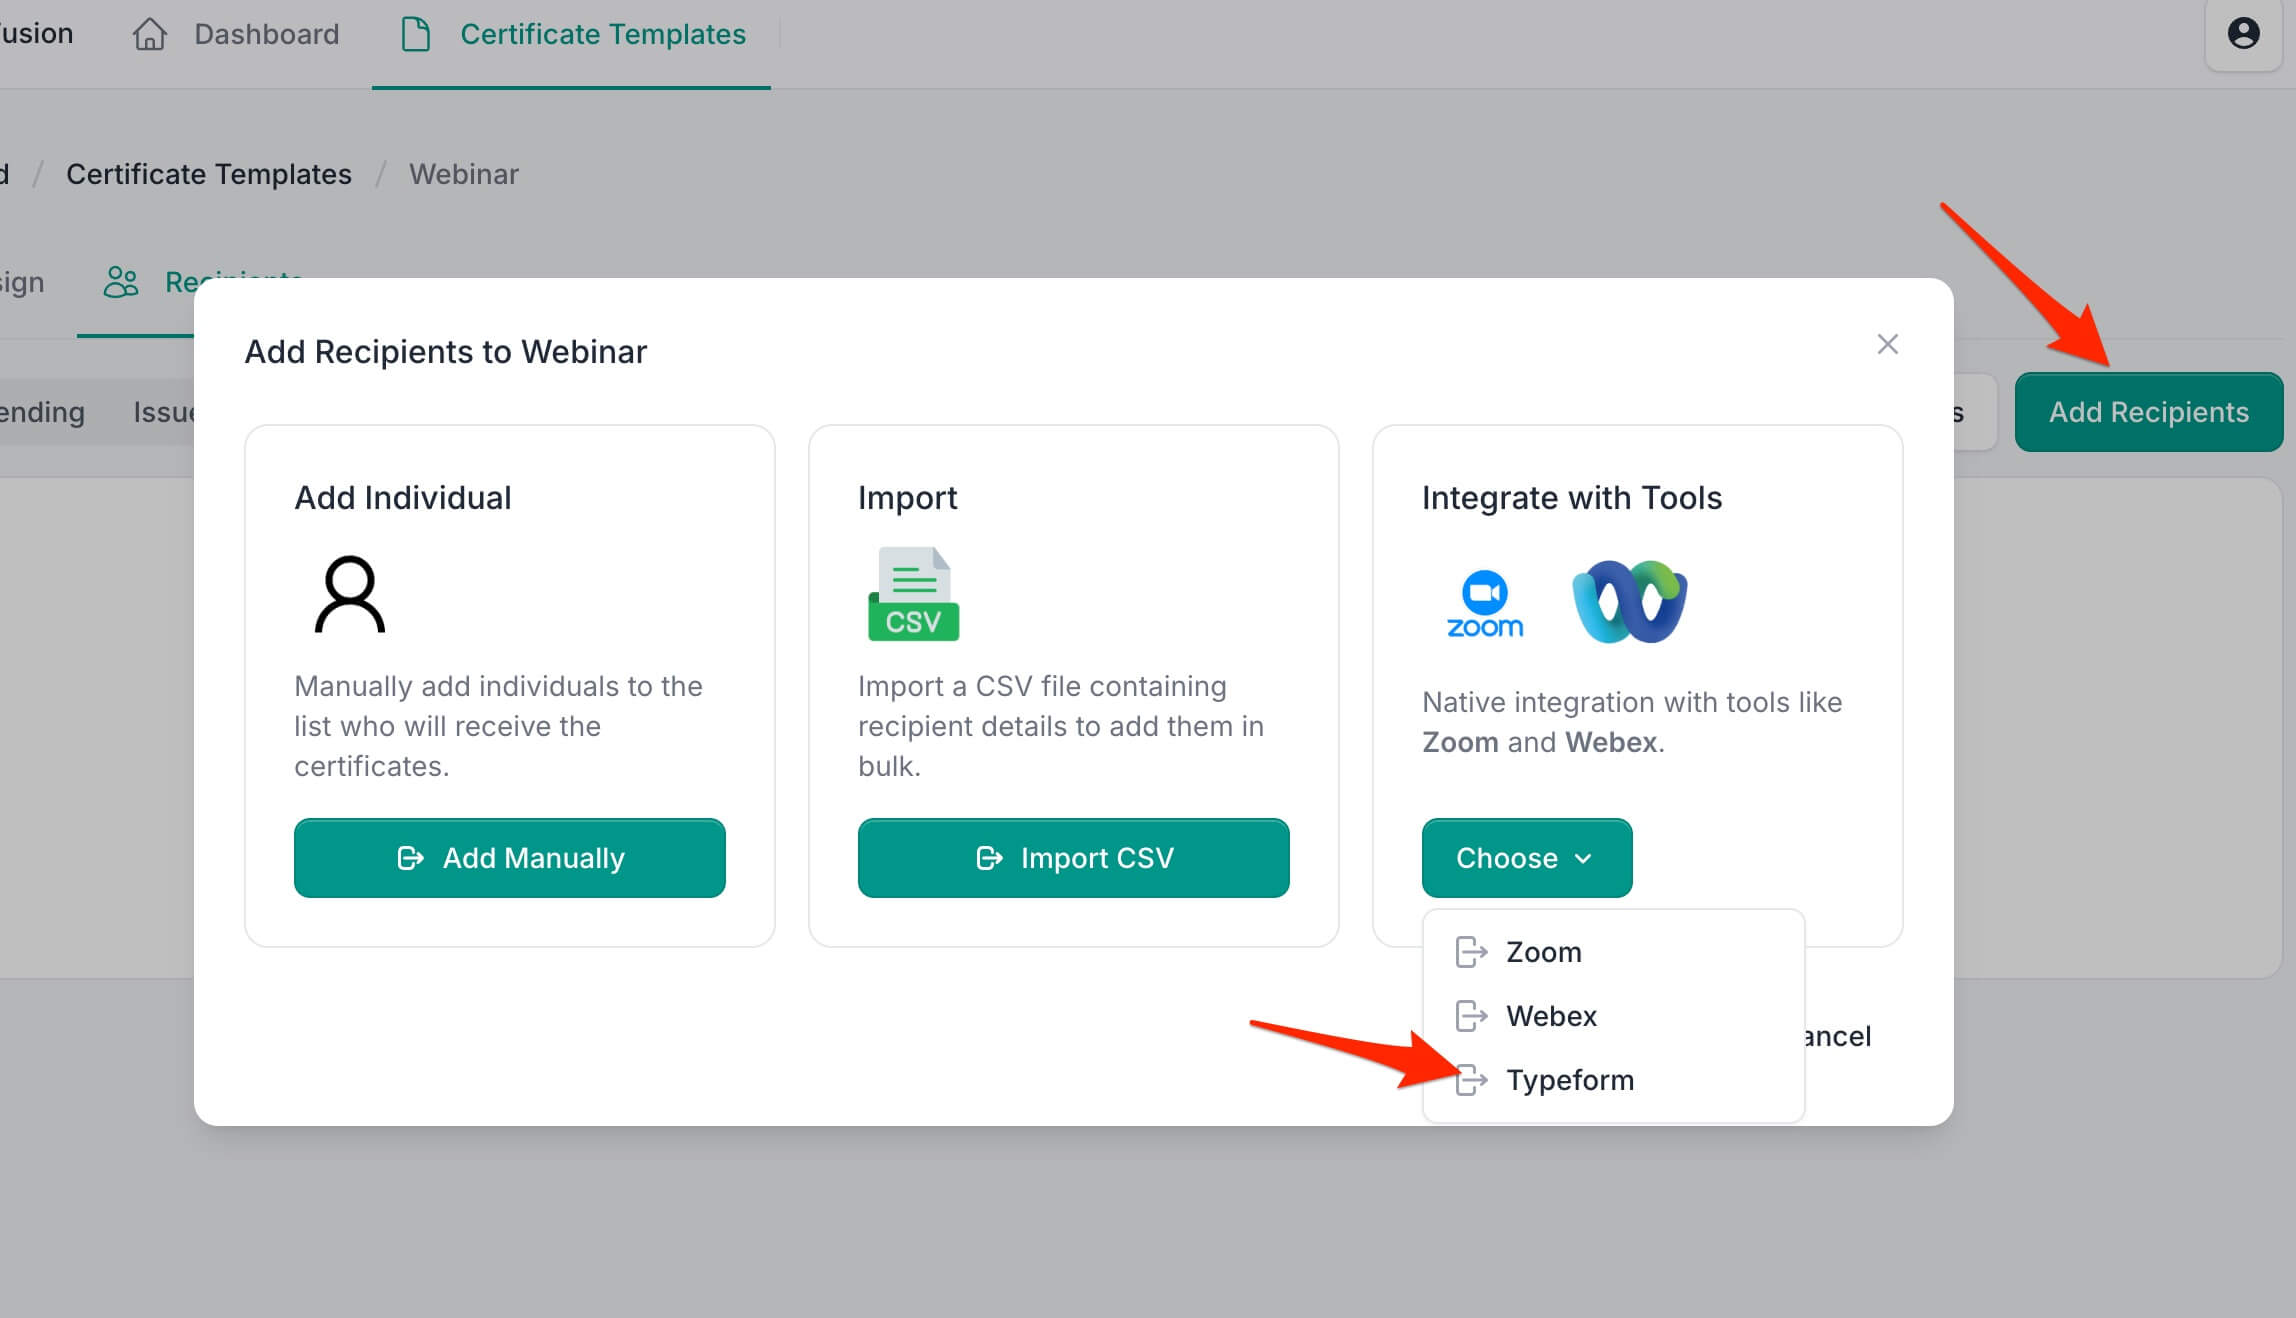
-
Select the Typeform you connected earlier.
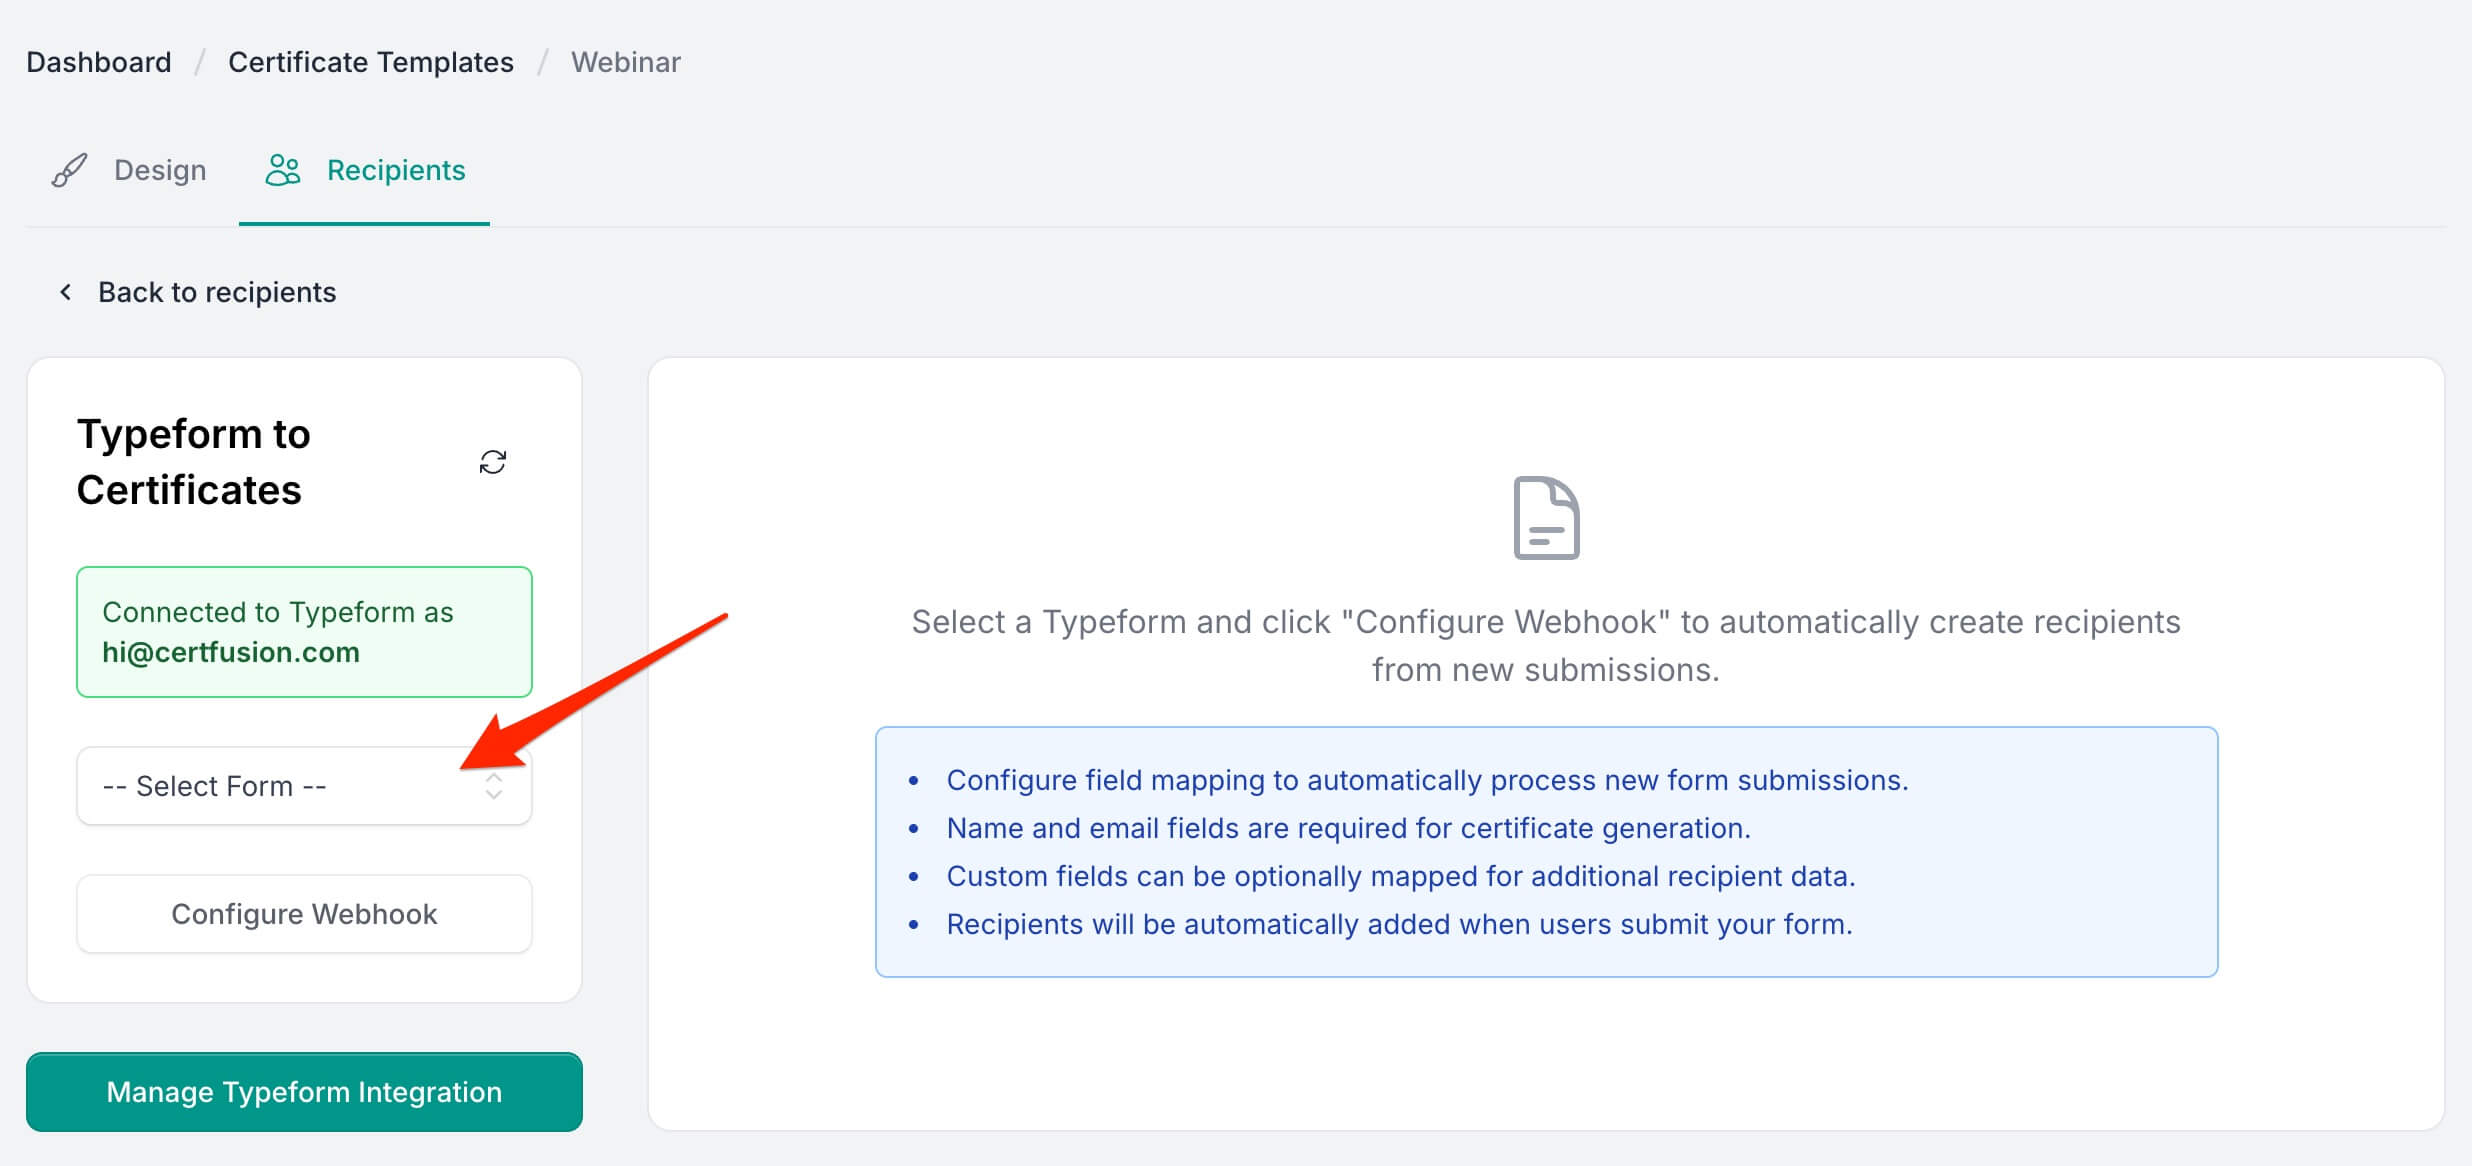
-
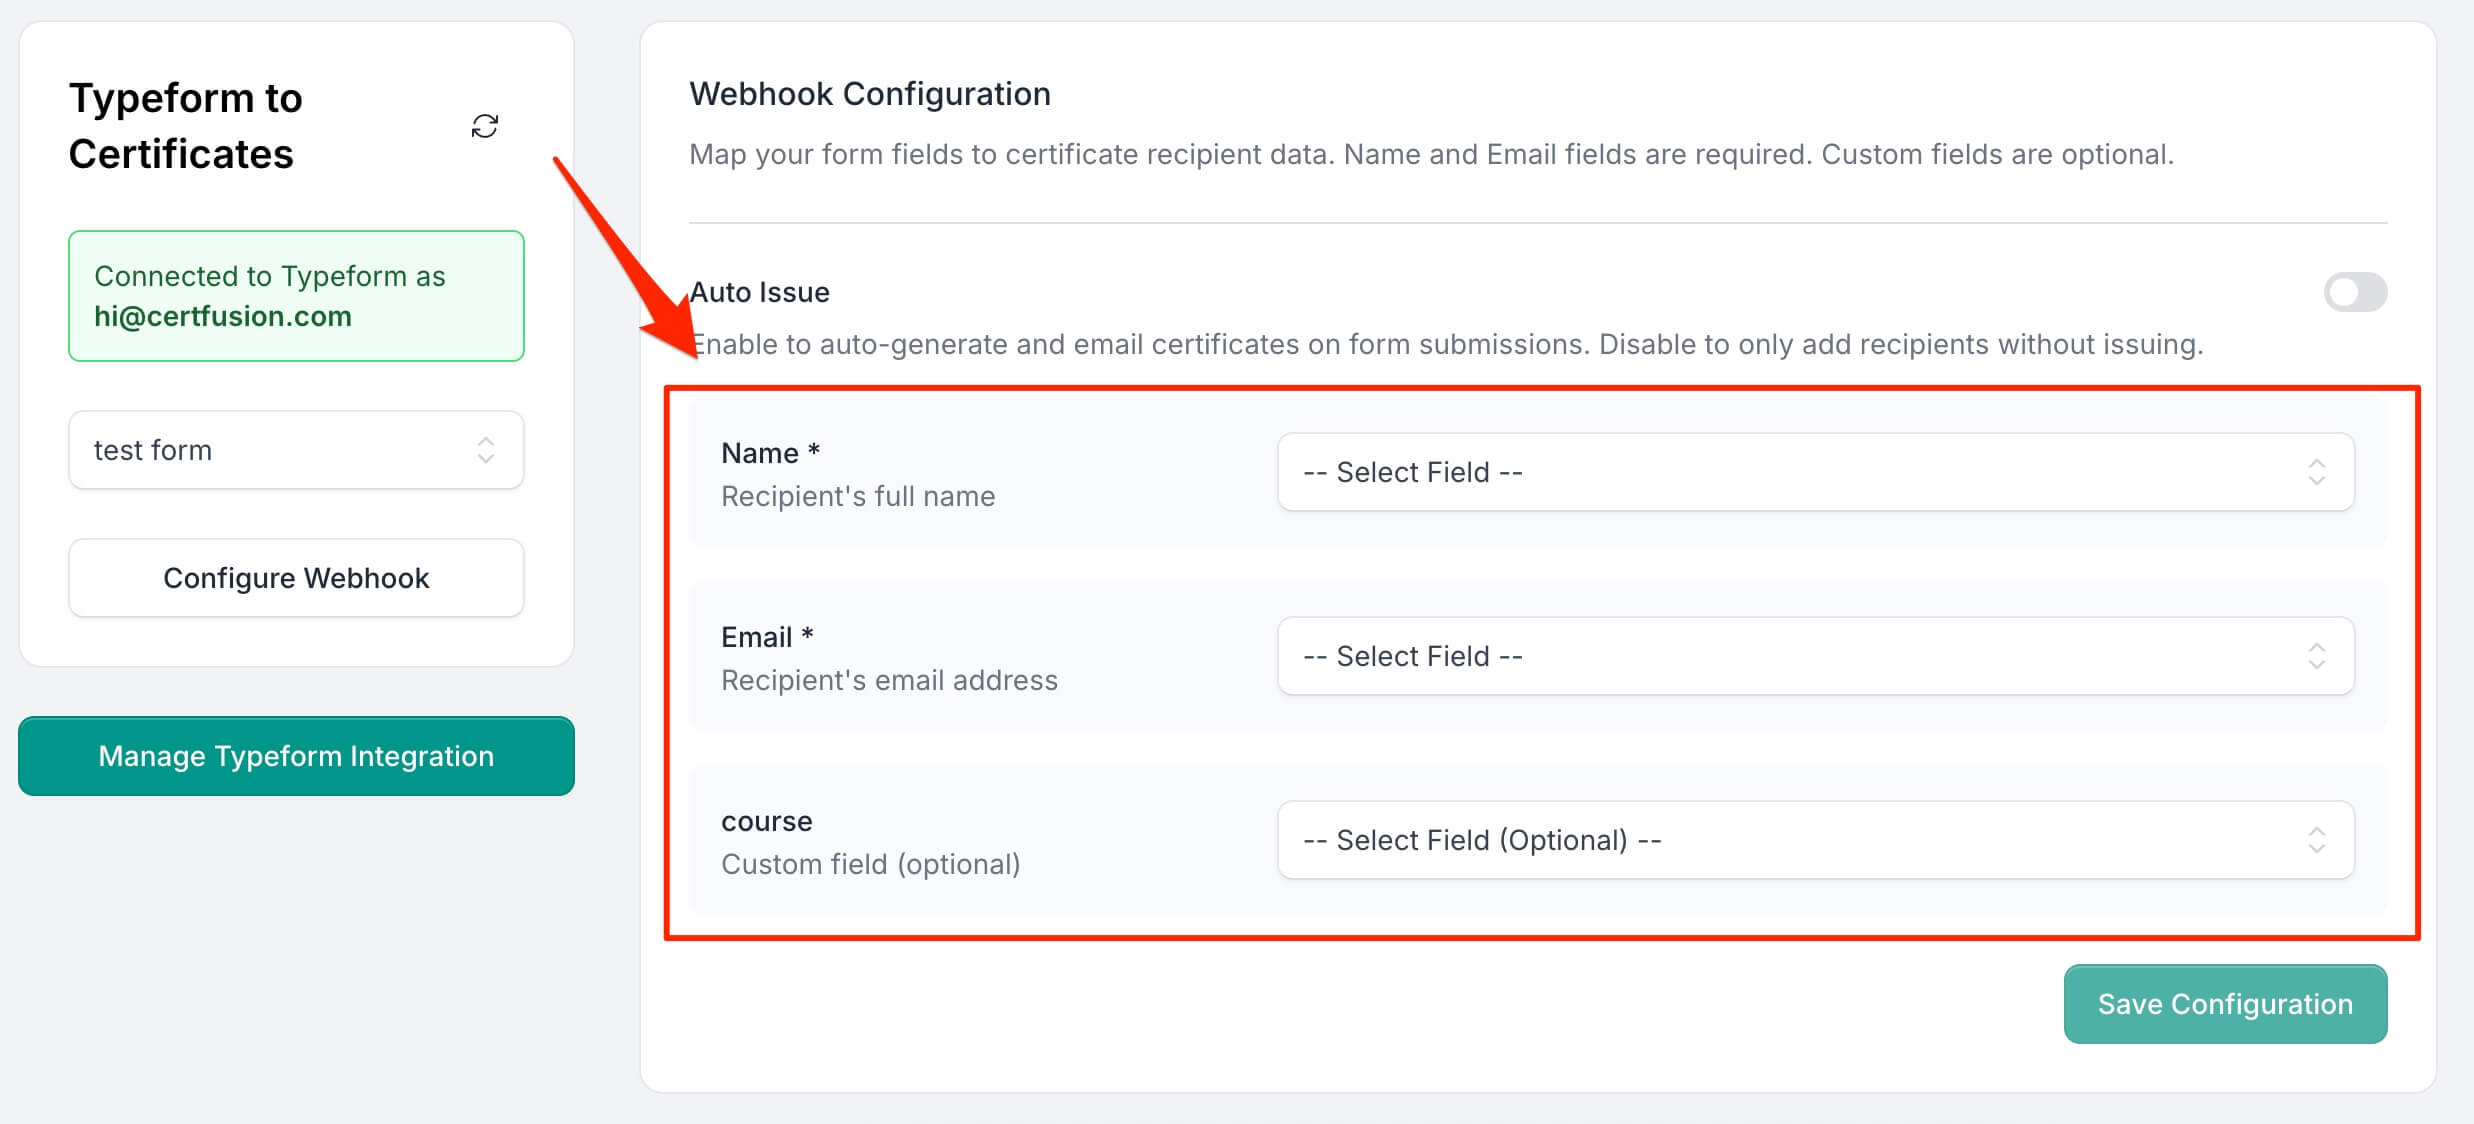
Map fields:
- Name → Recipient Name
- Email → Email Address
- (Optional) Map other fields to custom fields in your template (e.g., Course Name, Completion Date)
-
Enable Auto-Issue Certificates if you want certificates sent automatically for each new submission.

-
Click Save Configuration.
📖 Need help mapping fields? Check the official guide’s mapping examples.
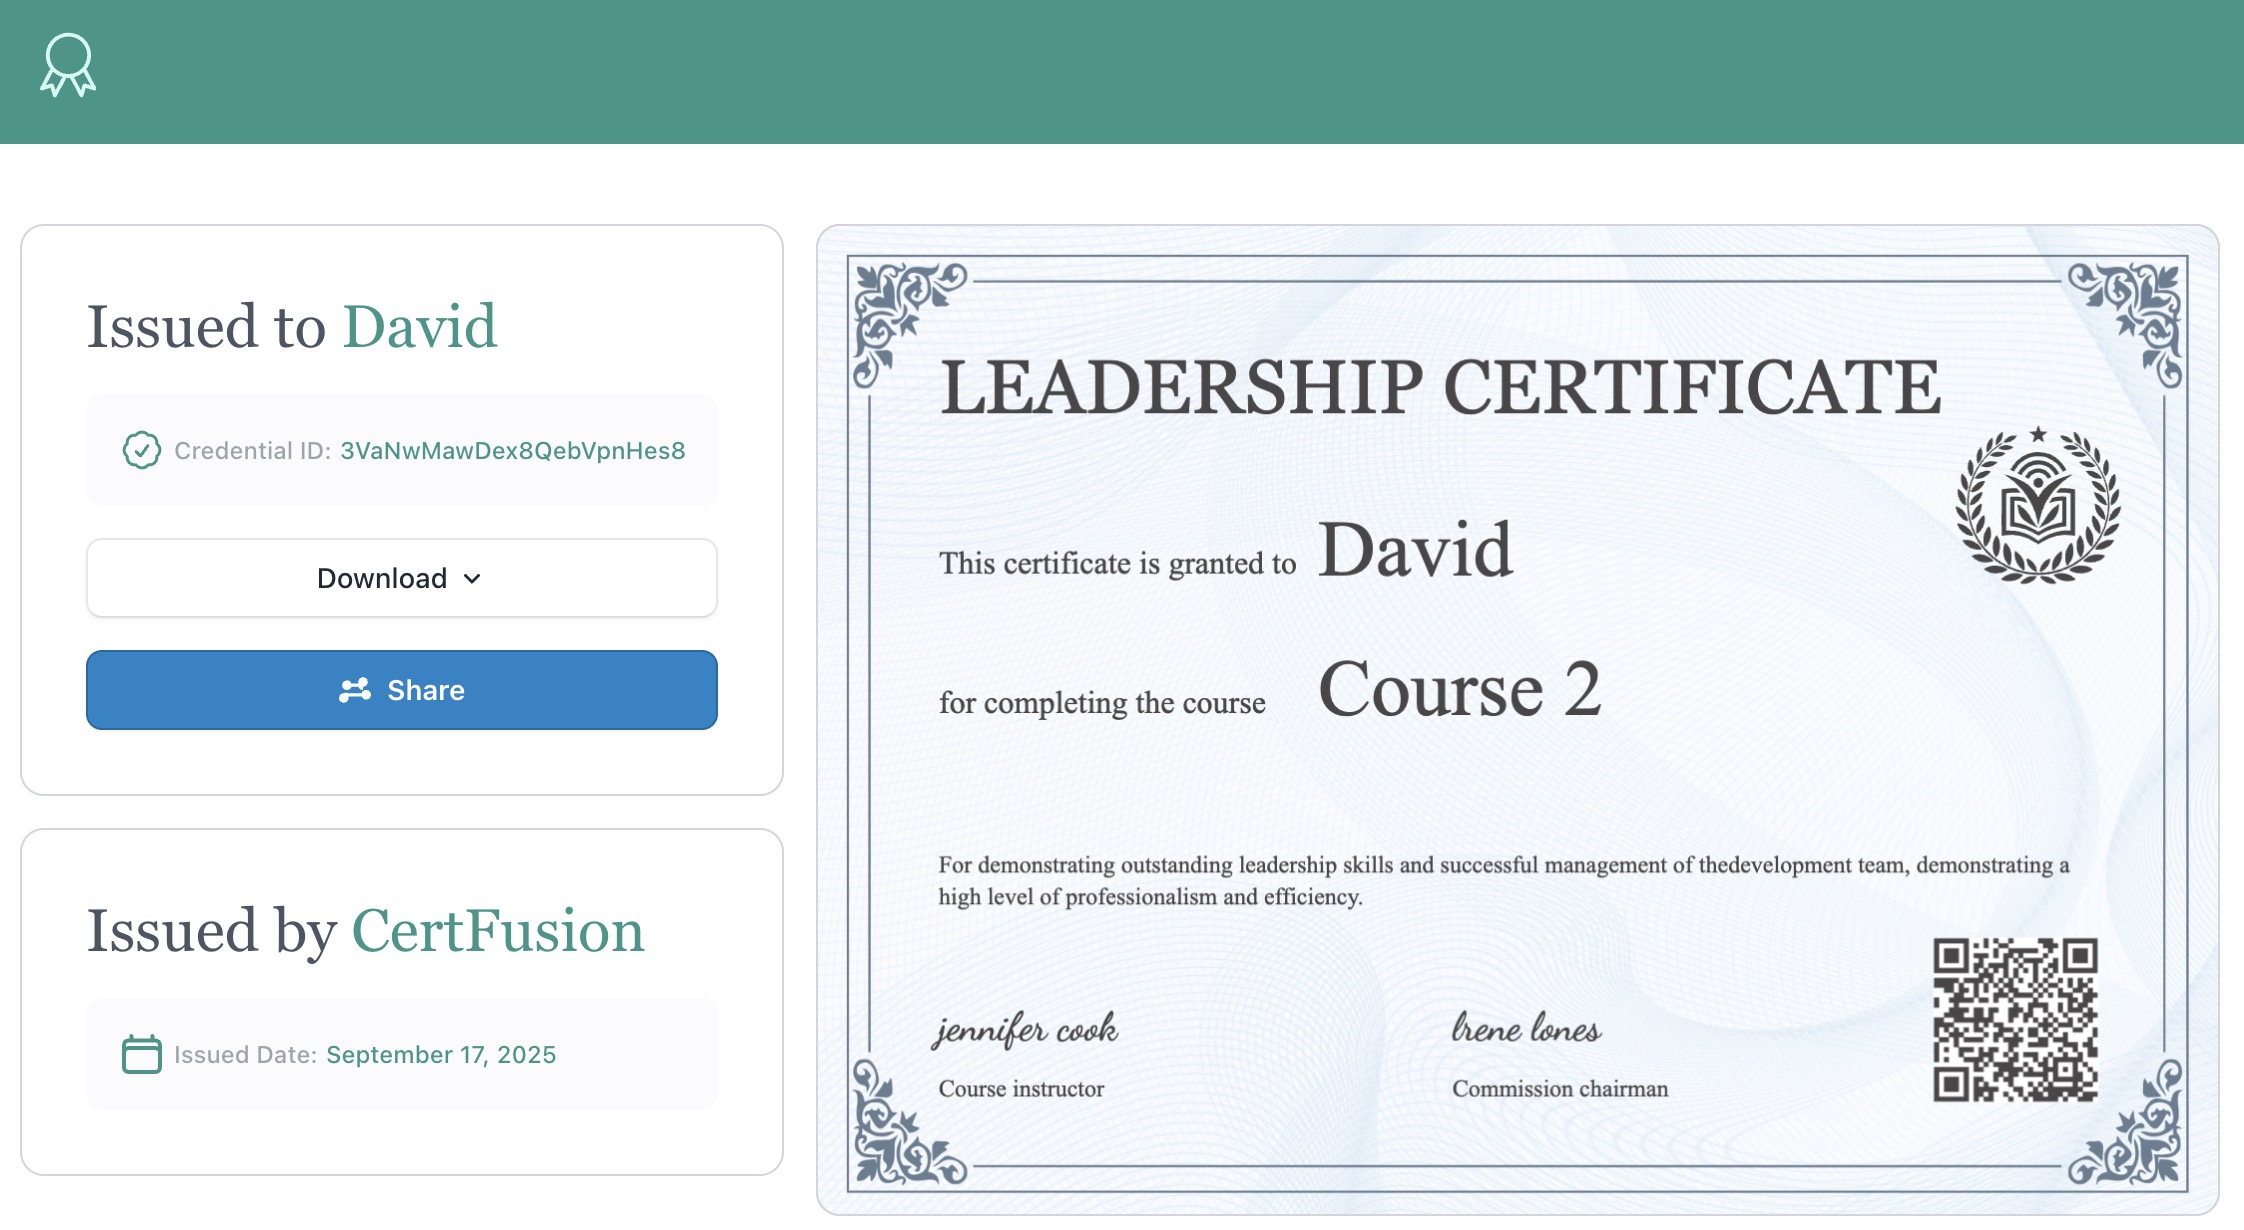
Step 5: Delivery, Verification & Managing Your Integration
When someone submits your connected Typeform:
- CertFusion will generate the certificate,
- Email it automatically to the participant, and
- Provide a unique verification link for authenticity.
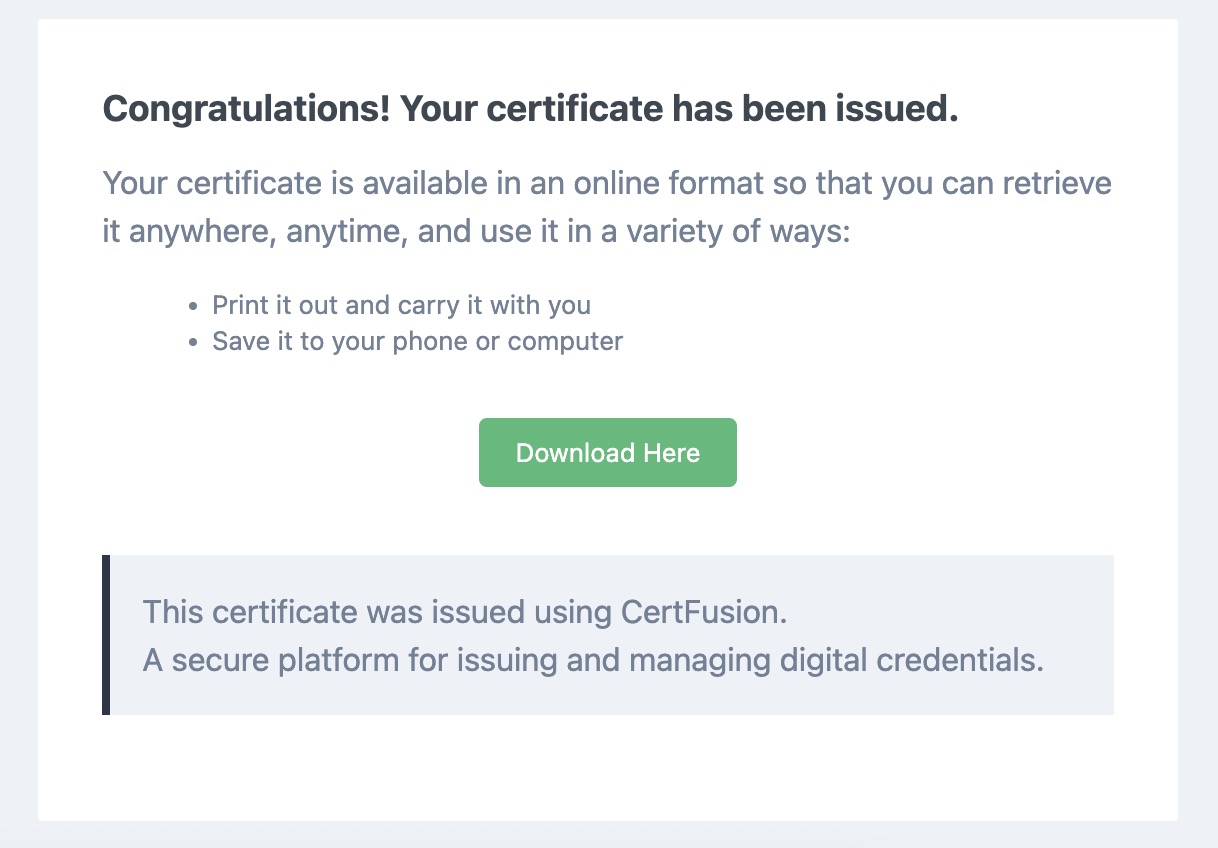
Participants receive:
- A unique URL to view their certificate online
- A PDF download link
- A way to verify authenticity on CertFusion’s verification page
Managing Your Integration
At any time, you can revisit the Recipients tab of your certificate template to:
- Pause Auto-Issue (helpful if you want to manually review responses before sending certificates)
- Update Field Mappings (e.g., if you add new questions in Typeform)
- Switch to a Different Typeform for another event or course without creating a new template
For more details on managing integrations, see the full Typeform integration guide.
Why Use CertFusion with Typeform
- Fully Automated: Certificates are issued immediately after a submission
- Dynamic Fields: Recipient Name, Issued Date, and Certificate UUID are filled automatically
- Customizable: Include extra Typeform responses as custom fields on the certificate
- Scalable: Works for small workshops or large events with thousands of participants
Next Steps
Now you know how to generate e-certificates from Typeform with CertFusion.
📌 Pro Tip: Test your Typeform integration with a dummy submission first to ensure all fields map correctly before your live event.
👉 Log in to CertFusion and connect your Typeform to start automating certificates today — or visit the official Typeform integration guide for additional tips and troubleshooting.
Table of Contents
Related Articles
Discover more insights and stories that might interest you