How to Generate E-Certificate from Tally Form
If you collect participant responses using Tally, CertFusion can automatically generate and deliver certificates for each submission. This guide explains how to generate e-certificate from Tally form step by step.
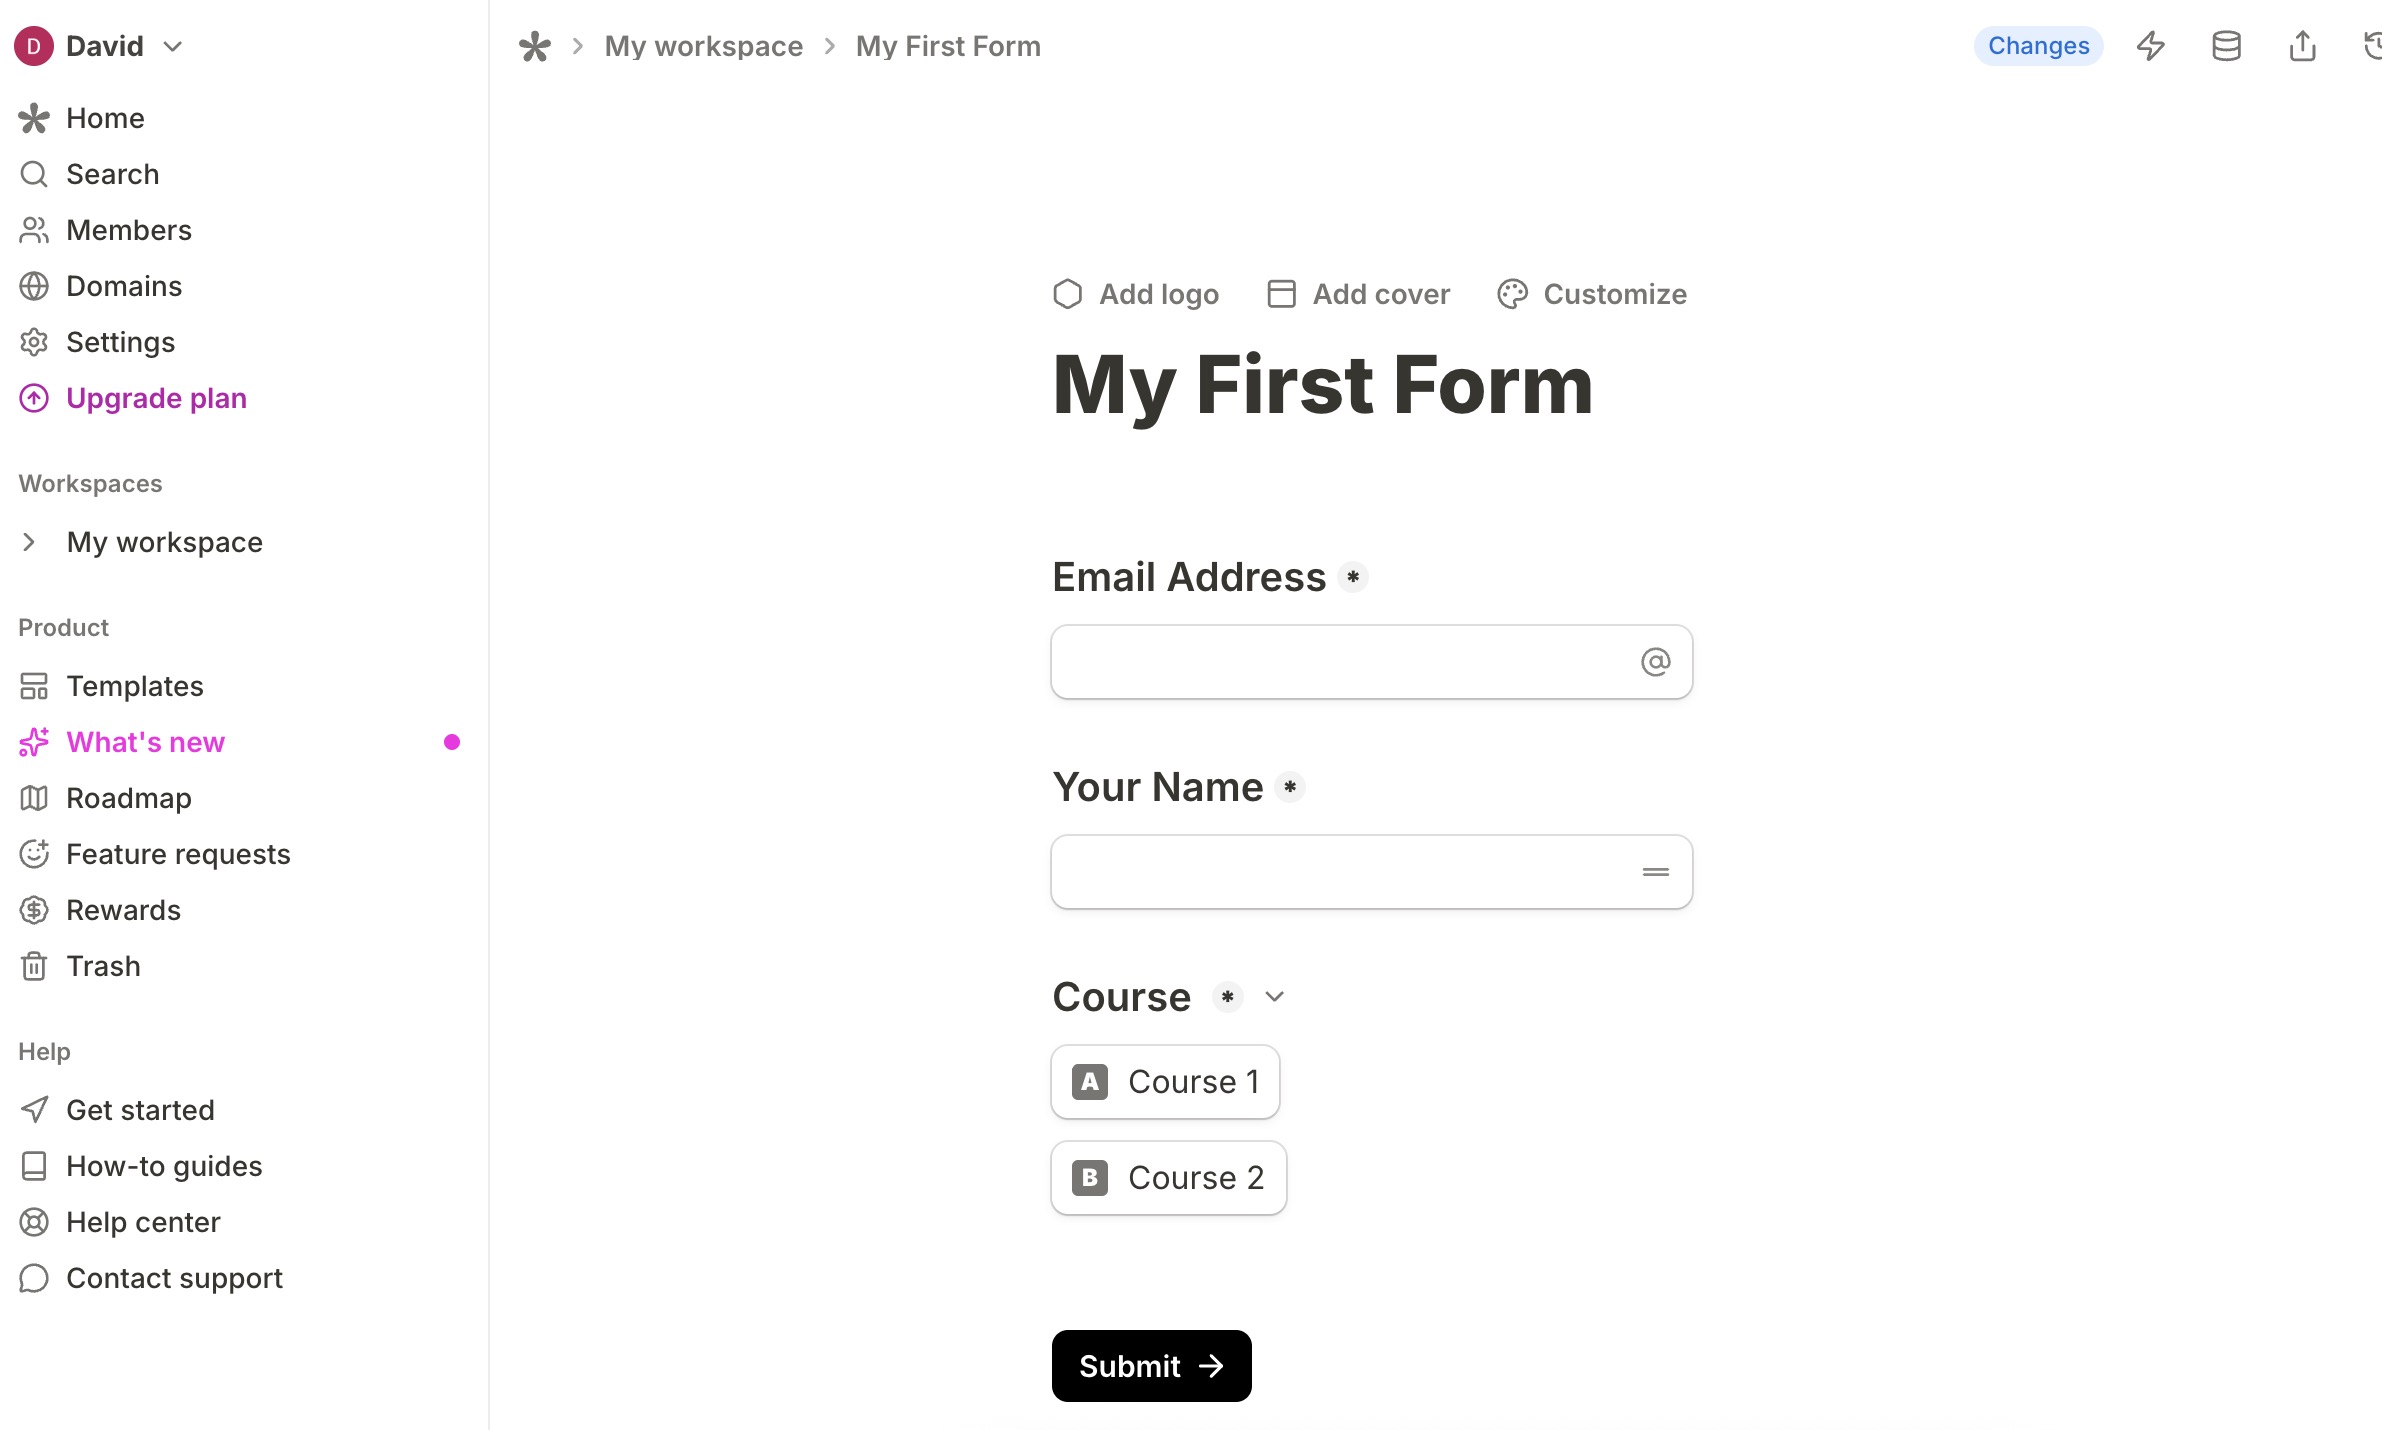
Step 1: Prepare Your Tally Form
Before connecting to CertFusion:
-
Create your Tally form (survey, quiz, or application).
-
Include at least these required fields:
- Name – participant’s full name.
- Email – where the certificate will be sent.
-
(Optional) Add extra fields for your certificate’s custom data:
- Course Name
- Completion Date
- Training Hours
- Instructor Name
Tip: Ensure Name and Email fields are required to prevent missing data.
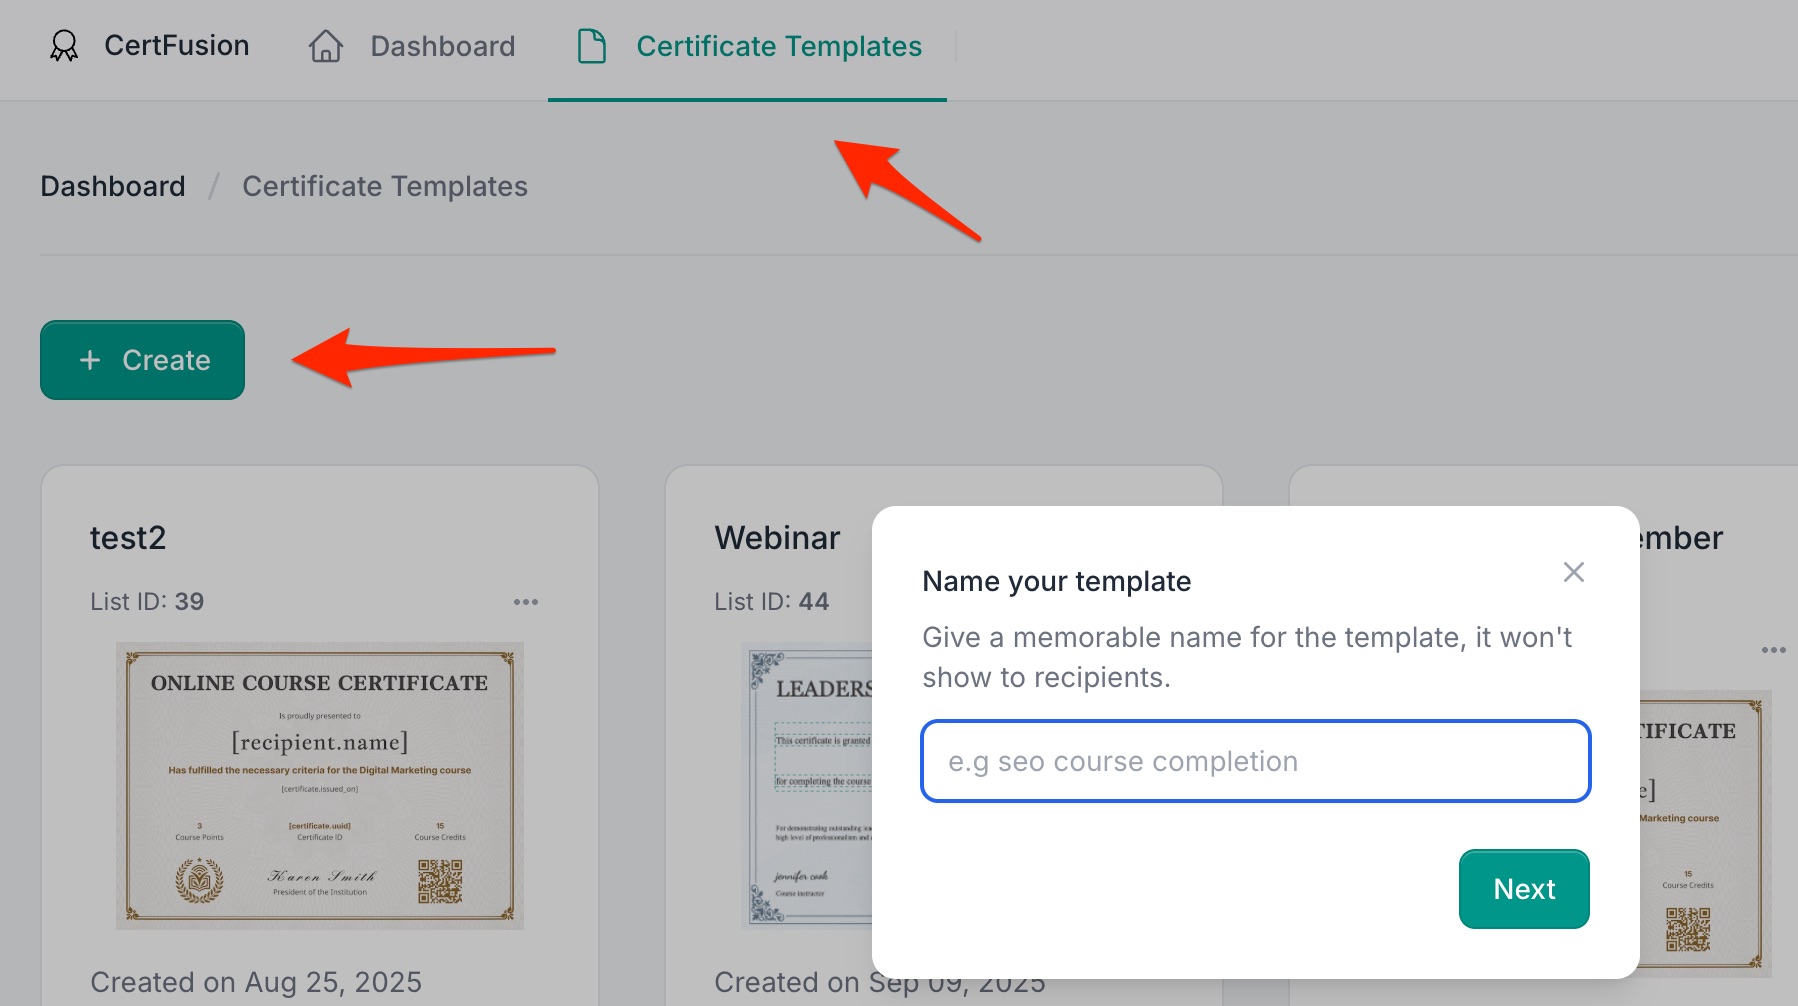
Step 2: Create or Select a Certificate Template
-
Log in to your CertFusion dashboard.
-
Go to Certificate Templates → select an existing template or click Create.
-
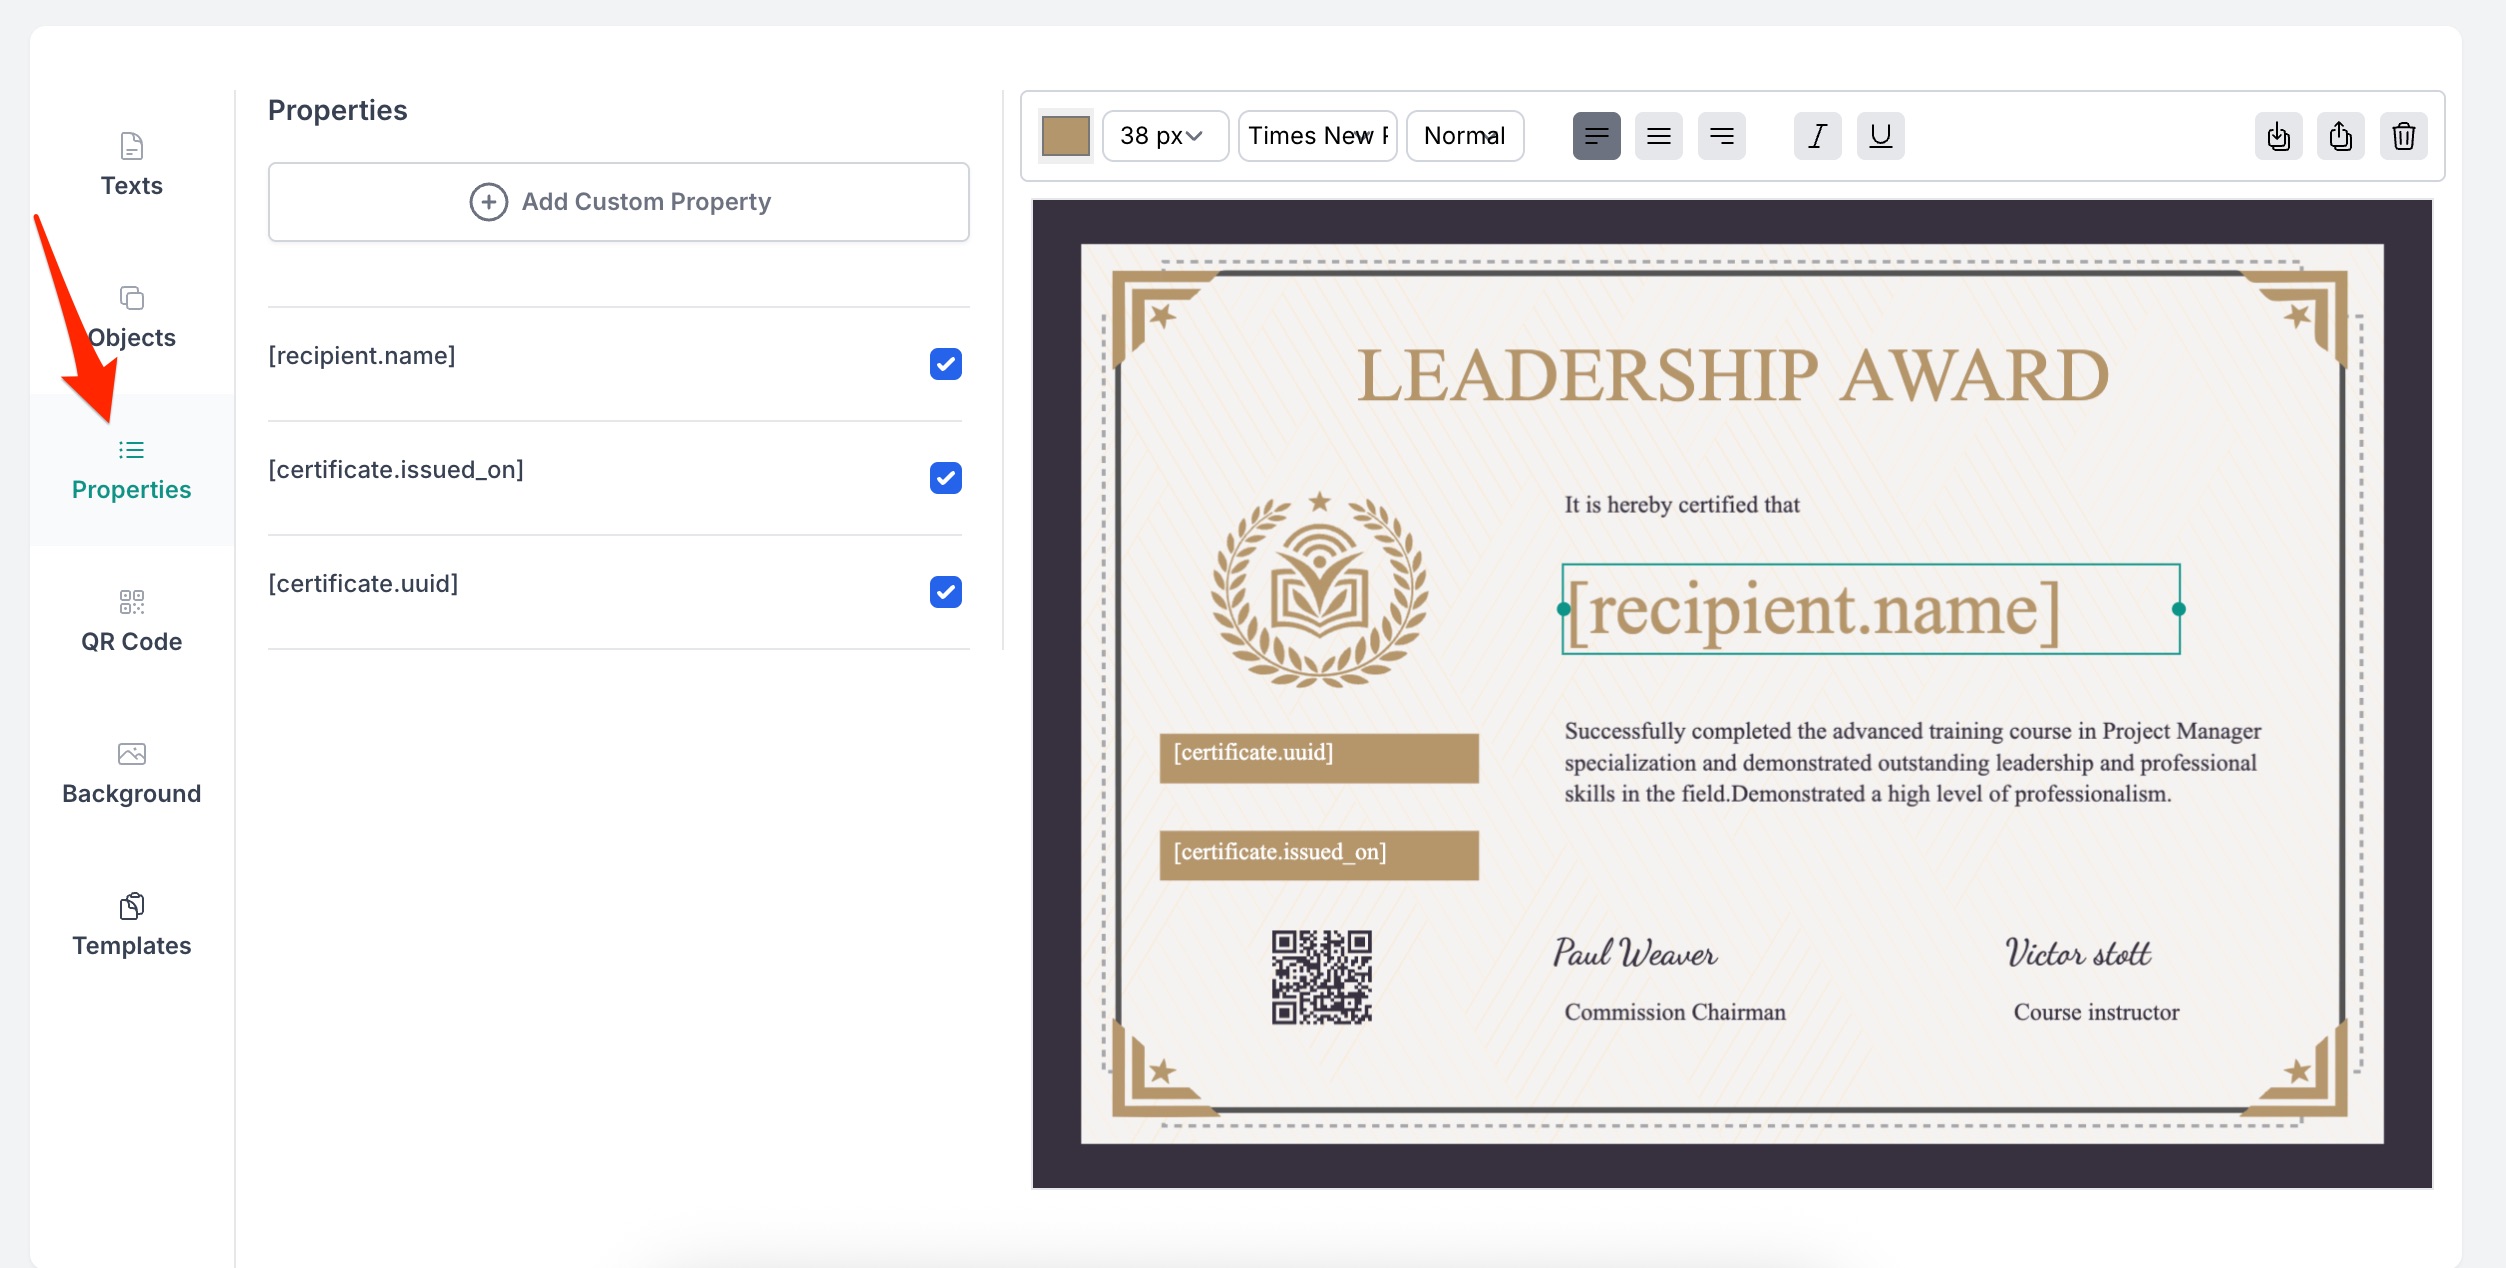
Add dynamic fields to your certificate:
- Recipient Name – mapped from Tally form responses.
- Issued Date – automatically filled when certificates are generated.
- Certificate UUID – unique ID for verification.
-
(Optional) Add Custom Fields to include other Tally responses on the certificate.
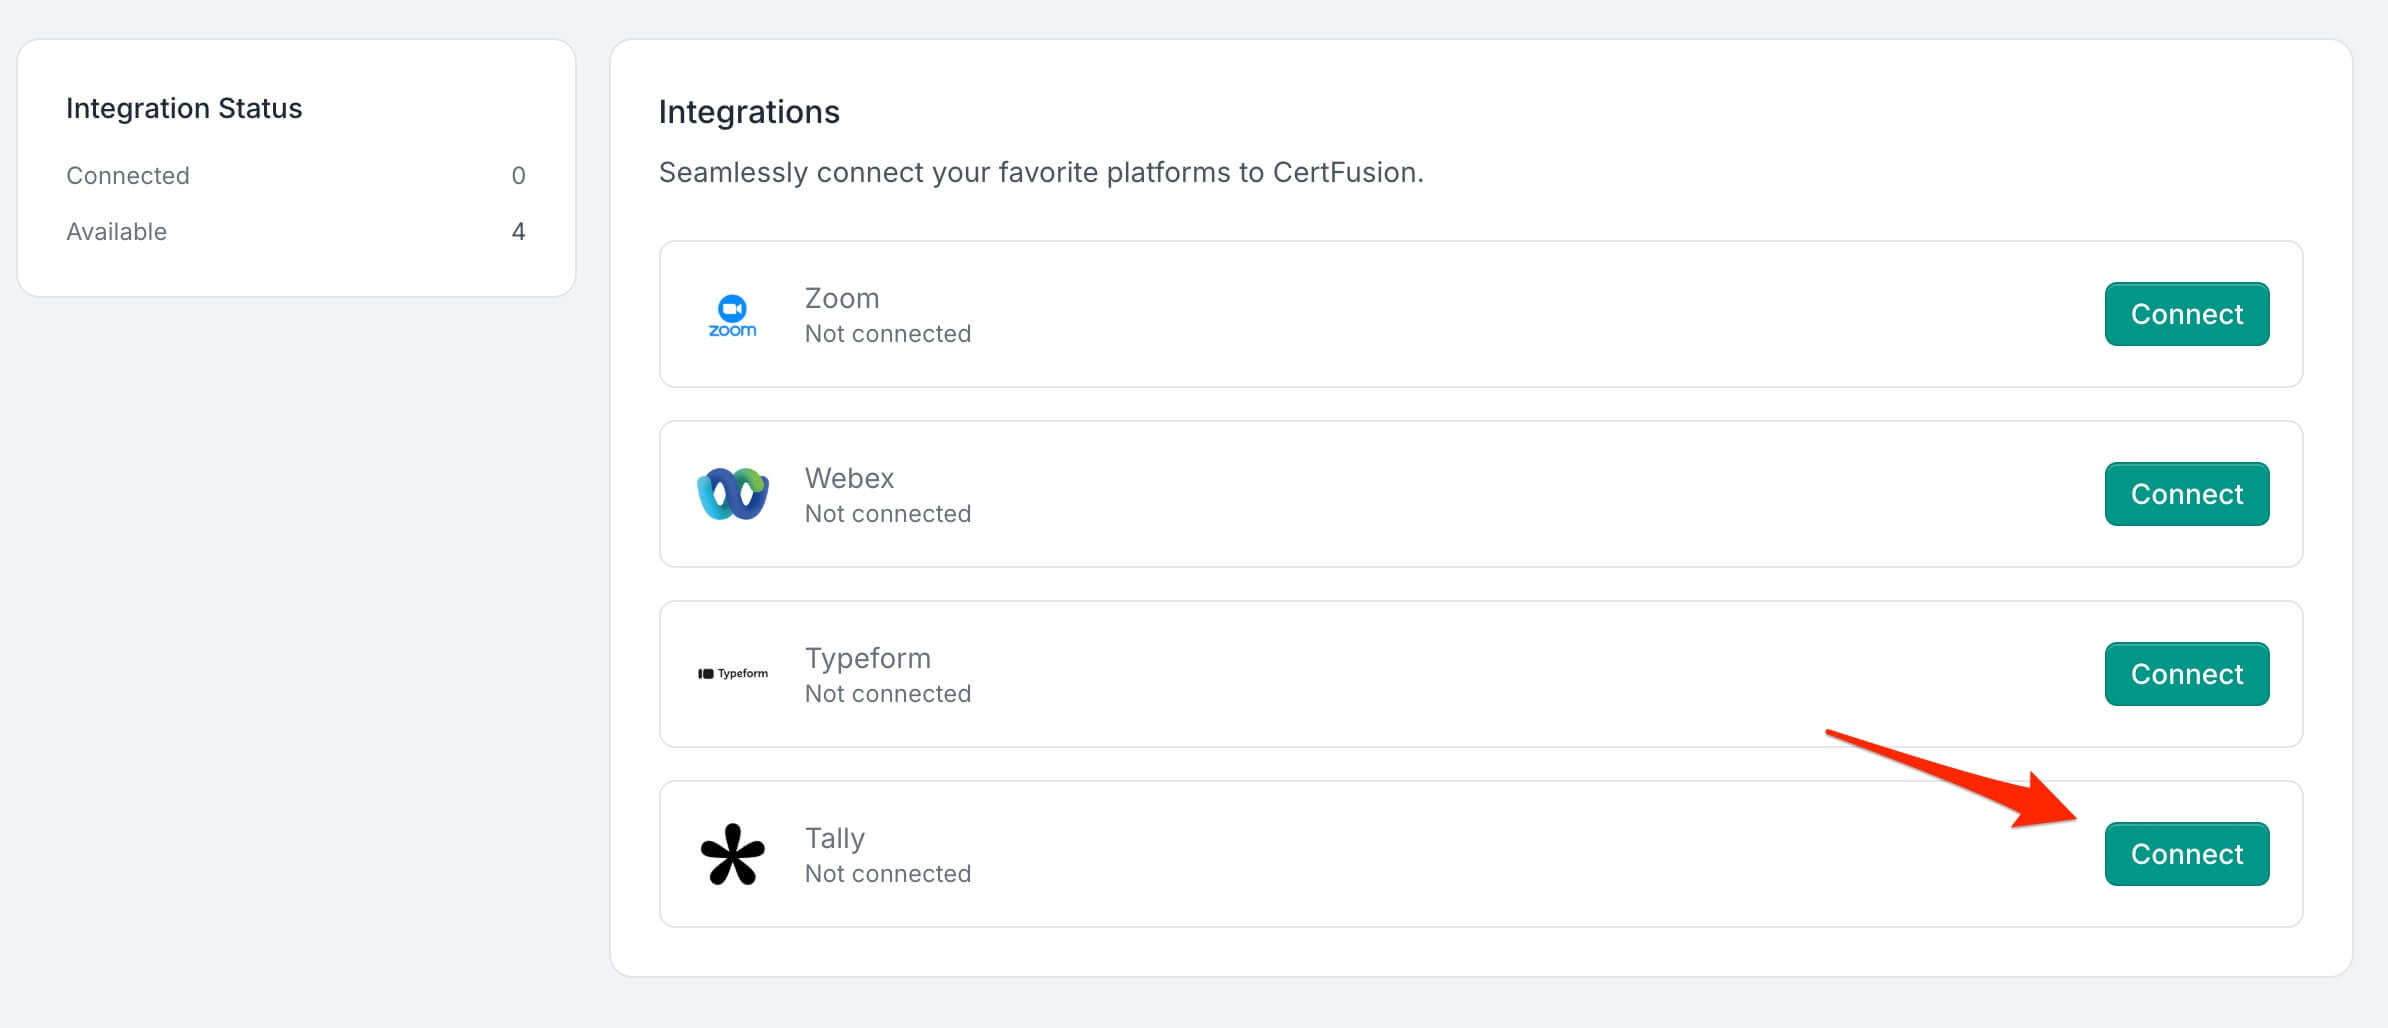
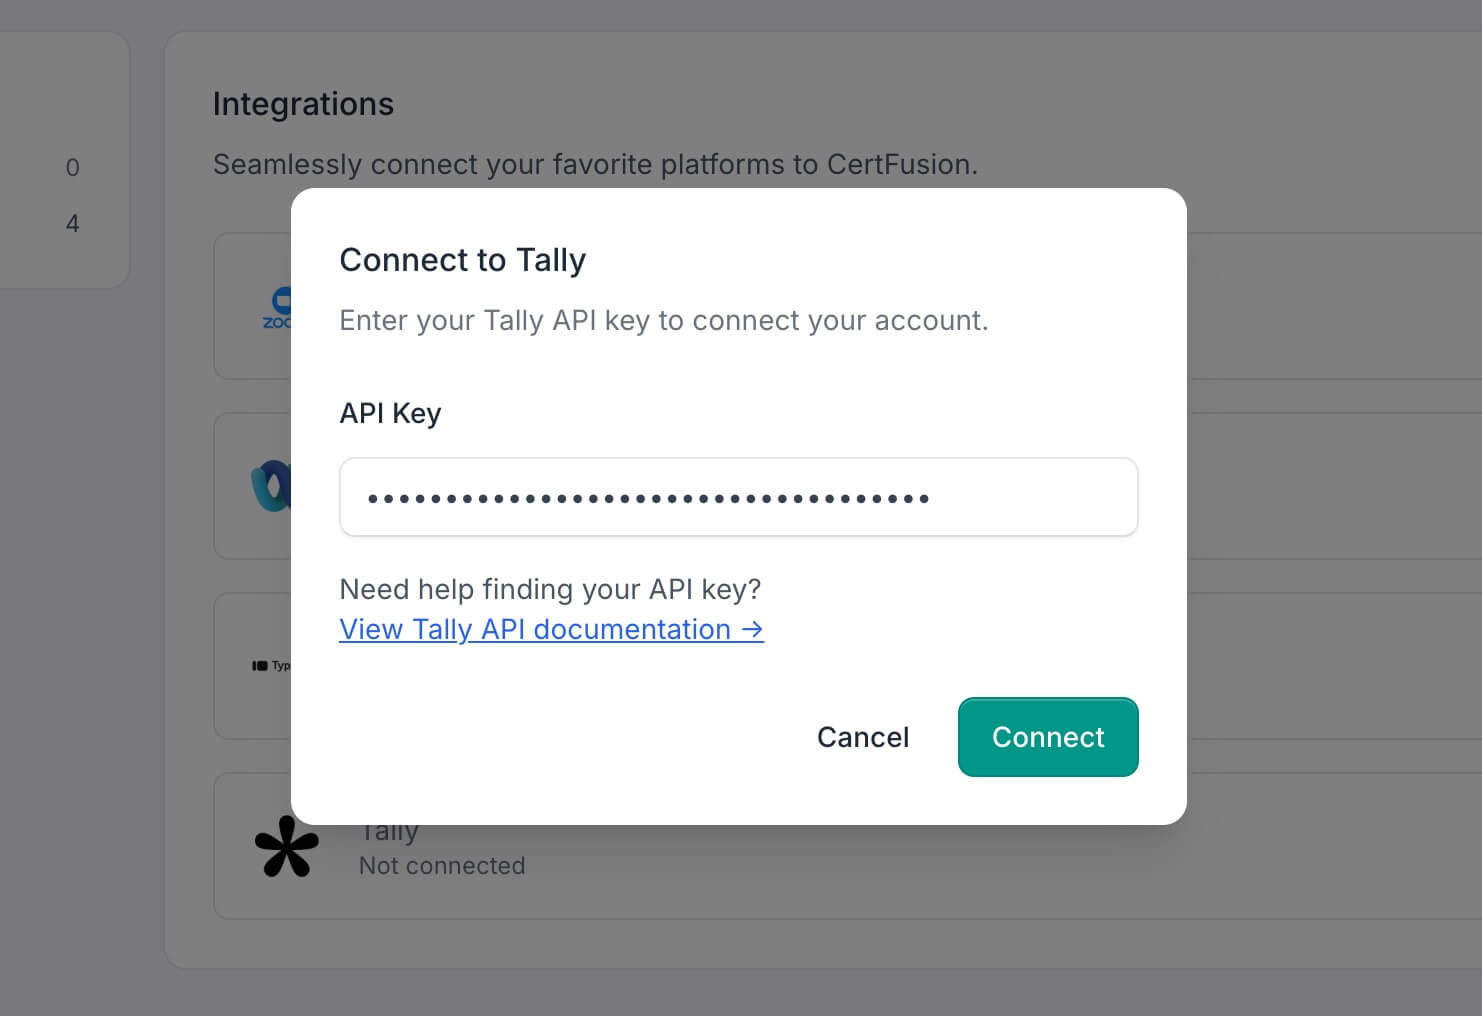
Step 3: Connect Your Tally Account
-
Go to Integrations → Tally in your CertFusion dashboard.
-
Click Connect and enter your Tally API key.
-
Click Connect to validate your API key and save the connection.
Tip: CertFusion only accesses the form structure and response data needed for certificate generation. Your API key is securely stored.
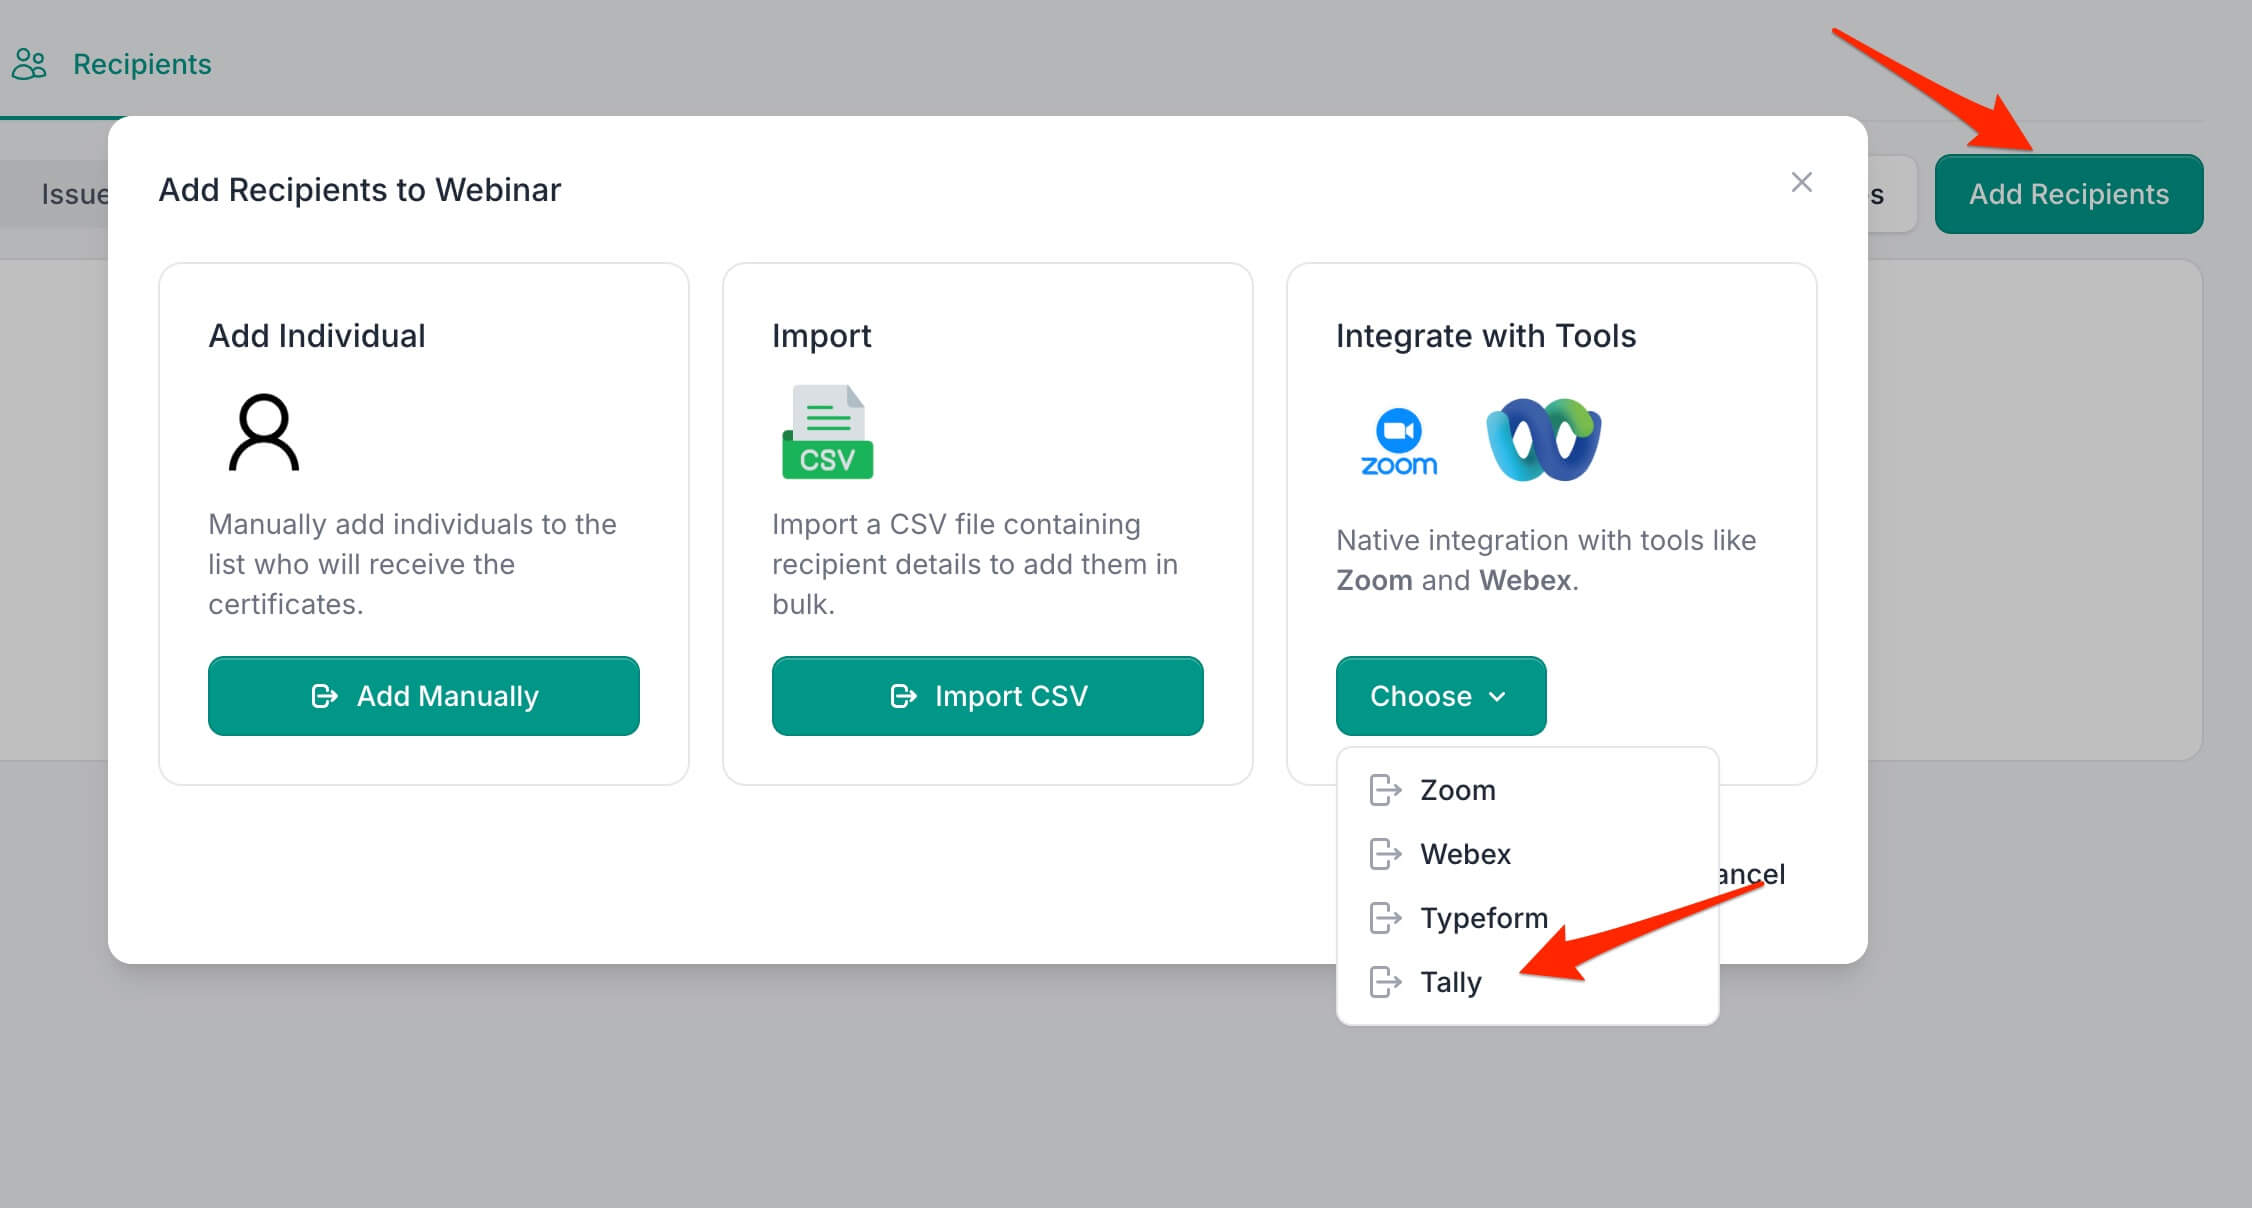
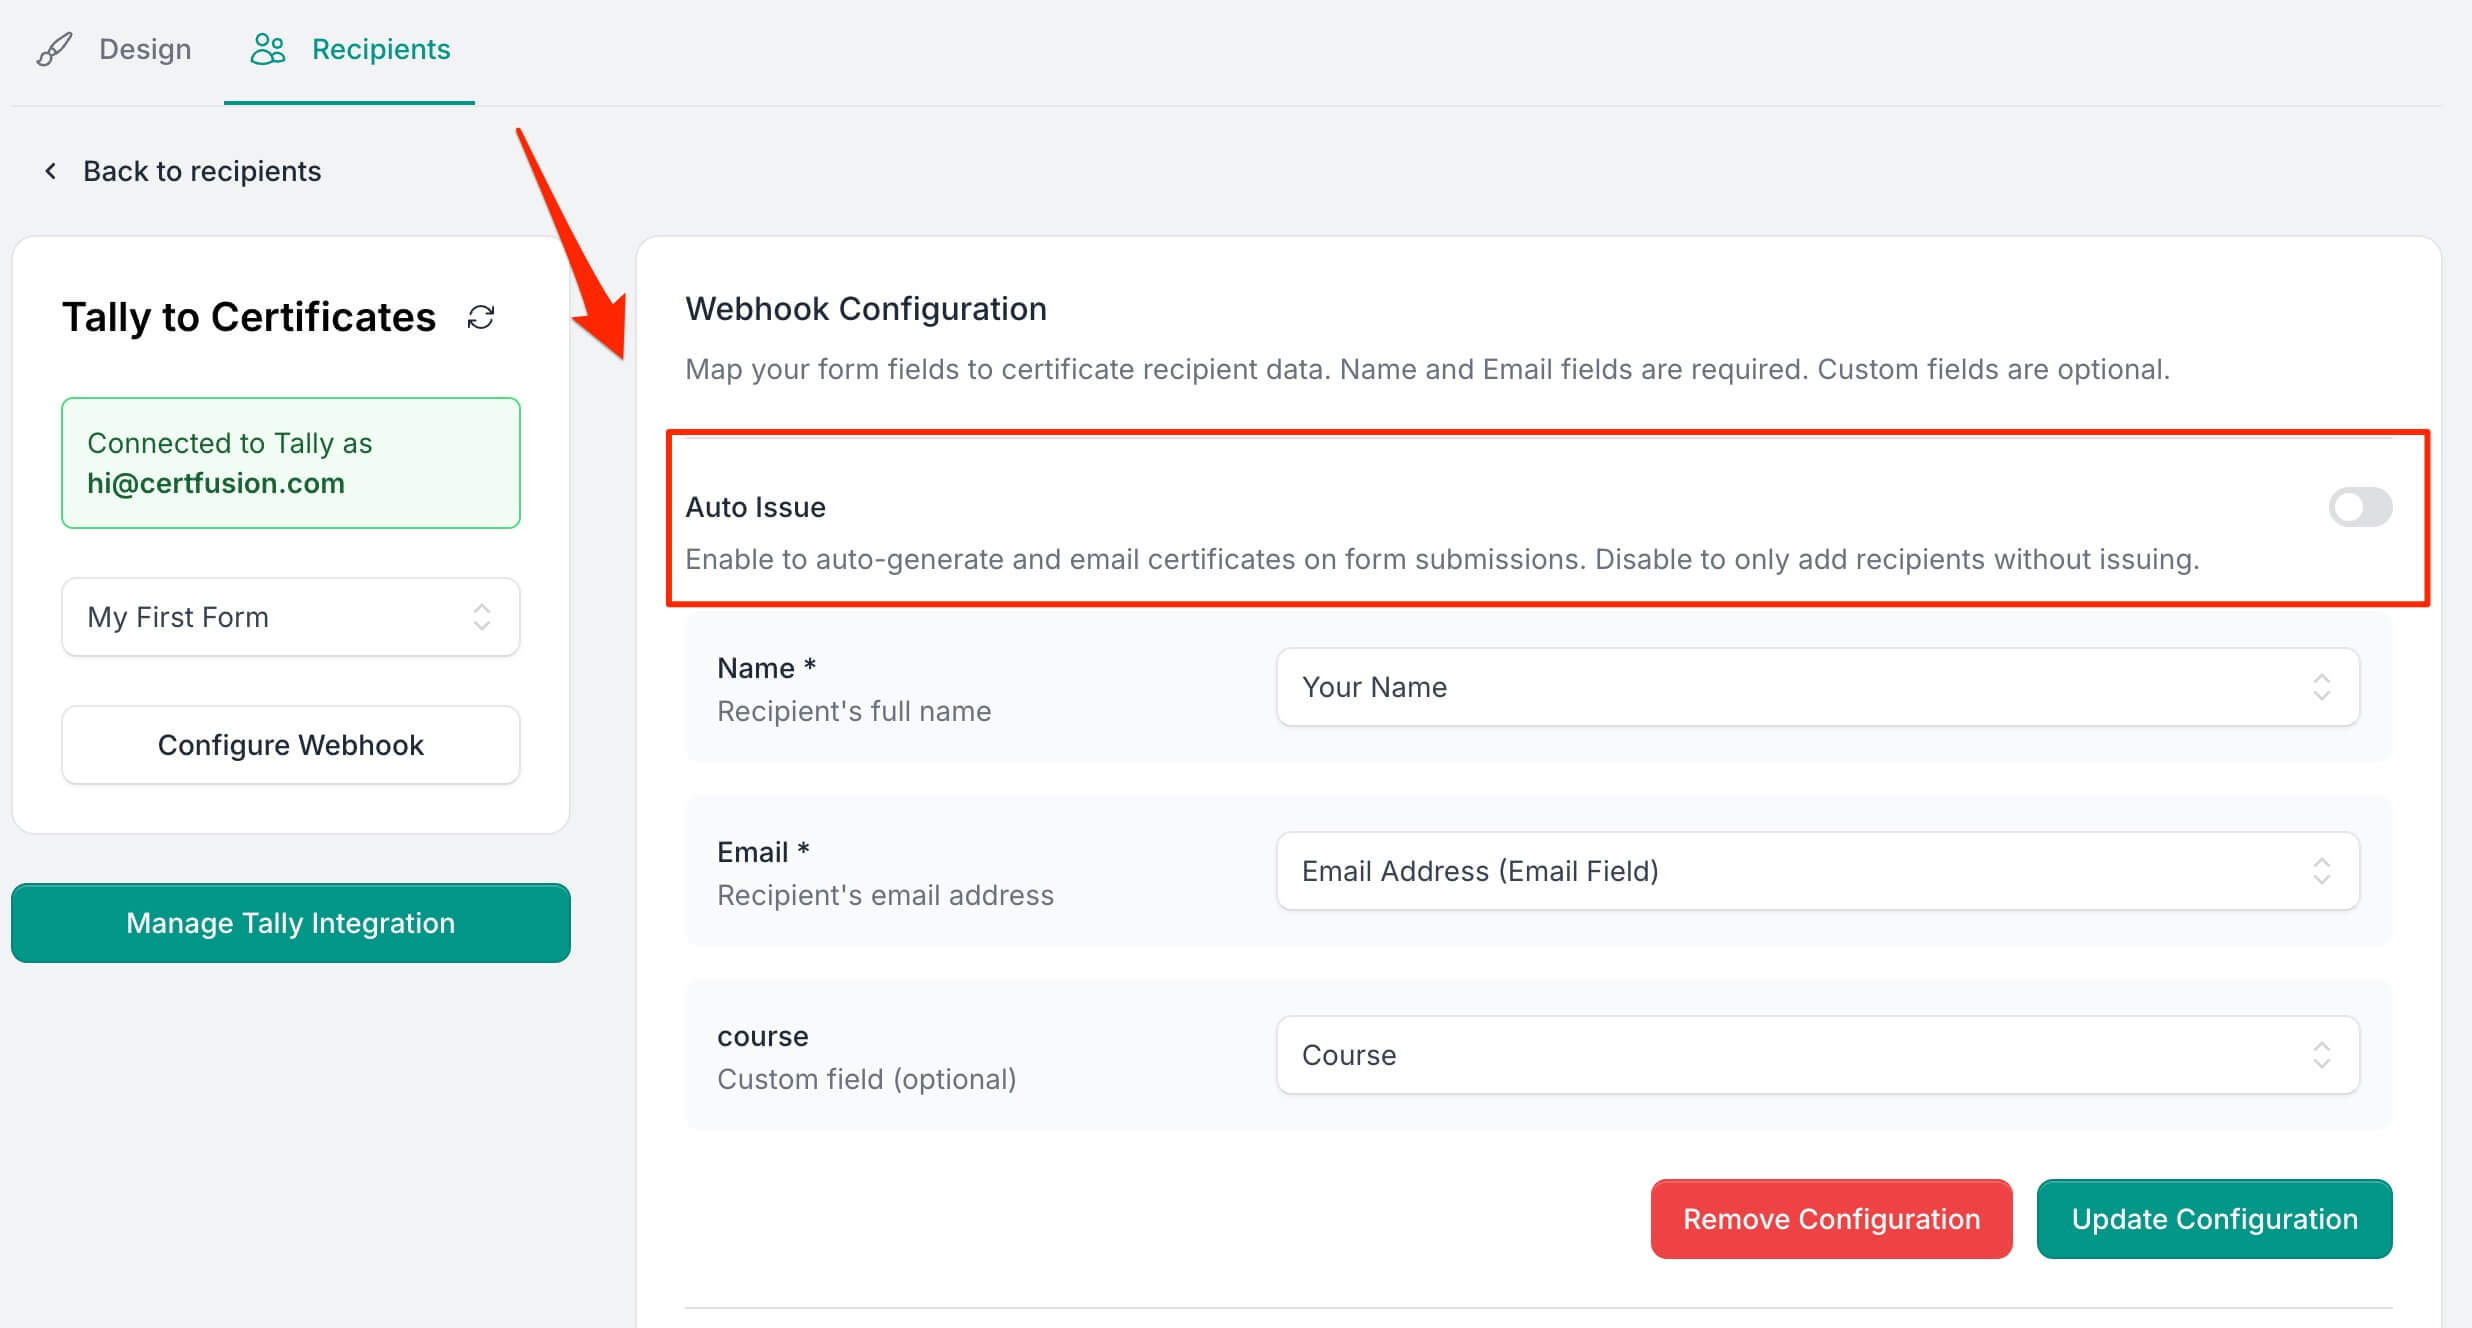
Step 4: Configure Automatic Certificate Generation
-
Open the Recipients section of your certificate template.
-
Click Add Recipients → Integrate with Tools → Tally.
-
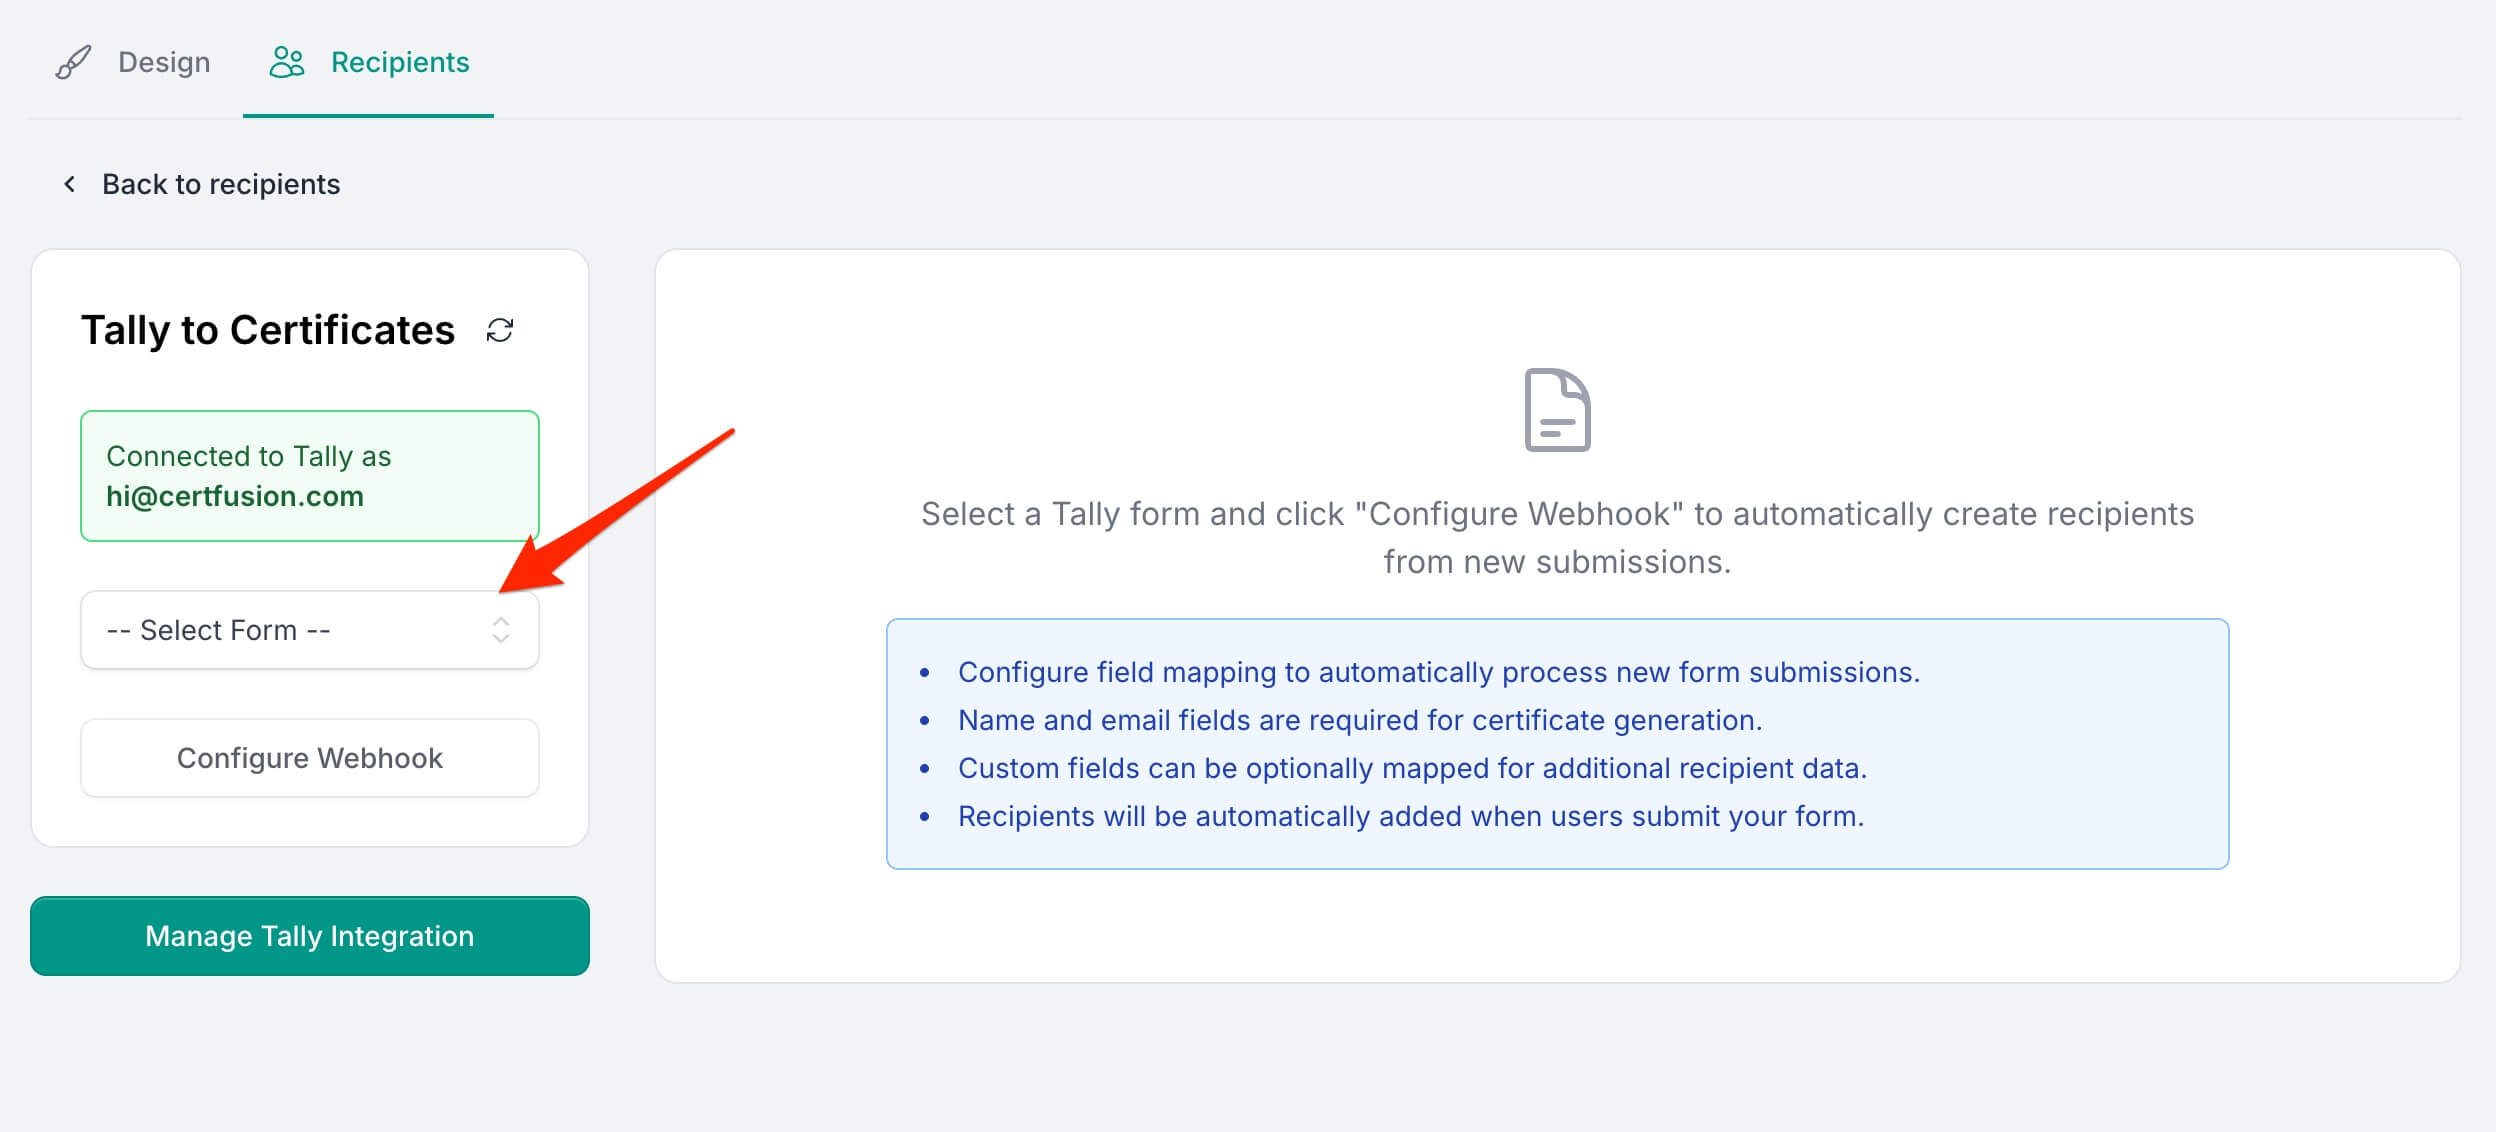
Select the Tally form you want to connect.
-
Click Configure Webhook to map fields:
- Name Field → Recipient Name (required)
- Email Field → Email Address (required)
- Custom Fields → optional fields from your certificate template
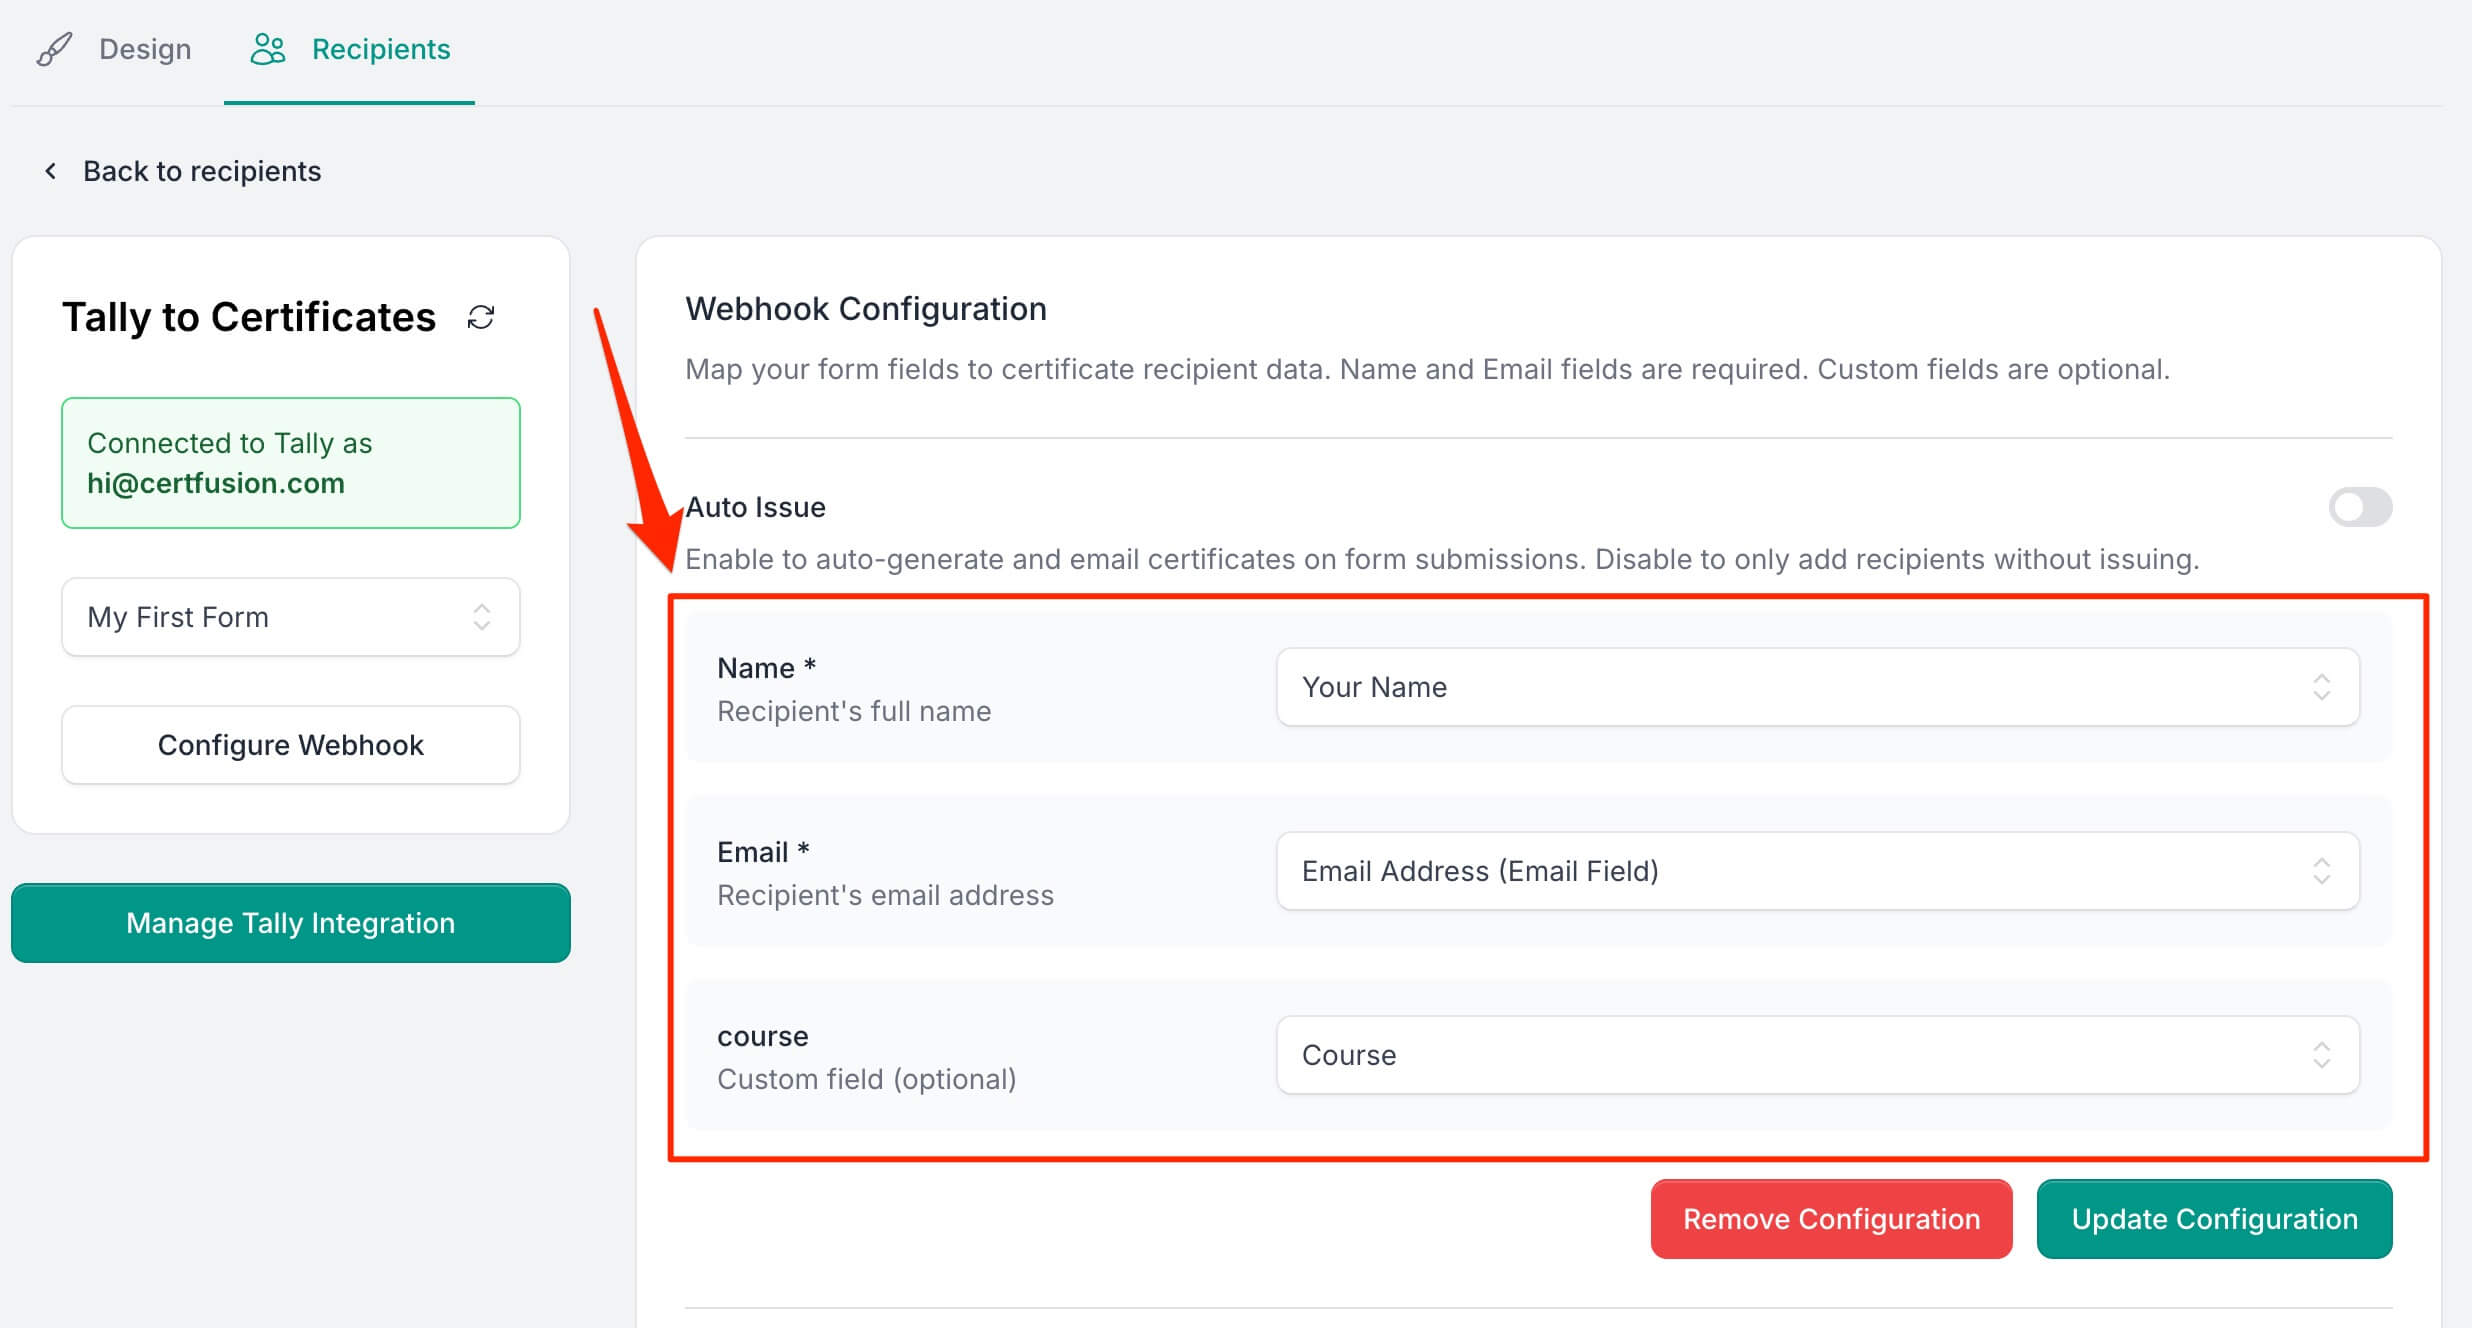
-
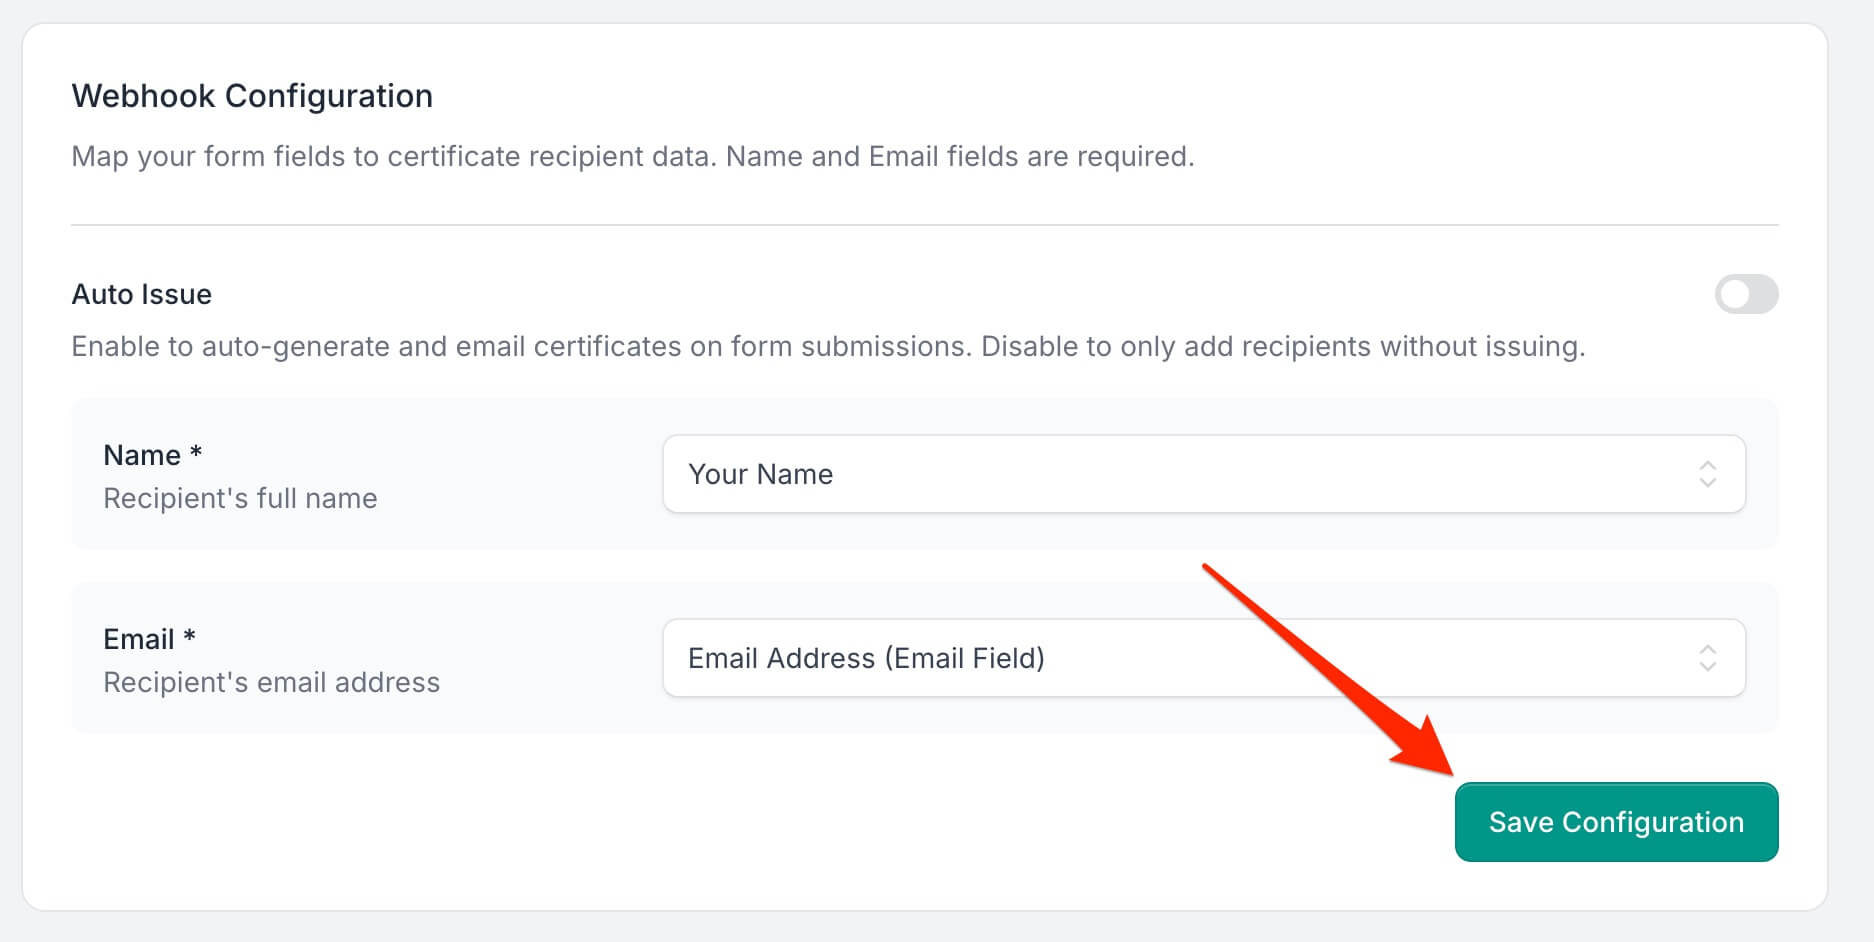
Toggle Auto-Issue Certificates if you want certificates to be generated and emailed automatically for every new submission.
-
Click Save Configuration to activate the webhook.
Step 5: Participants Receive Their Certificates
Once configured, each new submission will generate a certificate (if auto-issue is enabled):
- Participants receive an email with a unique URL to view their certificate online.
- Options to download the PDF and verify authenticity.
You can also monitor webhook status, track deliveries, and resend certificates from the Recipients page.

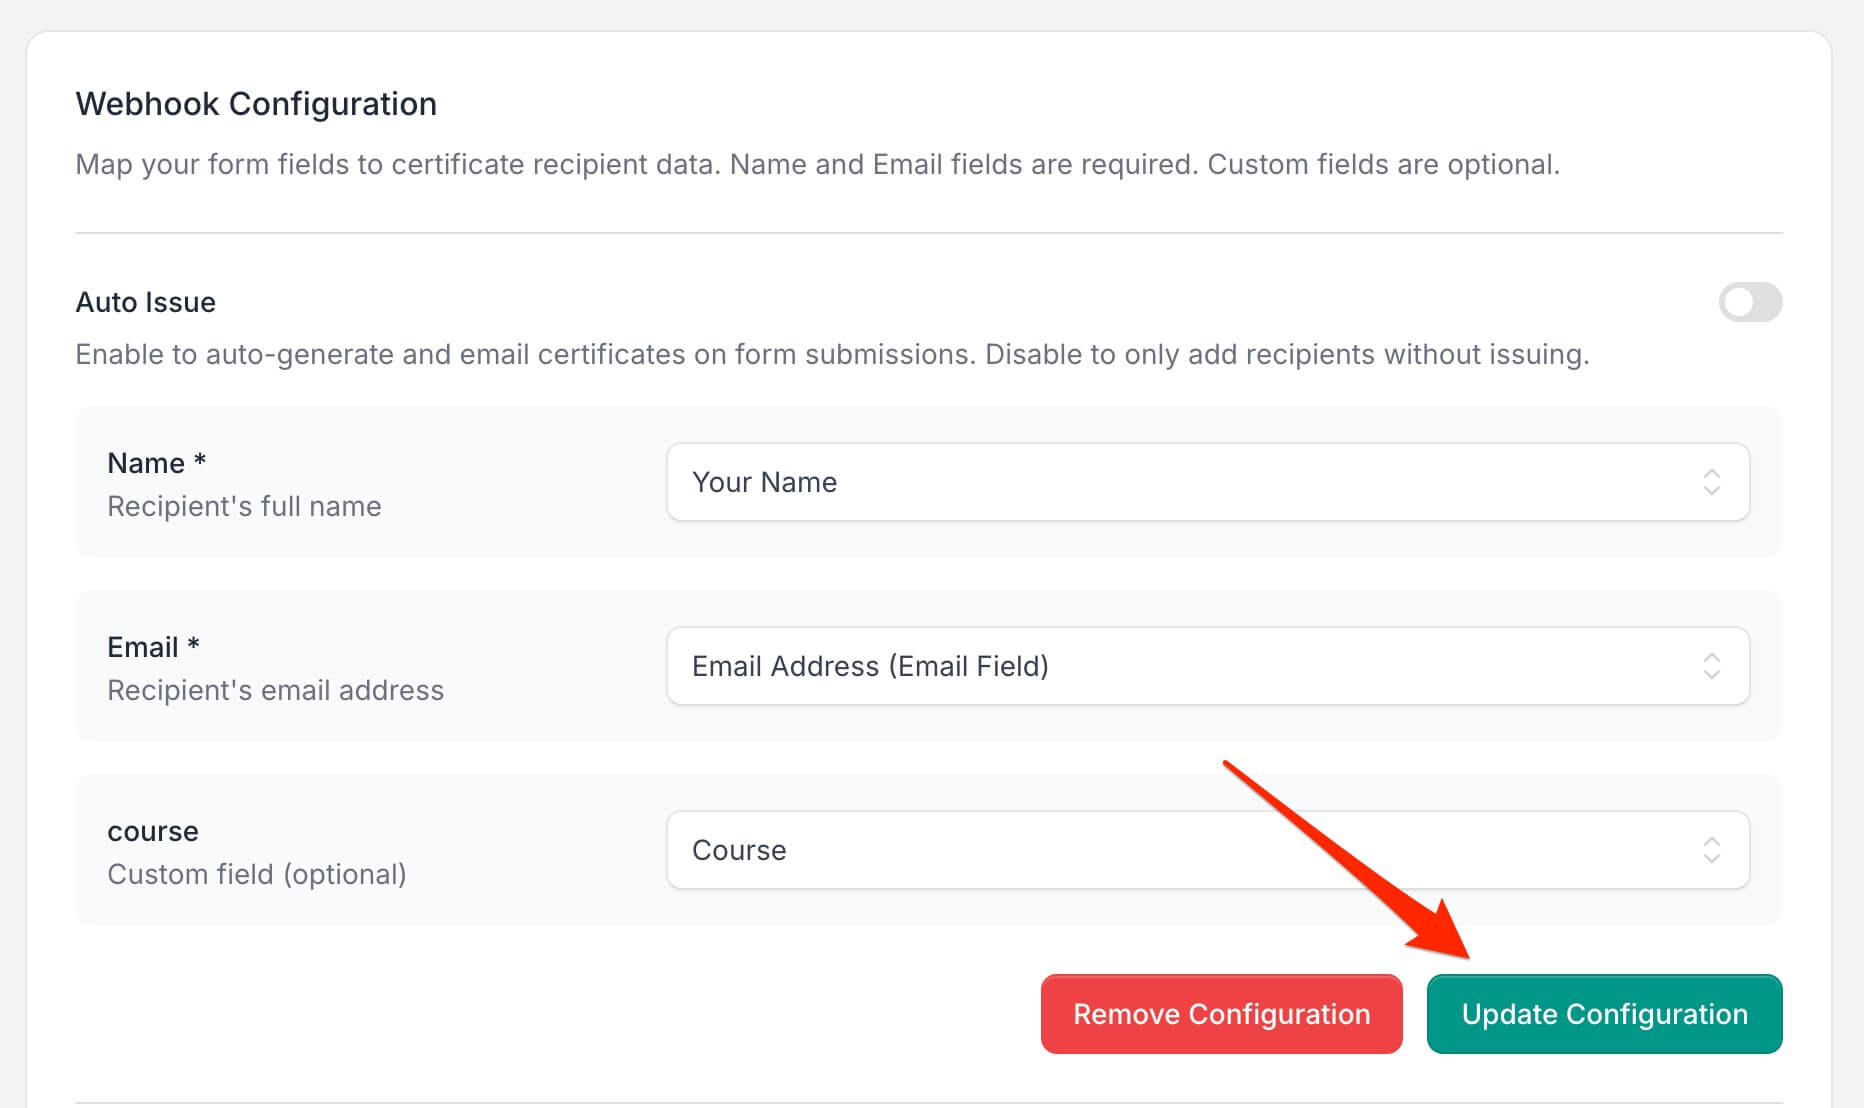
Step 6: Manage Your Tally Integration
-
Update Configuration: Change field mapping or toggle auto-issue anytime.
-
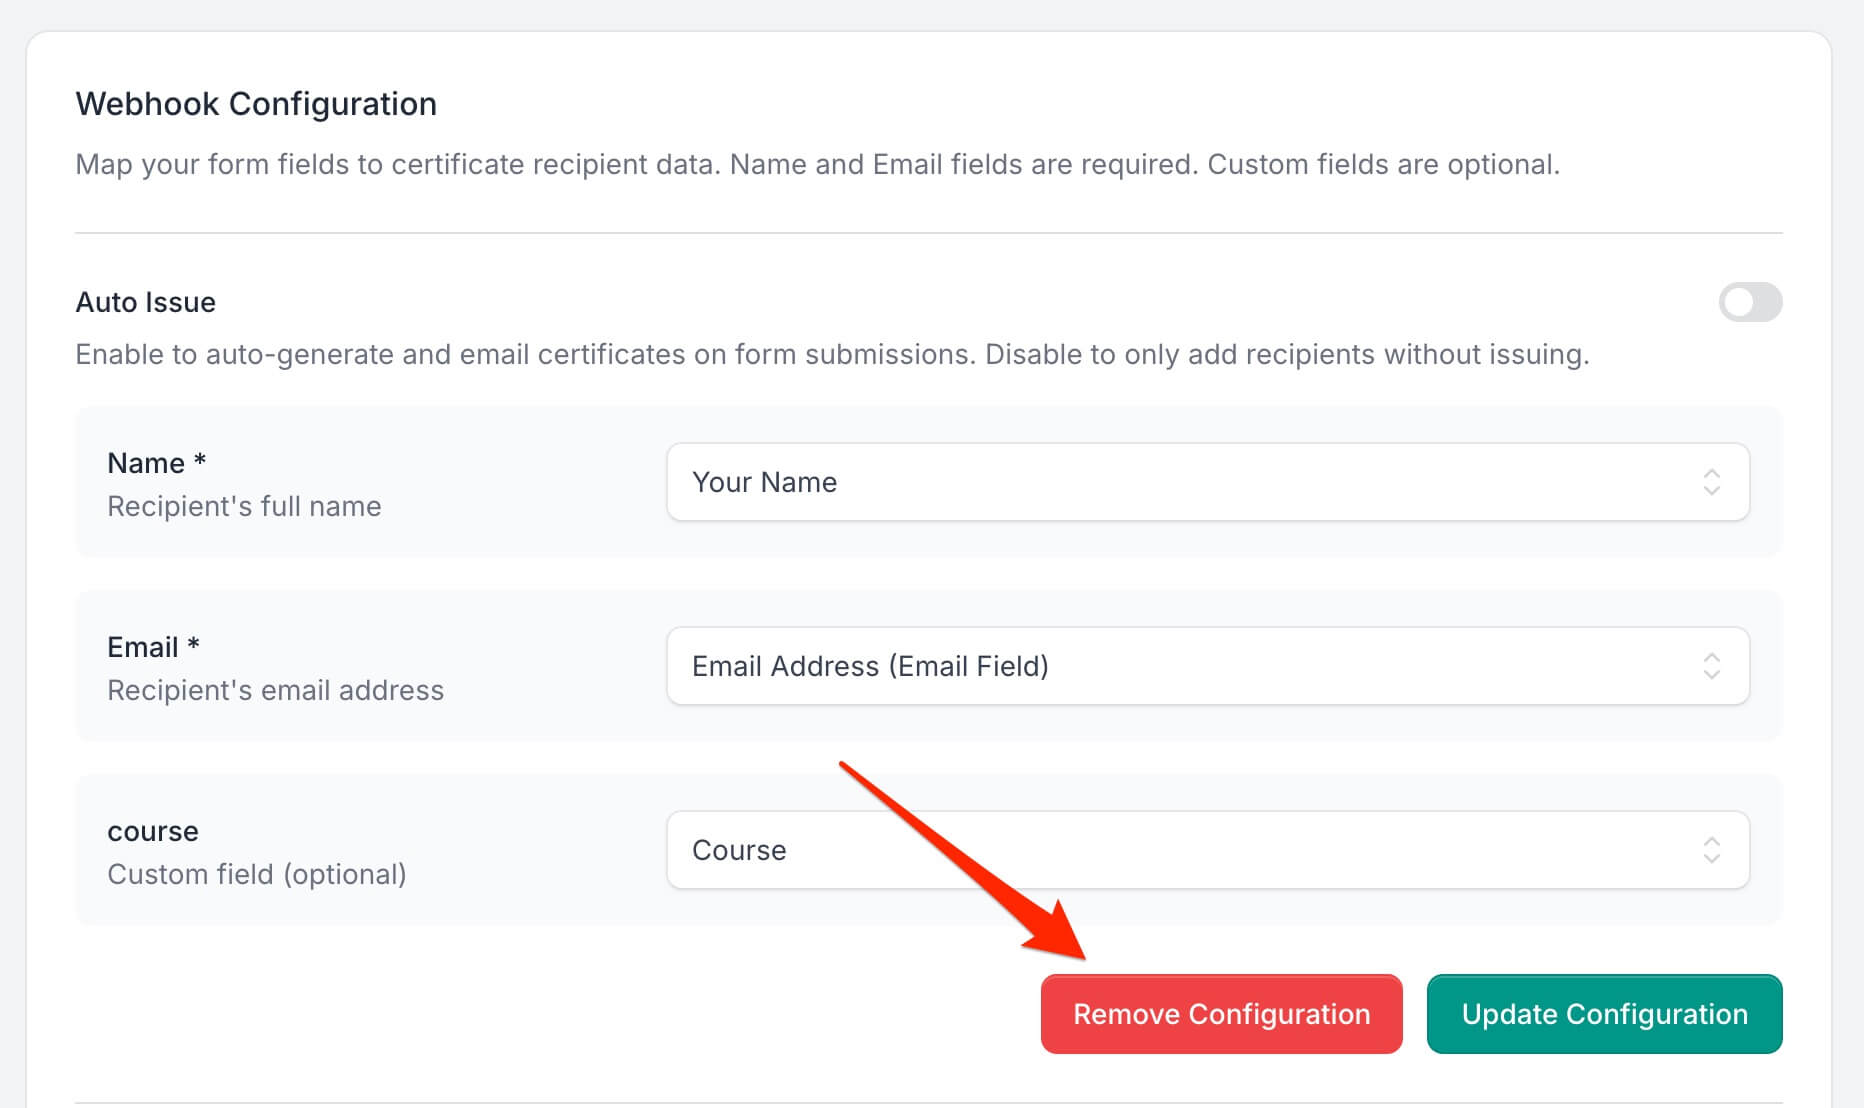
Pause or Remove Webhooks: Stop automatic certificate generation without affecting existing recipients.
-
Disconnect Tally: Remove API key and revoke CertFusion access if needed.
Tip: Always test with a sample submission to ensure field mappings and auto-issue settings are correct.
For more details on this integration, see the full Tally integration guide.
Why Use CertFusion with Tally
- Fully Automated: Certificates are issued immediately after form submission.
- Dynamic Fields Included: Recipient Name, Issued Date, and Certificate UUID are filled automatically.
- Customizable: Map additional form fields to custom fields on your certificate.
- Scalable: Works for small surveys or large events with thousands of participants.
Next Steps
Now you know how to generate e-certificate from Tally form with CertFusion.
📌 Pro Tip: Keep your Tally form fields consistent to avoid mapping errors when adding new forms.
👉 Log in to CertFusion and connect your Tally form today to automate certificate delivery.
Table of Contents
Related Articles
Discover more insights and stories that might interest you