How to Generate E-Certificate Automatically
Automating certificate creation saves hours of manual work and ensures a smooth experience for your participants. This guide shows you how to generate e-certificate automatically using CertFusion.
Step 1: Create a Certificate Template
-
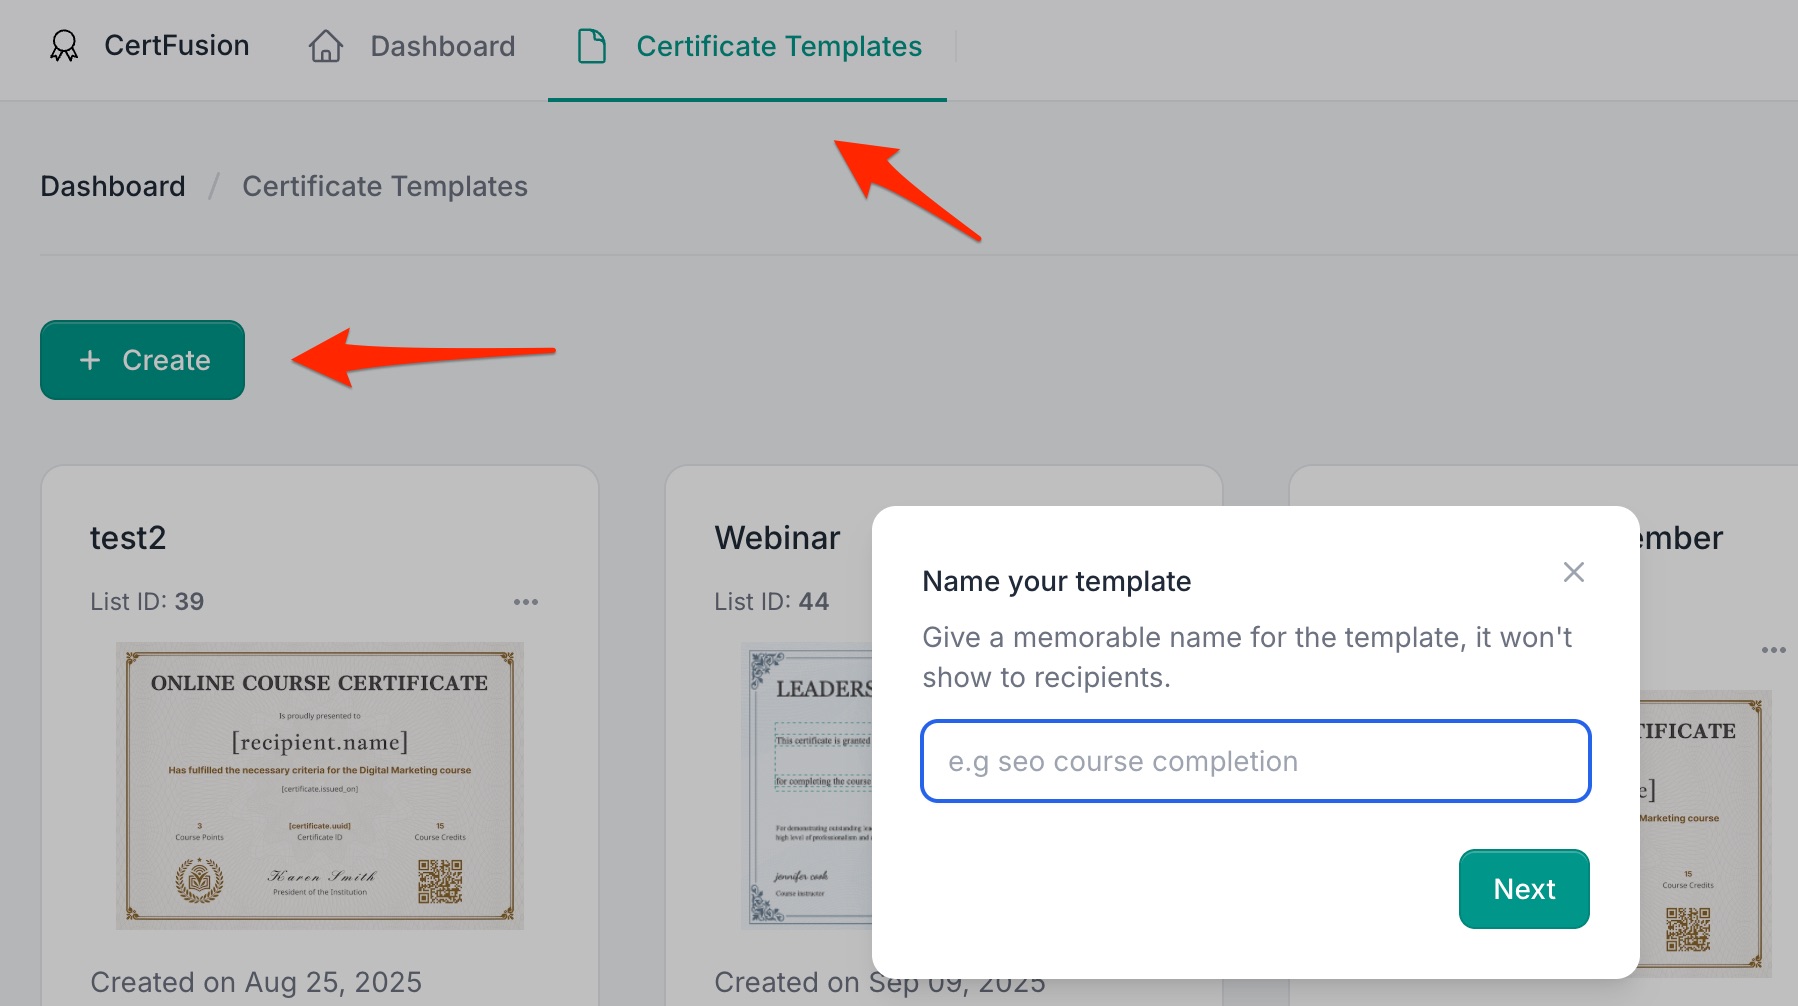
Log in to your CertFusion dashboard.
-
Navigate to Certificate Templates → click Create.
-
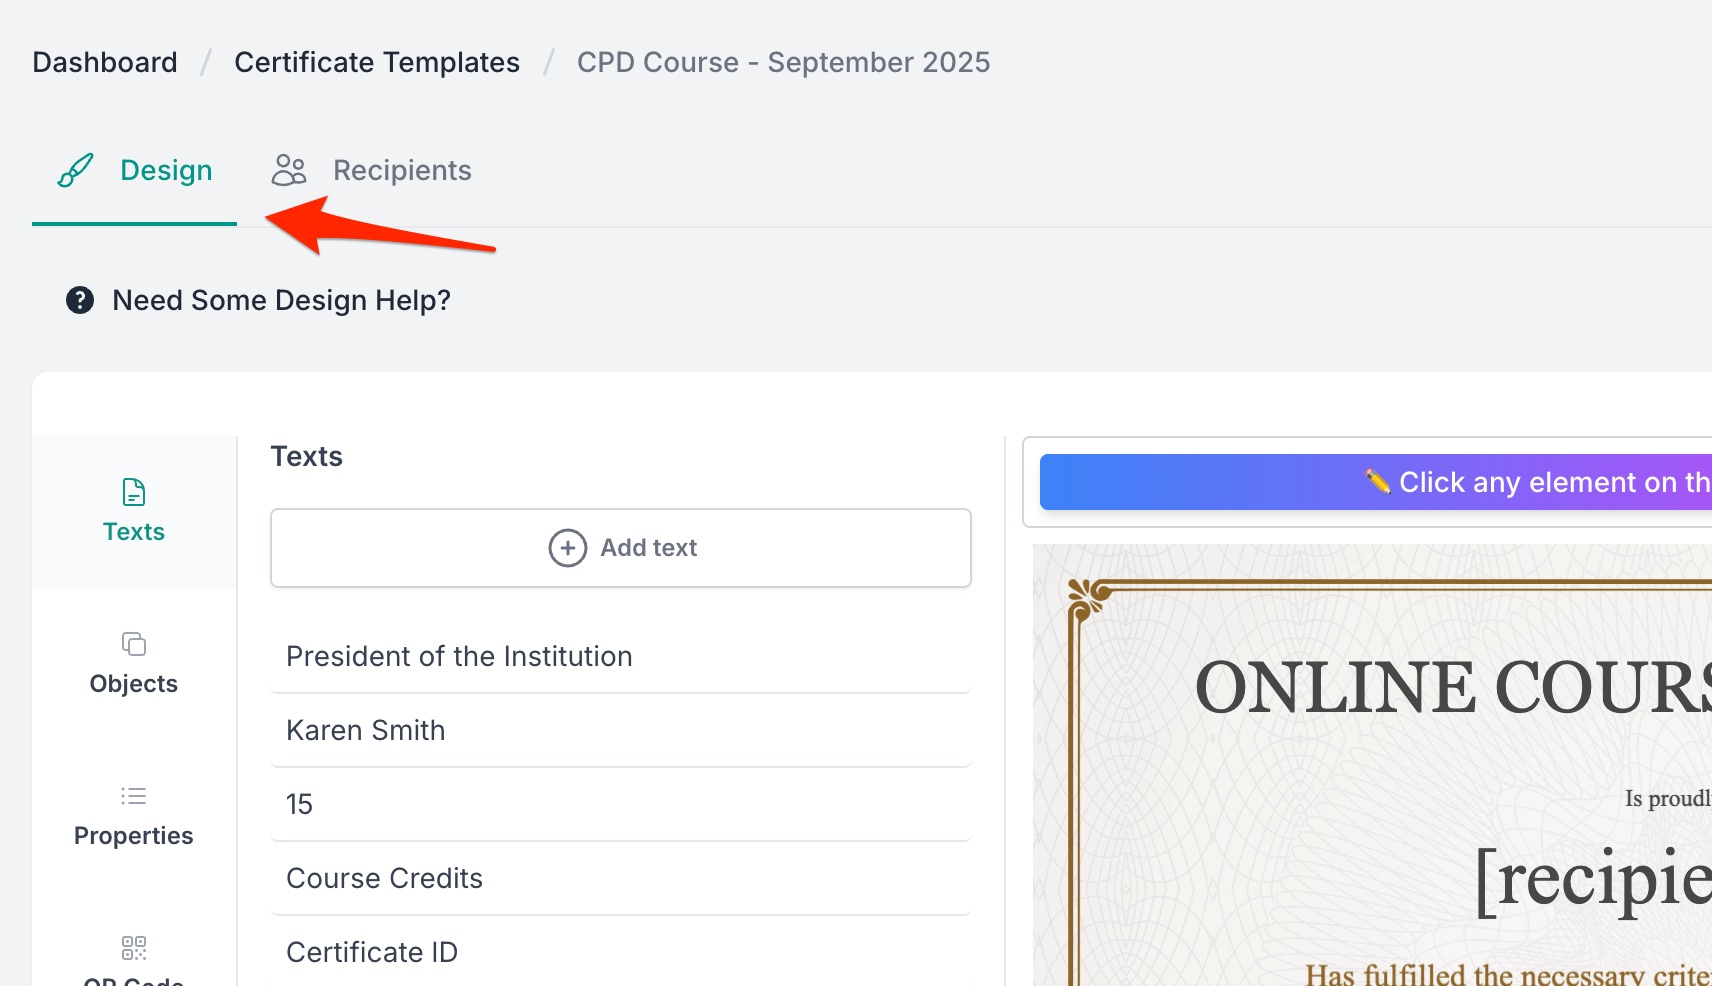
Use the drag-and-drop editor to design your certificate.
-
Add branding elements: logo, colors, signatures.
-
Insert dynamic fields:
- Recipient Name – automatically filled for each participant.
- Unique Certificate ID – auto-generated for verification.
- Custom Fields – create your own fields (e.g. Course Name, Hours, Instructor).
-
-
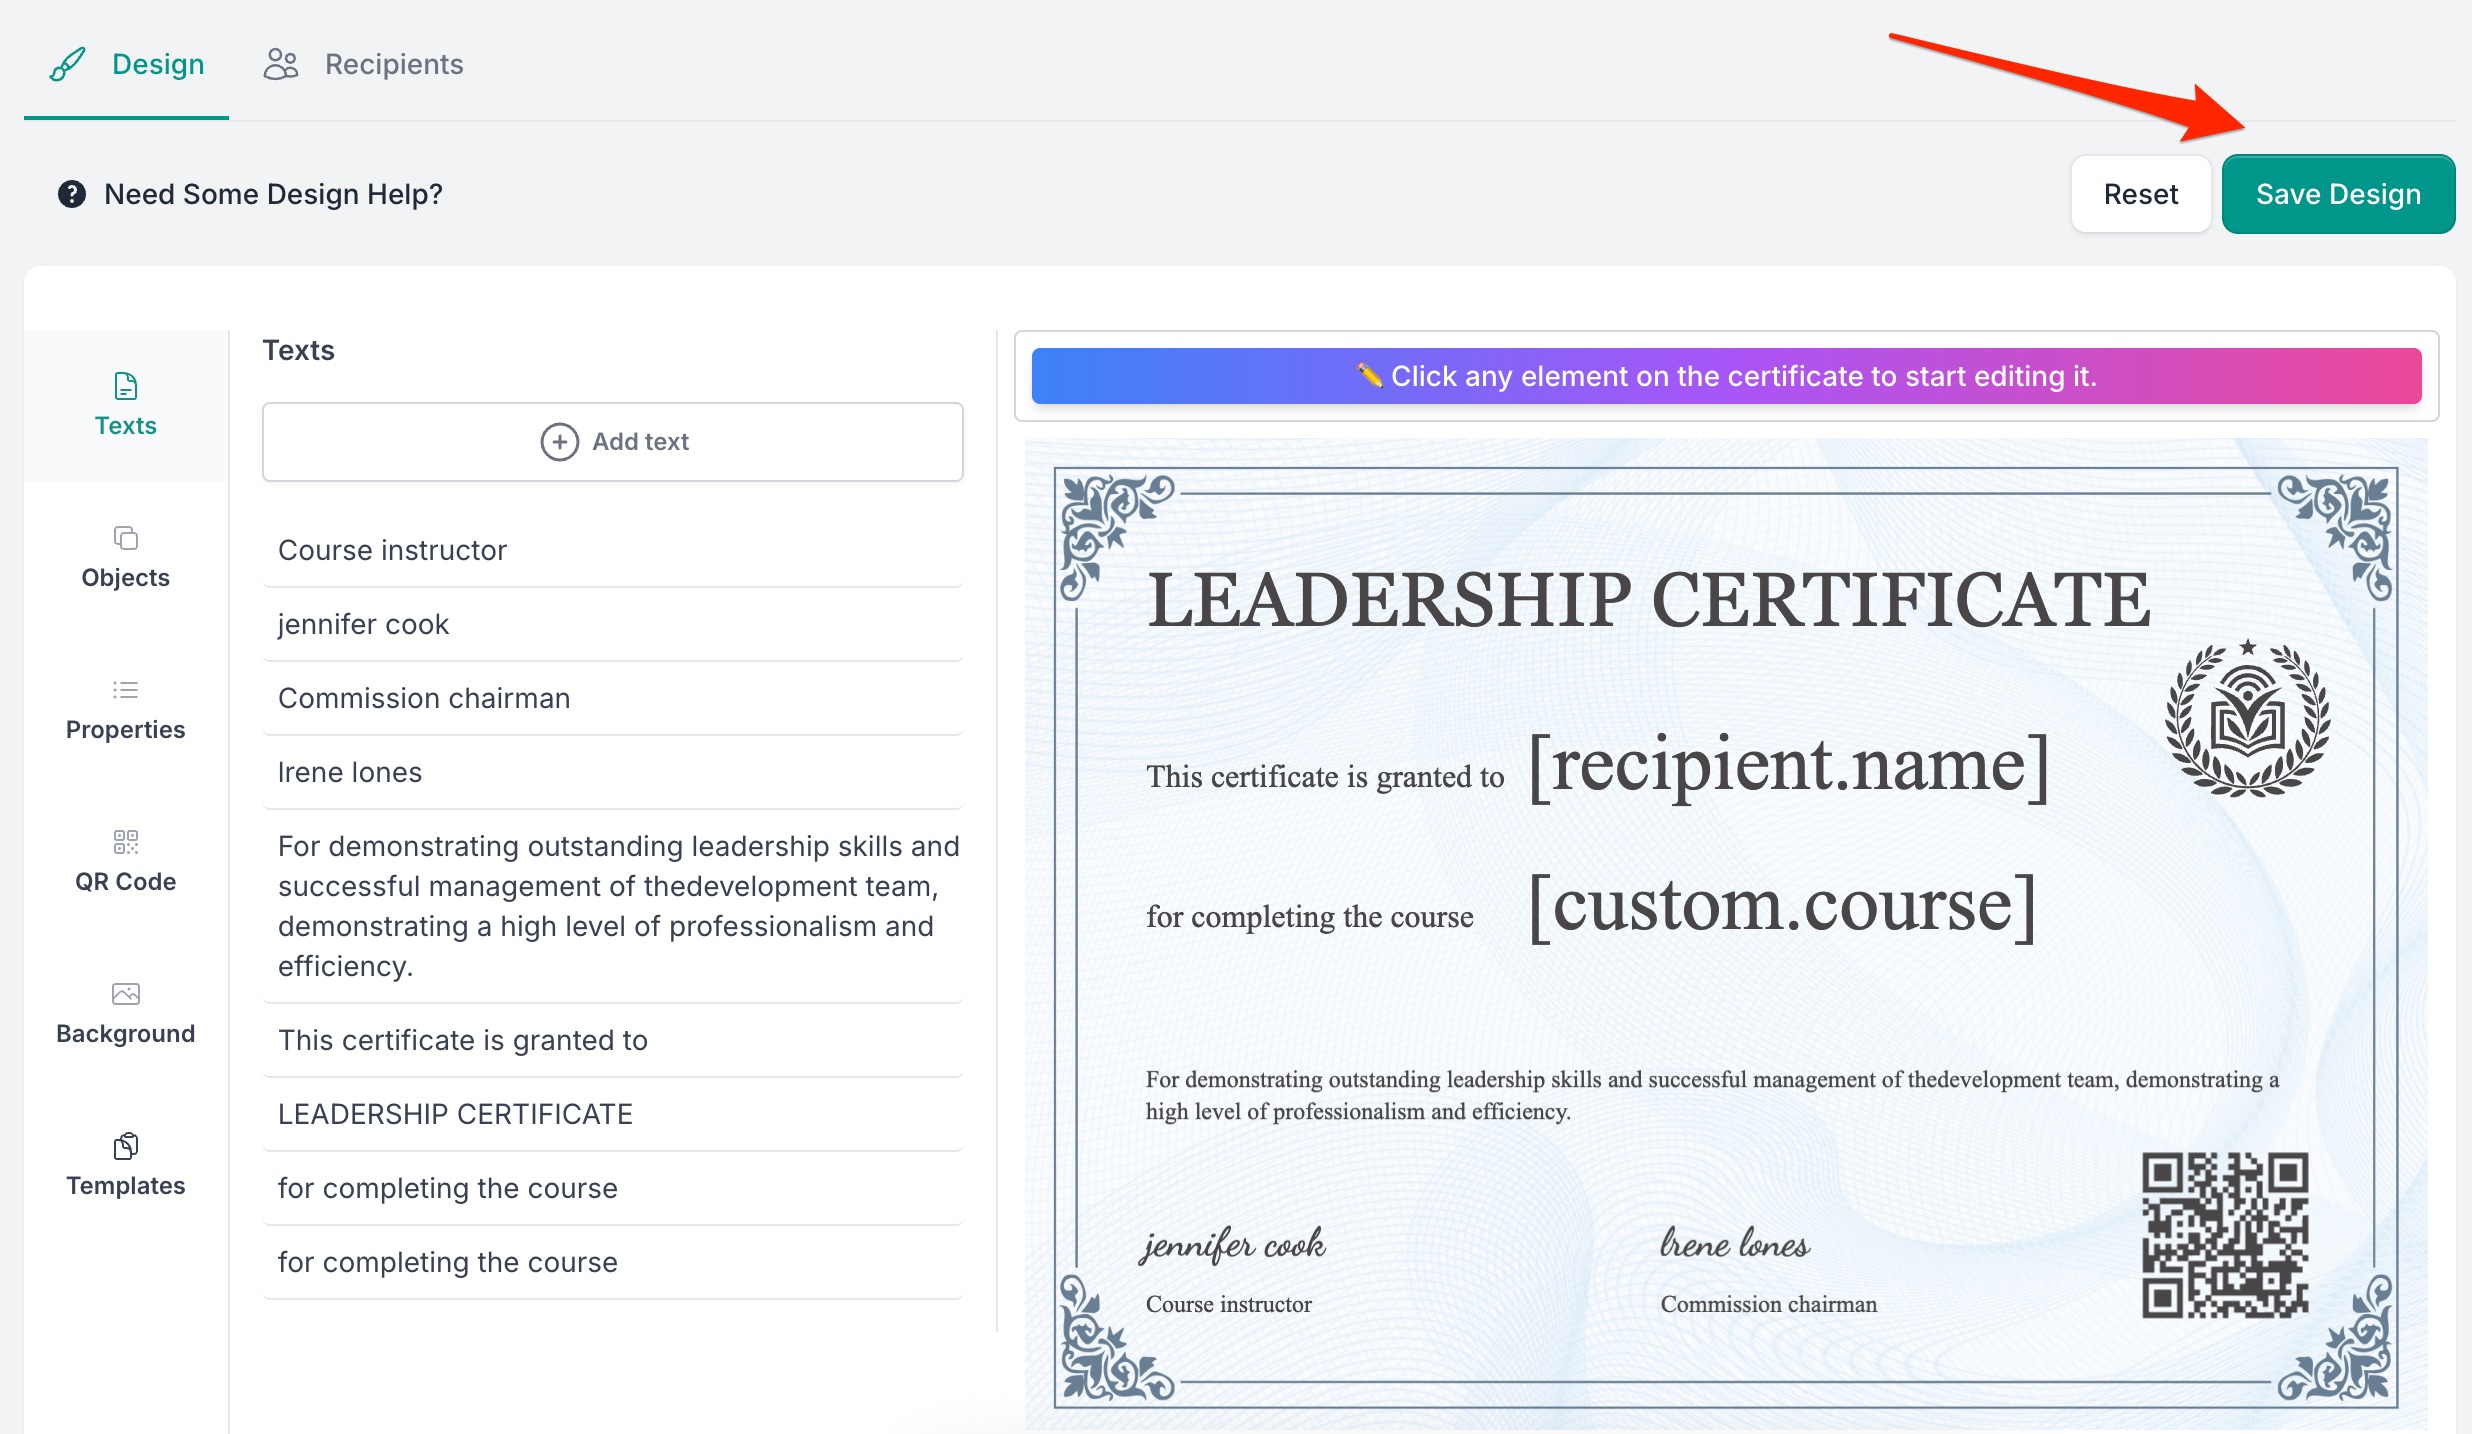
Click Save Template when done.
Step 2: Connect Attendee Data
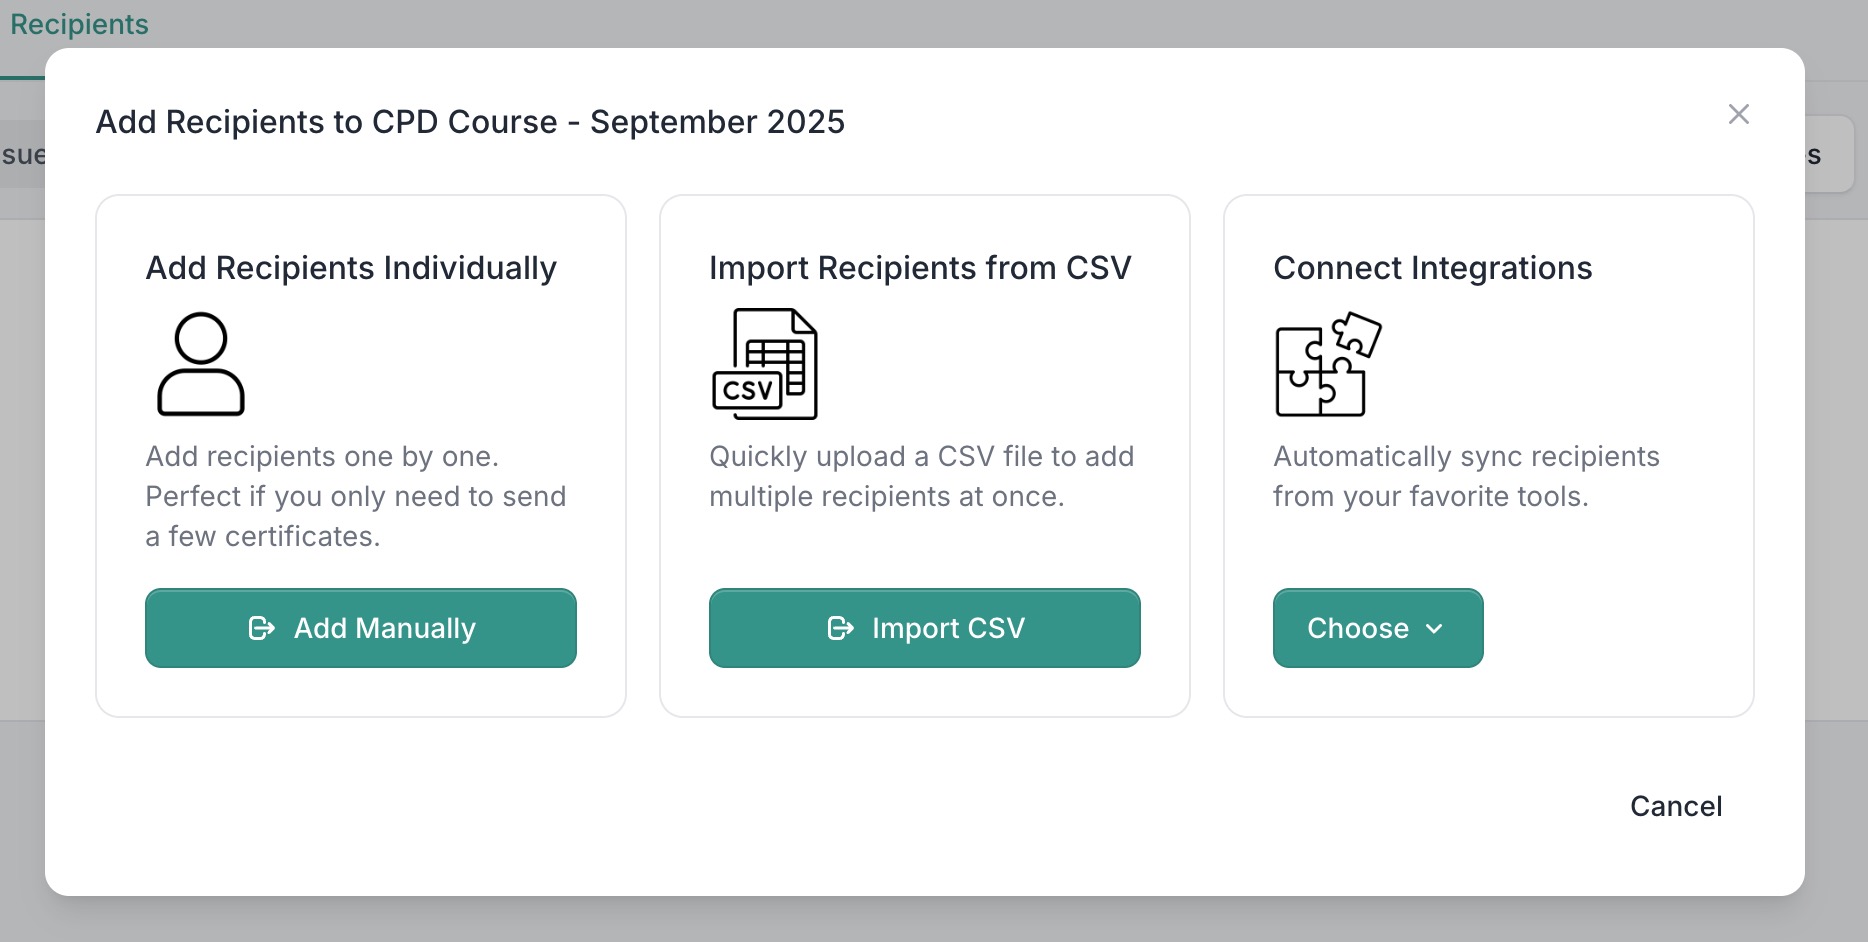
CertFusion offers multiple ways to bring in participant data:
- Form Integrations: Connect Google Forms, Typeform, or Tally. Map form fields (Name, Email, custom fields) to your template fields.
- Webinar Integrations: Sync Zoom or Webex attendance lists automatically.
- CSV Upload or Manual Entry: Import data manually if your event is offline or you don’t use a form.
Step 3: Enable Auto-Issuance
Automation works slightly differently depending on your data source:
-
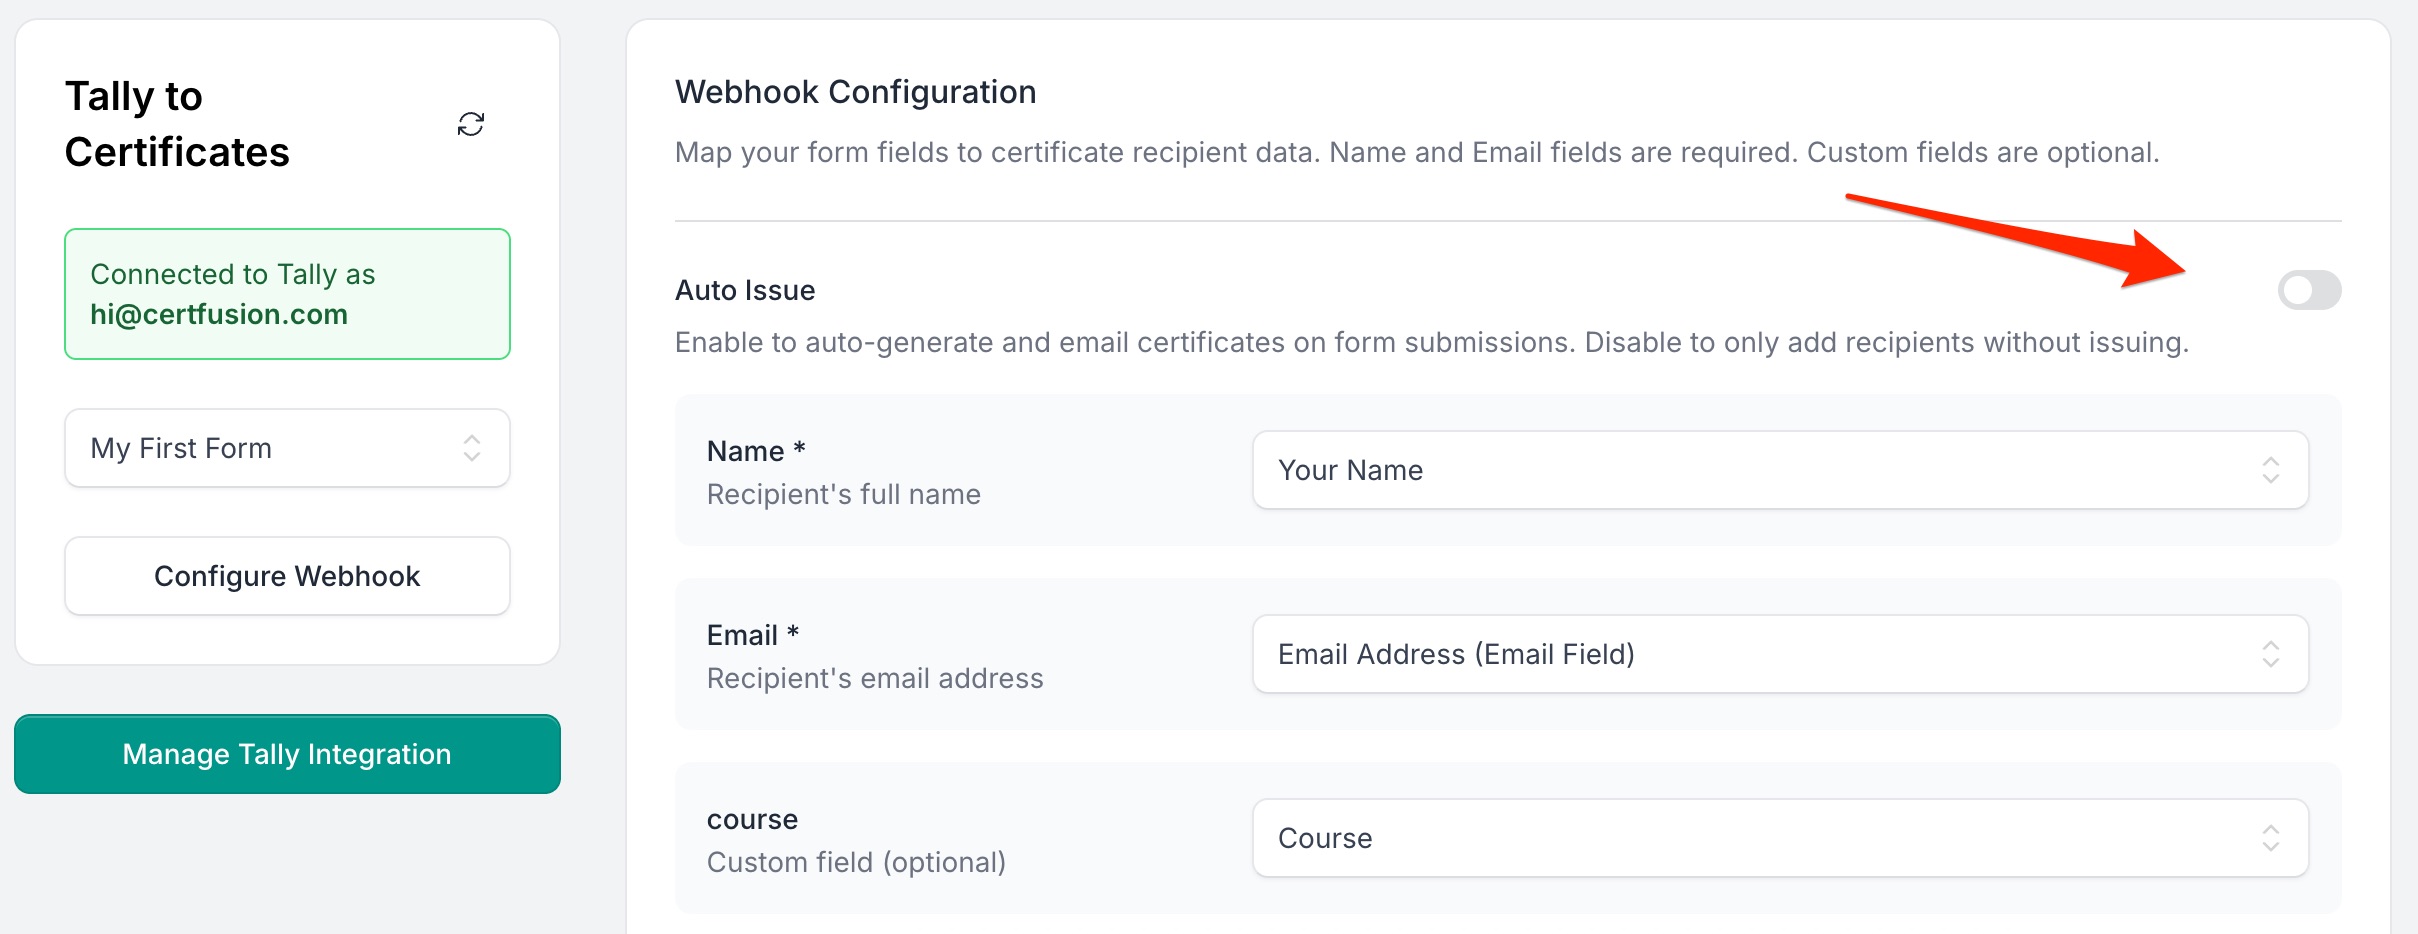
For Integrated Sources (Forms & Webinars):
- Go to the integration in recipients index page.
- Select the connected form/webinar.
- Toggle Auto-Issue Certificates.
CertFusion will now generate and send certificates automatically for every new submission or attendance record.
-
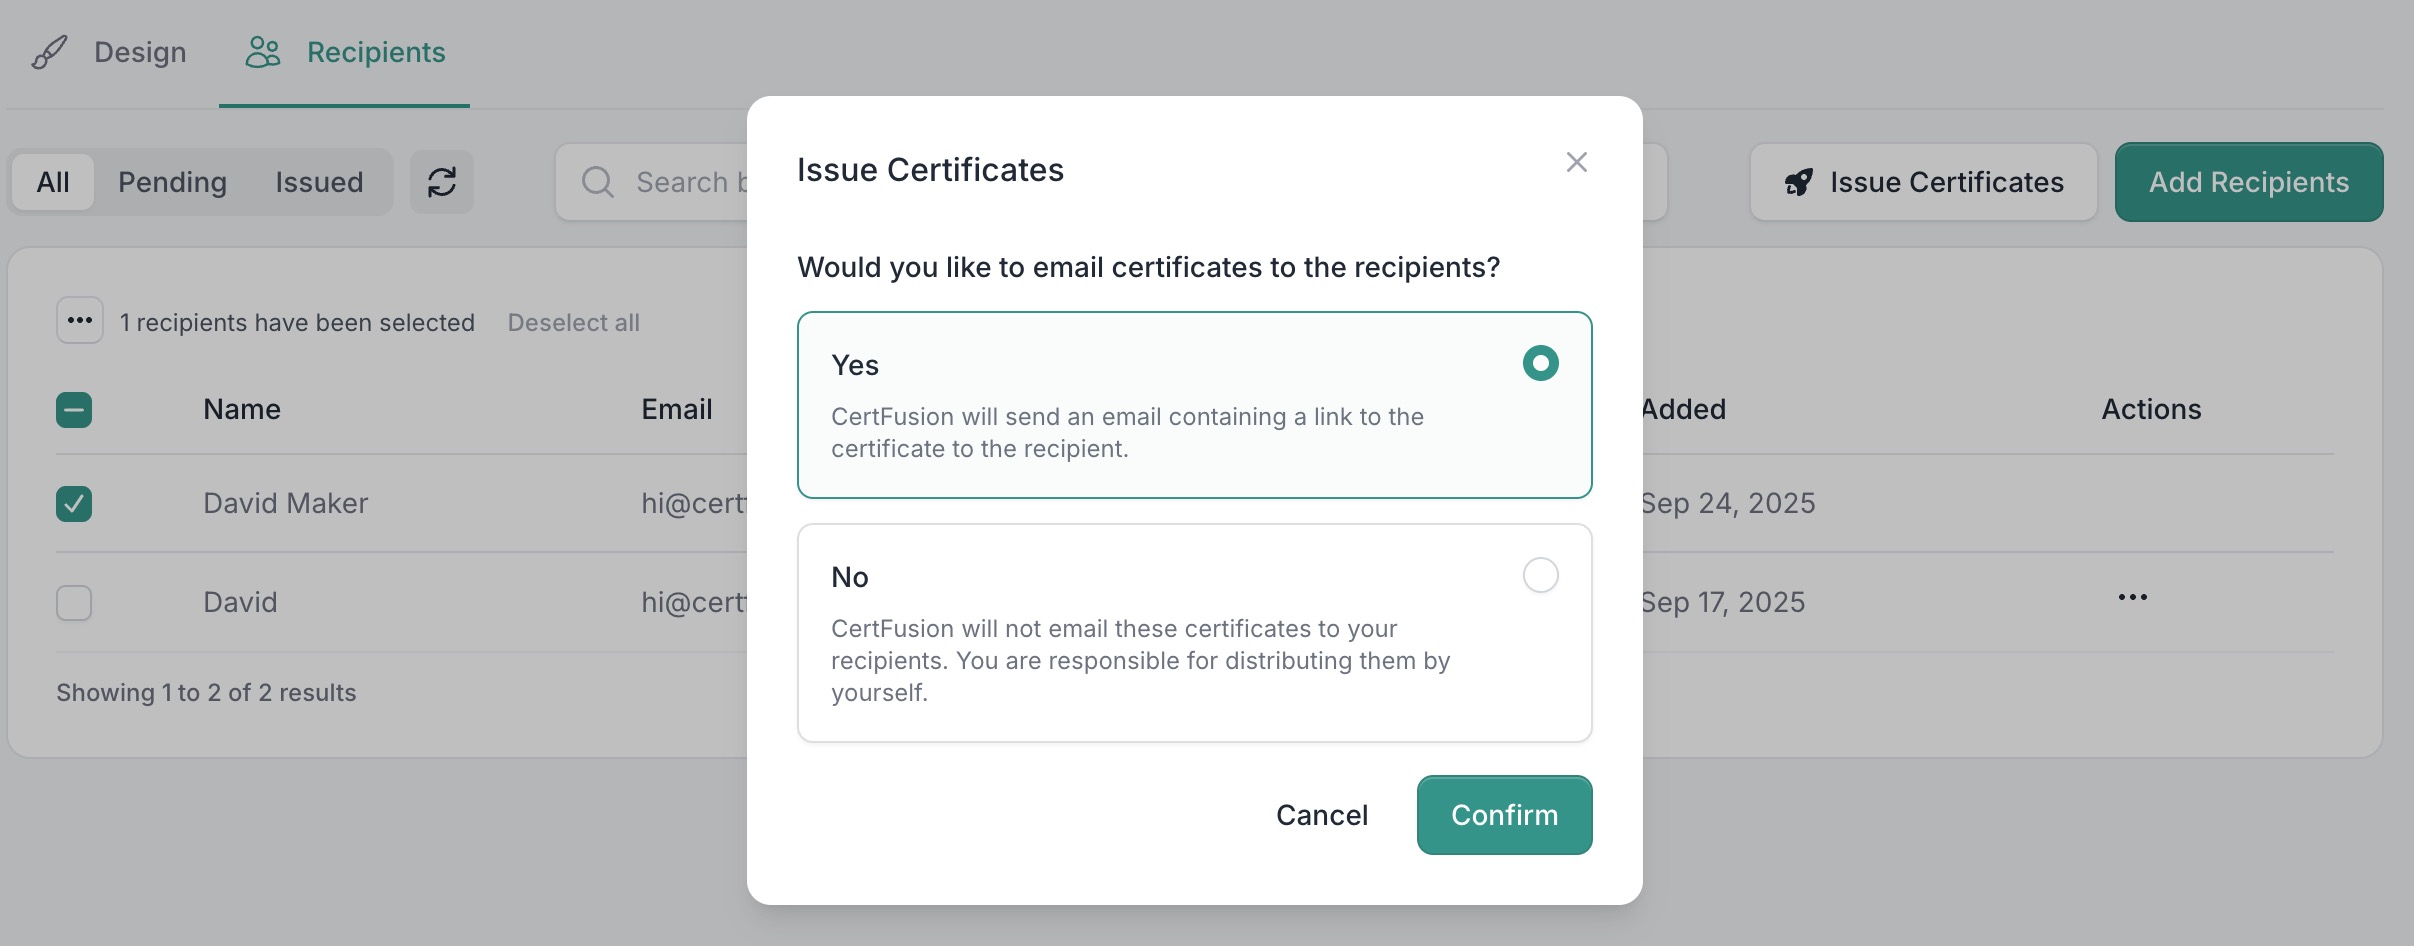
For CSV or Manual Entry:
- Go to Recipients.
- Add participants manually or upload a CSV file.
- Select recipients and click Issue Certificates to send them.
Step 4: Delivery & Verification
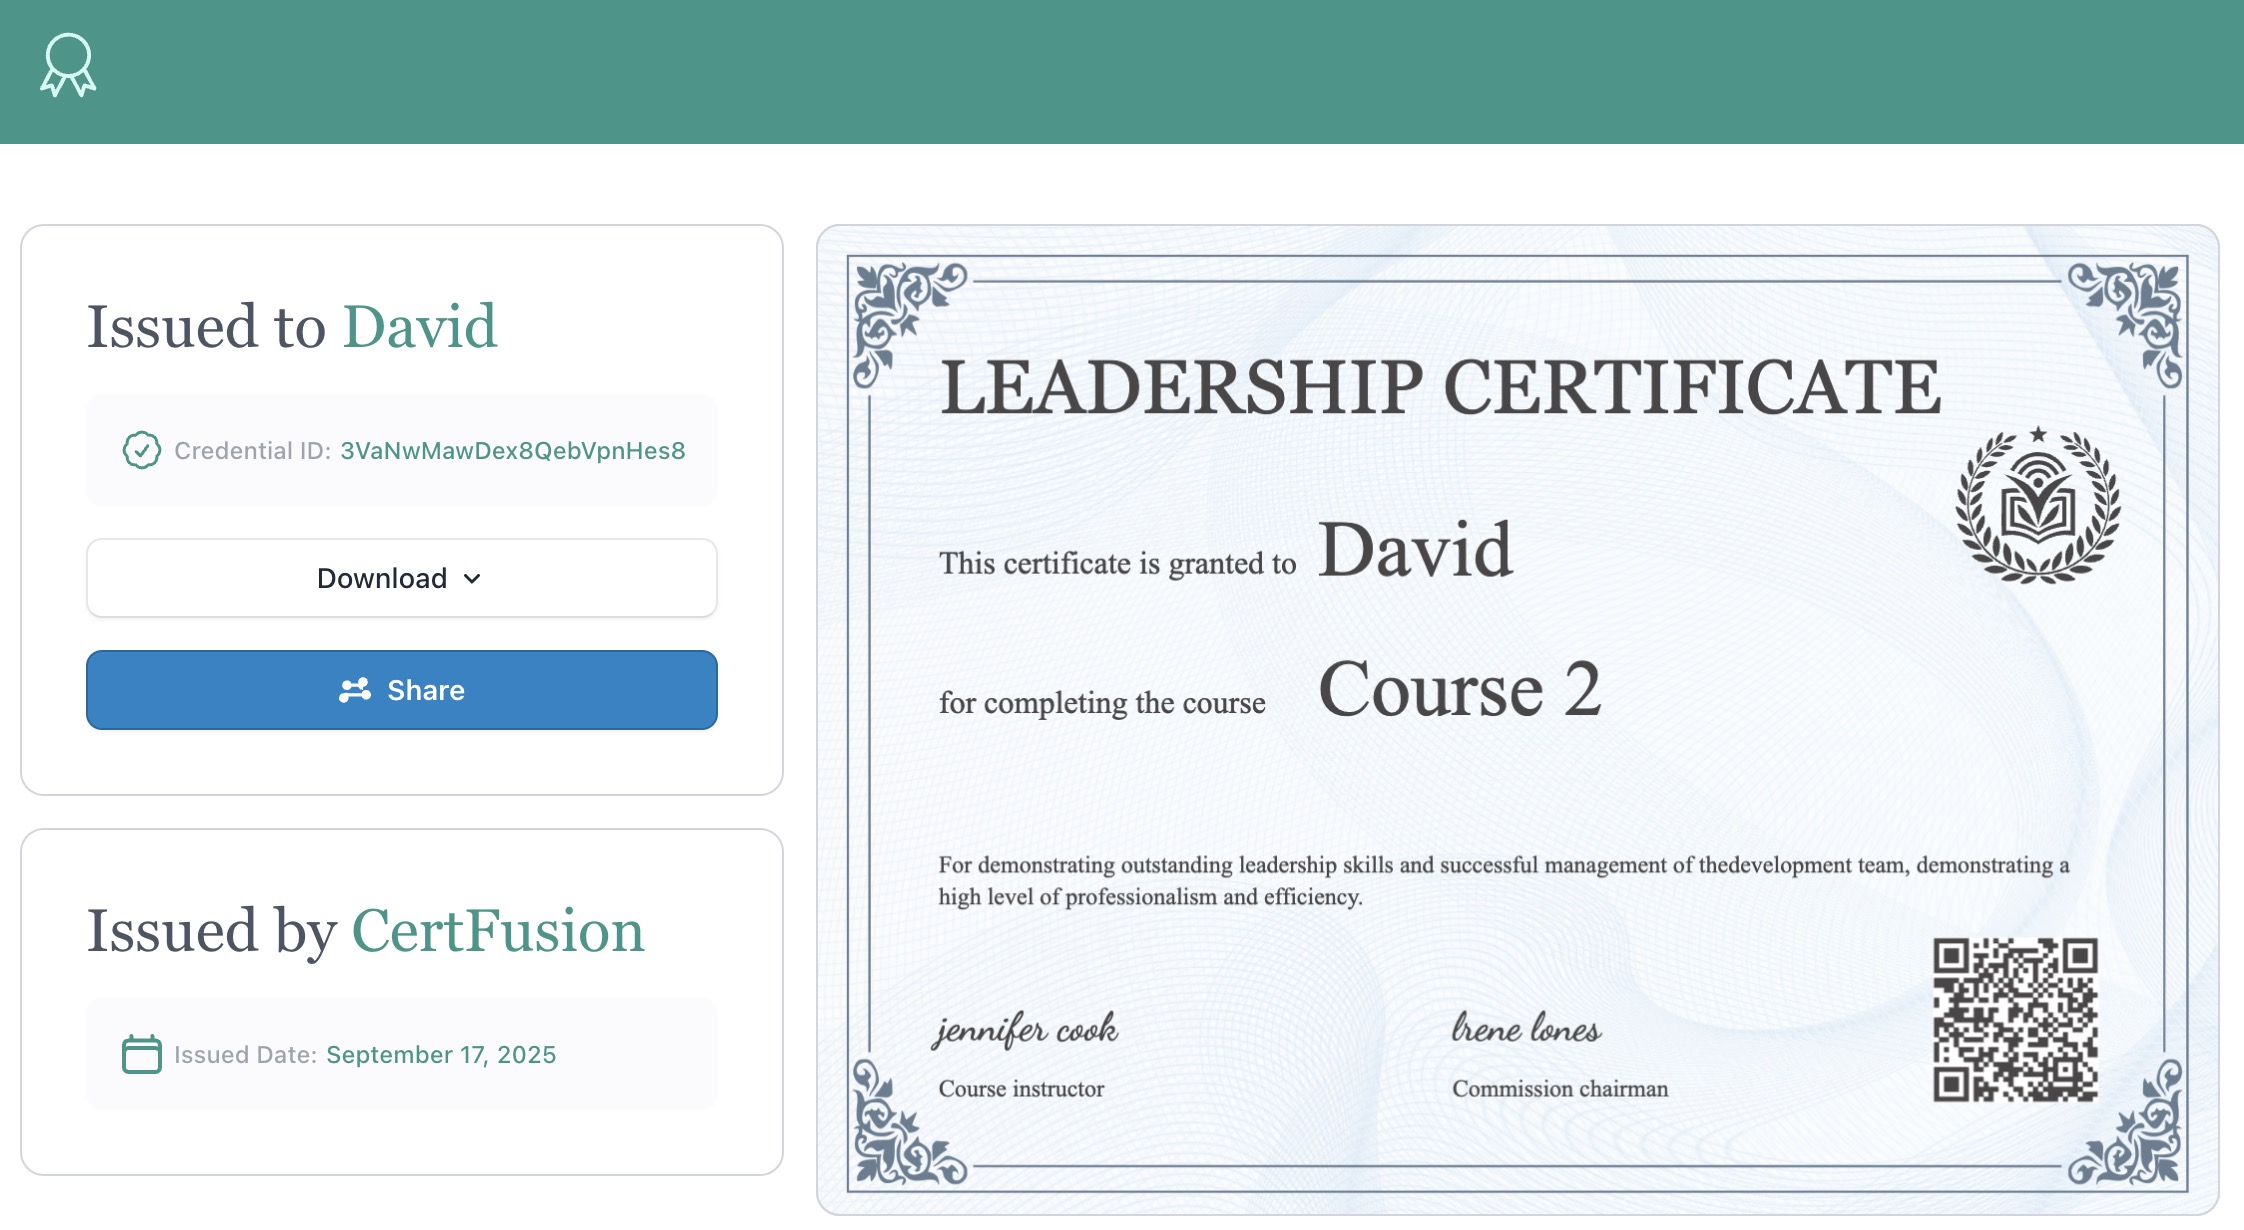
Once certificates are issued, recipients will receive an email containing:
- A unique, secure URL to view their certificate online.
- Options to download the PDF or verify authenticity on your CertFusion-hosted verification page.
Tracking & Resending
In the Recipients page, you can:
- Resend certificates with a single click if needed.

Why Use CertFusion for Automation
- Saves Time: No manual editing or sending required.
- Error-Free: Names and details are auto-filled from your data source.
- Professional Experience: Instant delivery and verification links.
- Scalable: Works for 10 or 10,000 recipients.
Next Steps
Now you know how to generate e-certificate automatically with CertFusion.
📌 Tip: If you’re just getting started, try setting up a test template and running a sample form submission to confirm everything works before your real event.
👉 Get started with CertFusion today and automate your first certificate in minutes.
Table of Contents
Related Articles
Discover more insights and stories that might interest you
