How to Auto Generate E-Certificate from Google Form
If you collect attendee information via Google Forms, CertFusion allows you to automatically generate e-certificate from Google Form submissions. This guide also covers how to generate e-certificate from Google Form for webinar attendees.
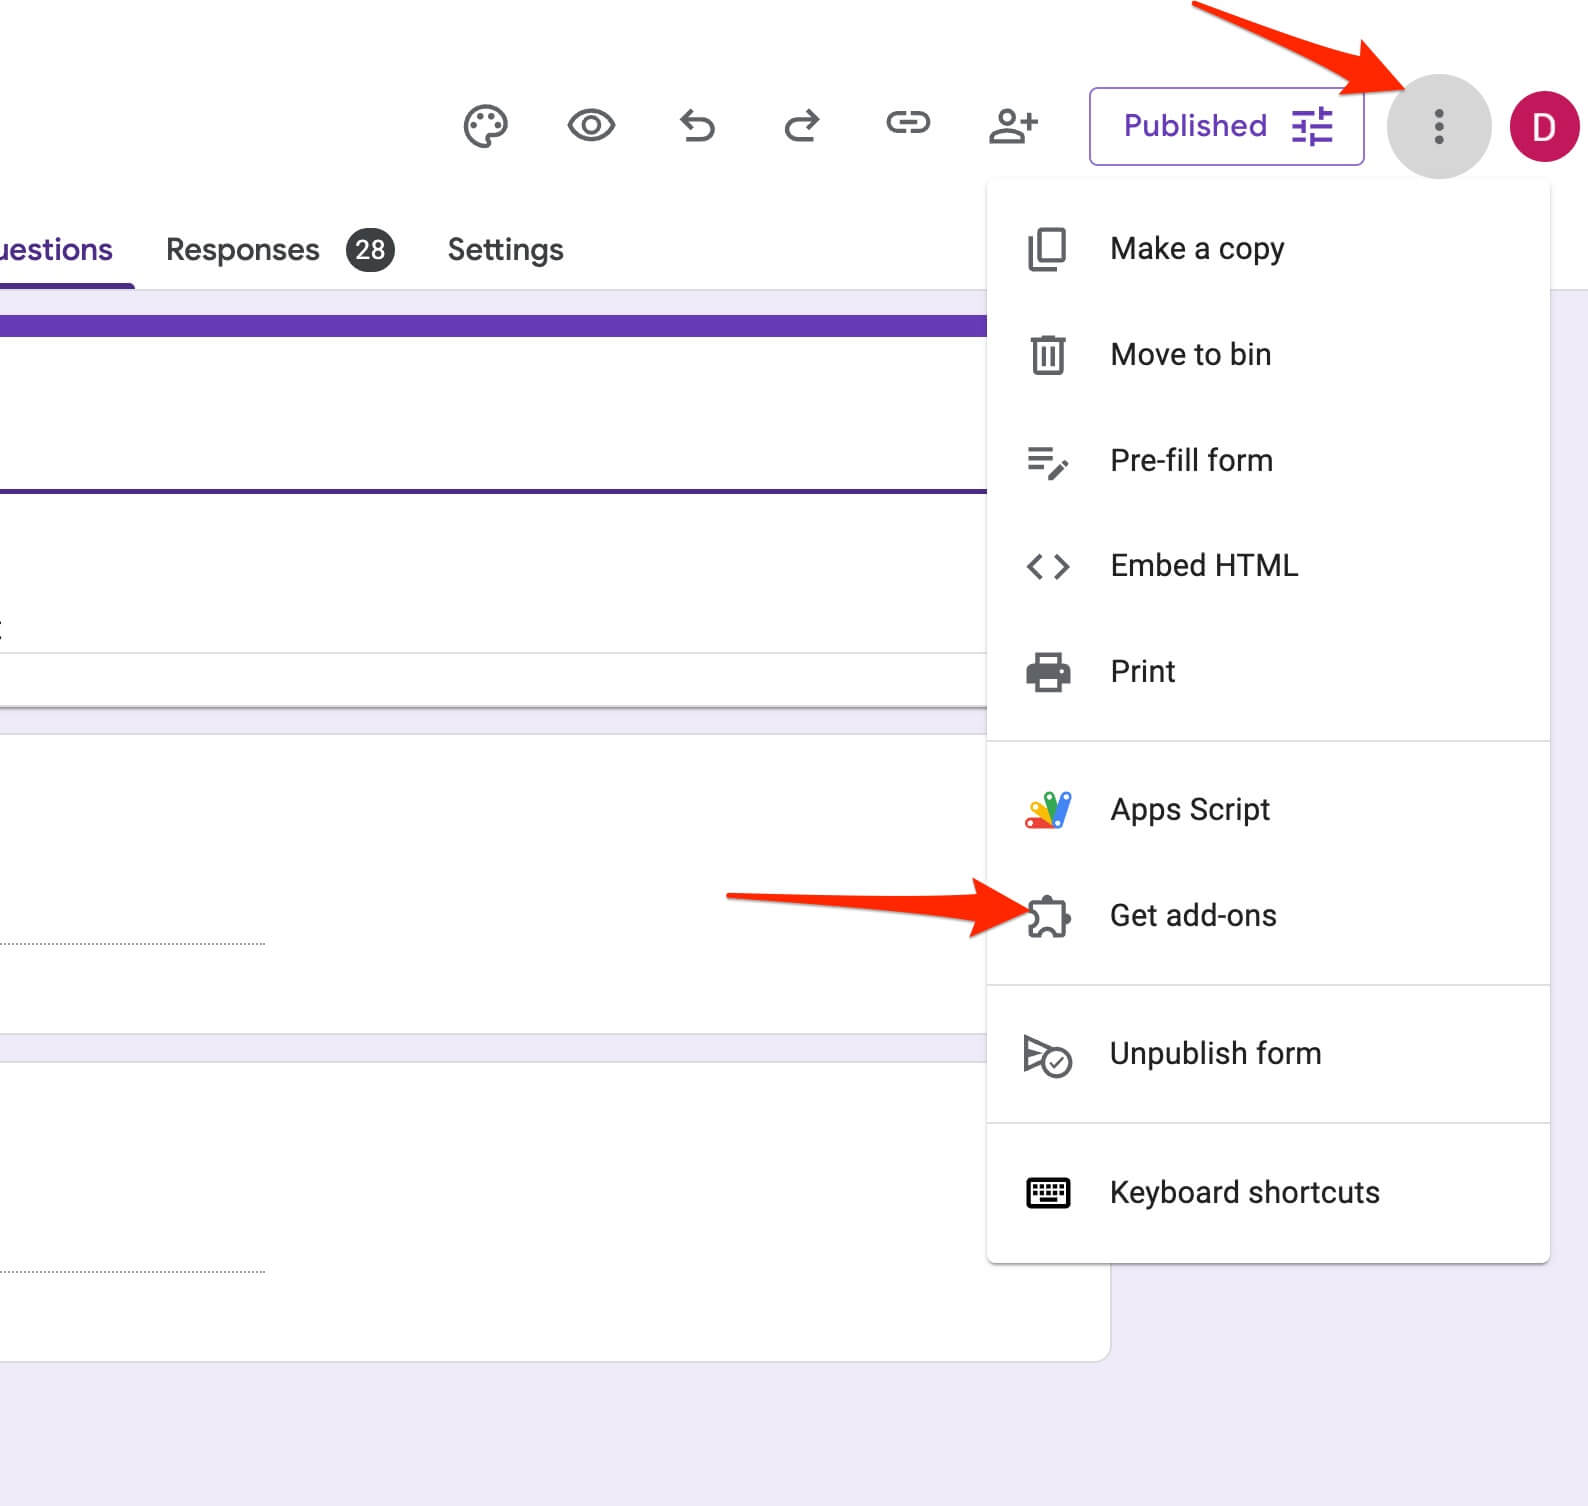
Step 1: Install the CertFusion Google Forms Add-on
-
Open your Google Form (create a new one or use an existing form).
-
Click the Add-ons button (puzzle piece icon) in the top-right corner.
-
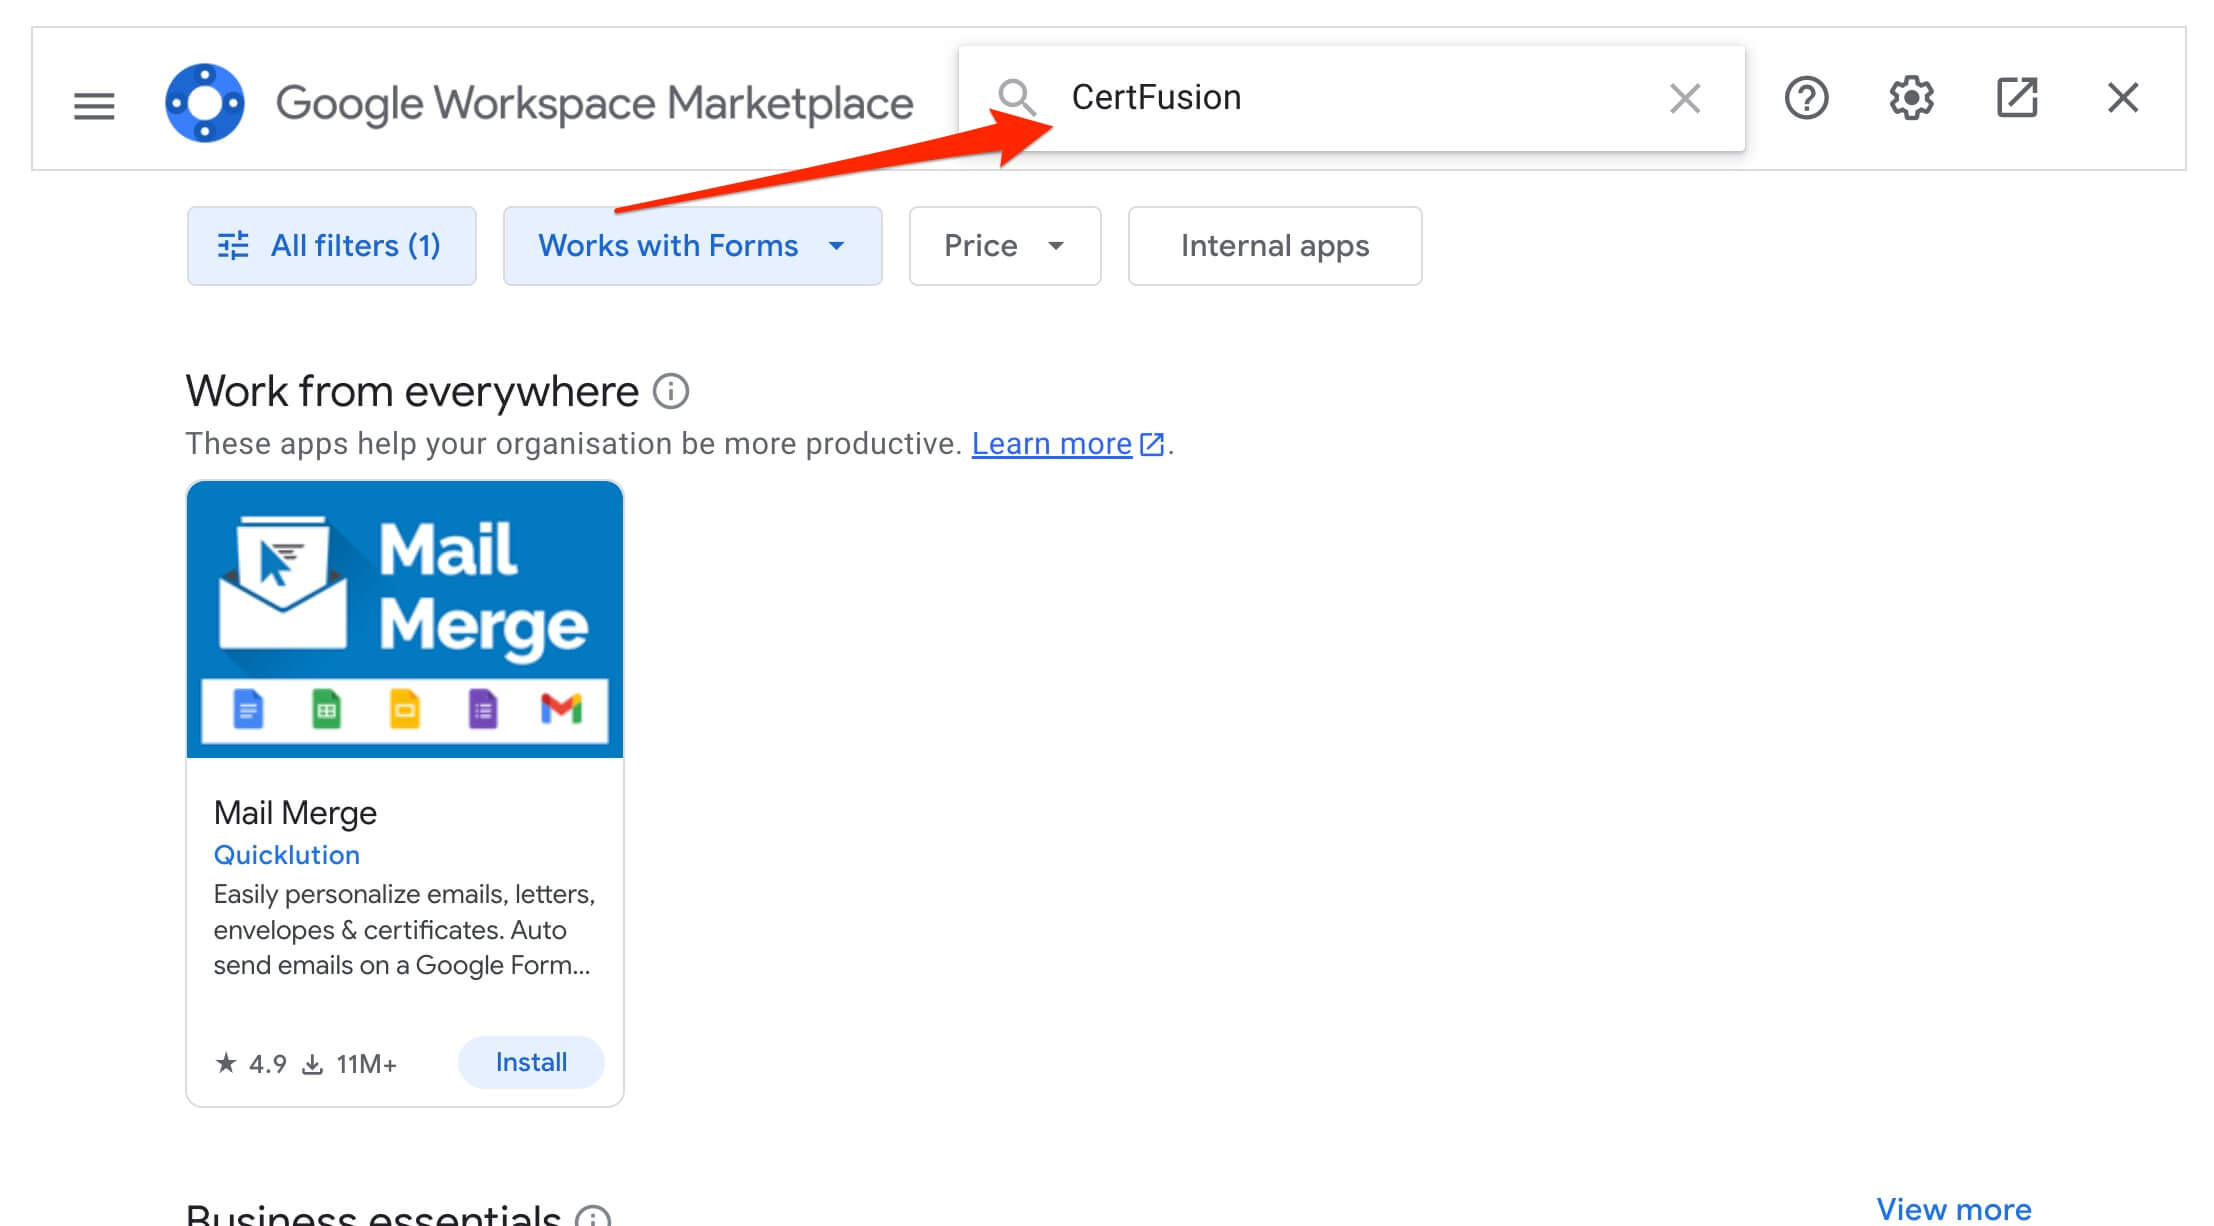
Search for CertFusion in the Google Workspace Marketplace and install it.
-
Authorize necessary permissions.
-
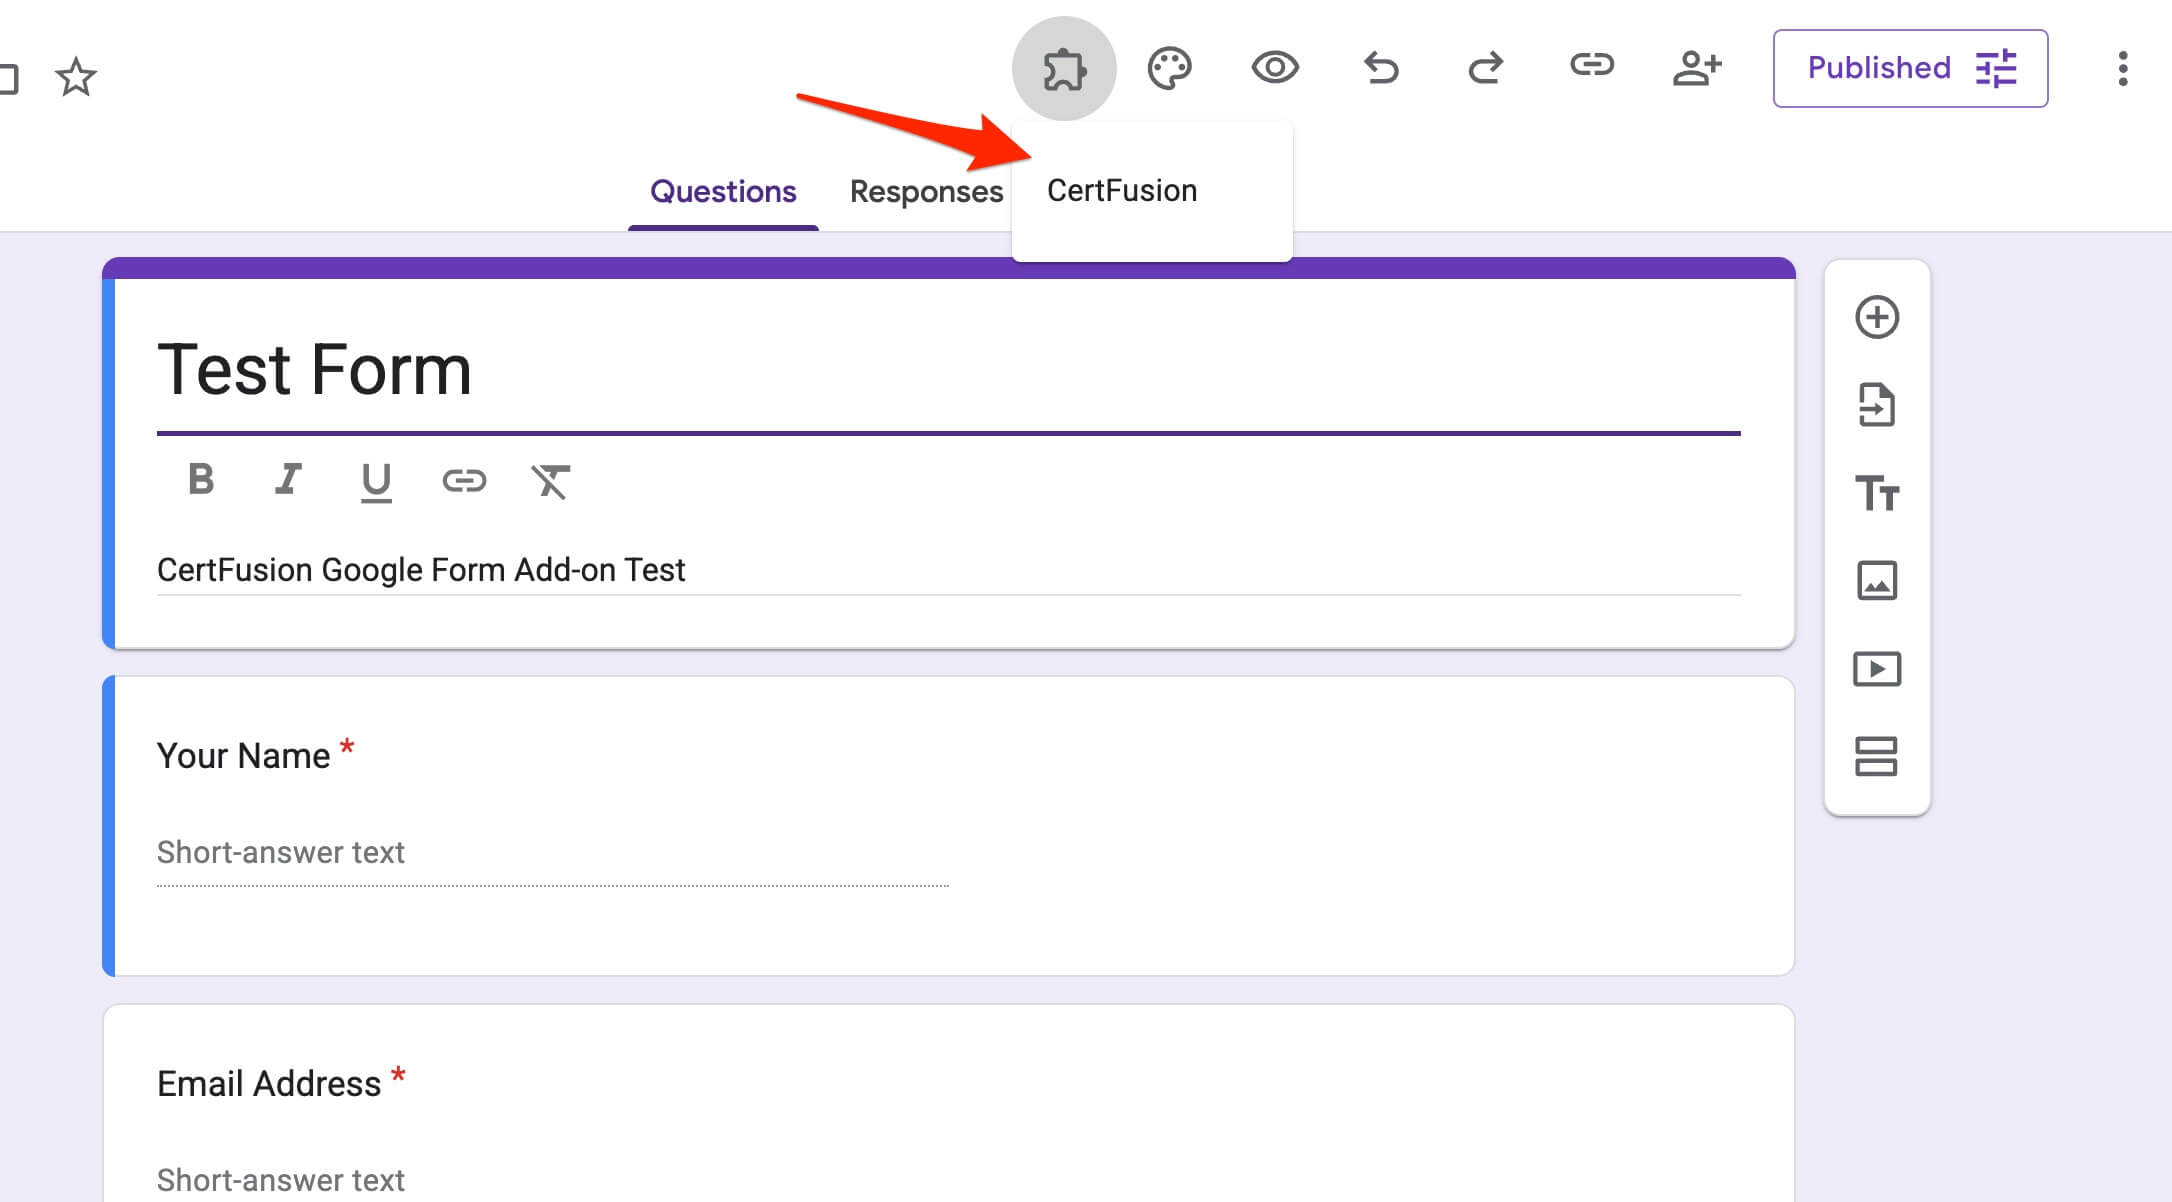
After installation, you will see the CertFusion menu in your form editor toolbar.
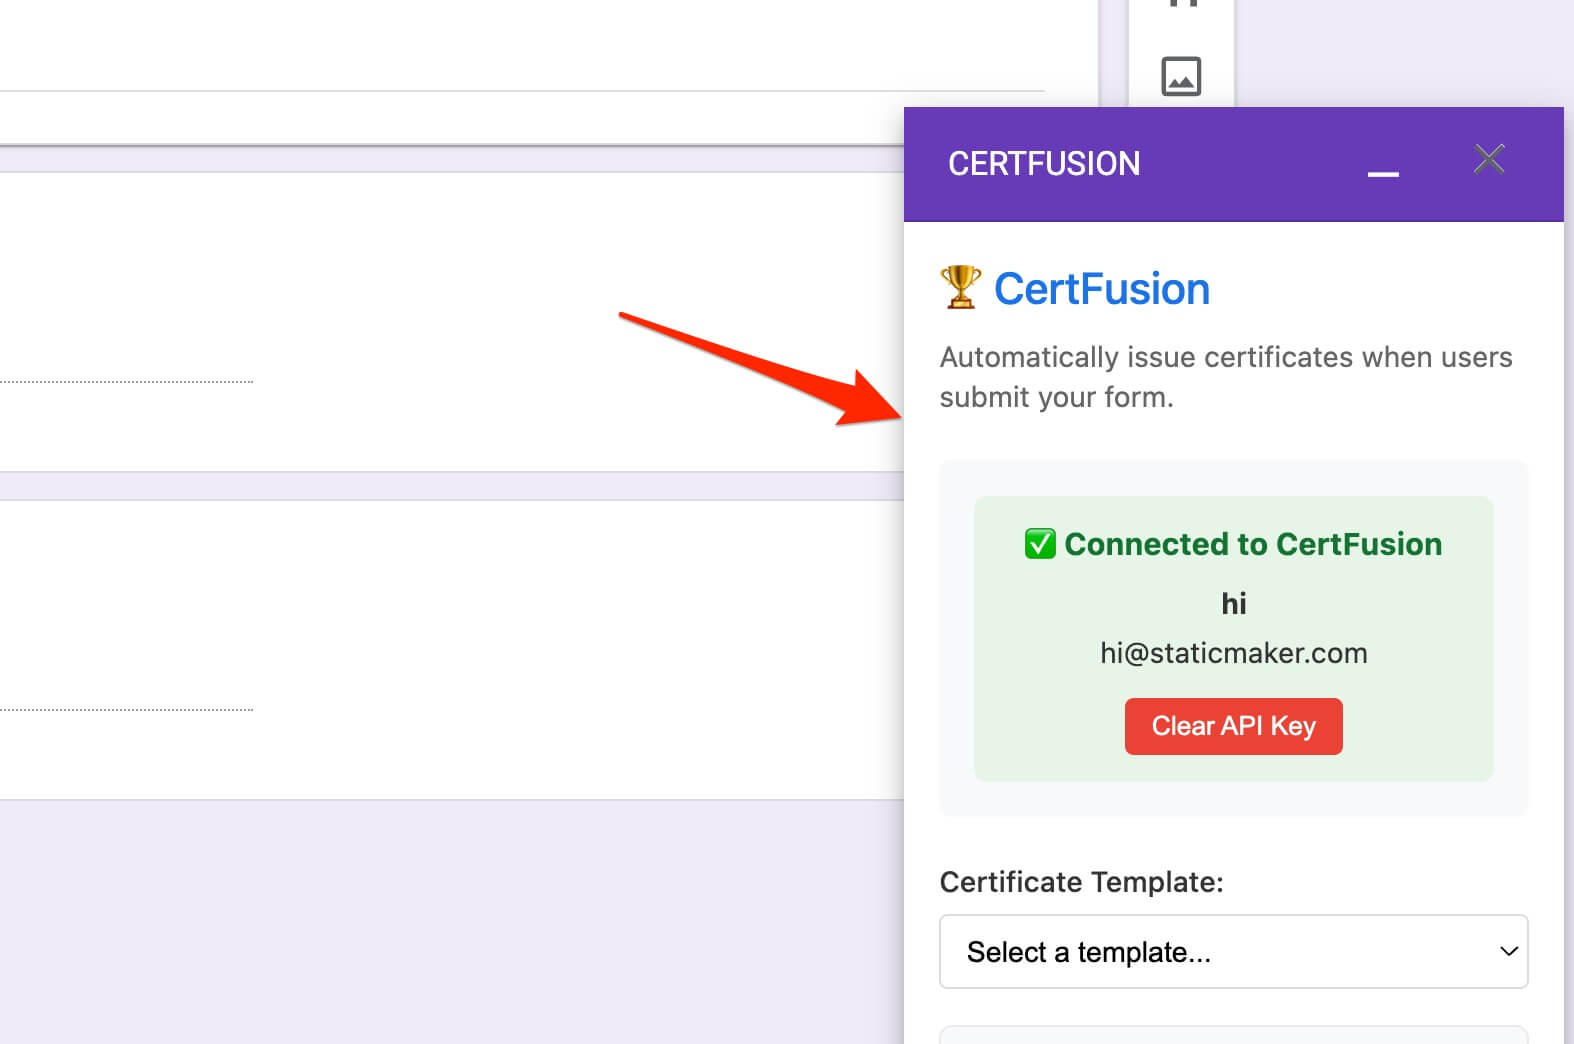
Step 2: Set Up Your Certificate Integration
-
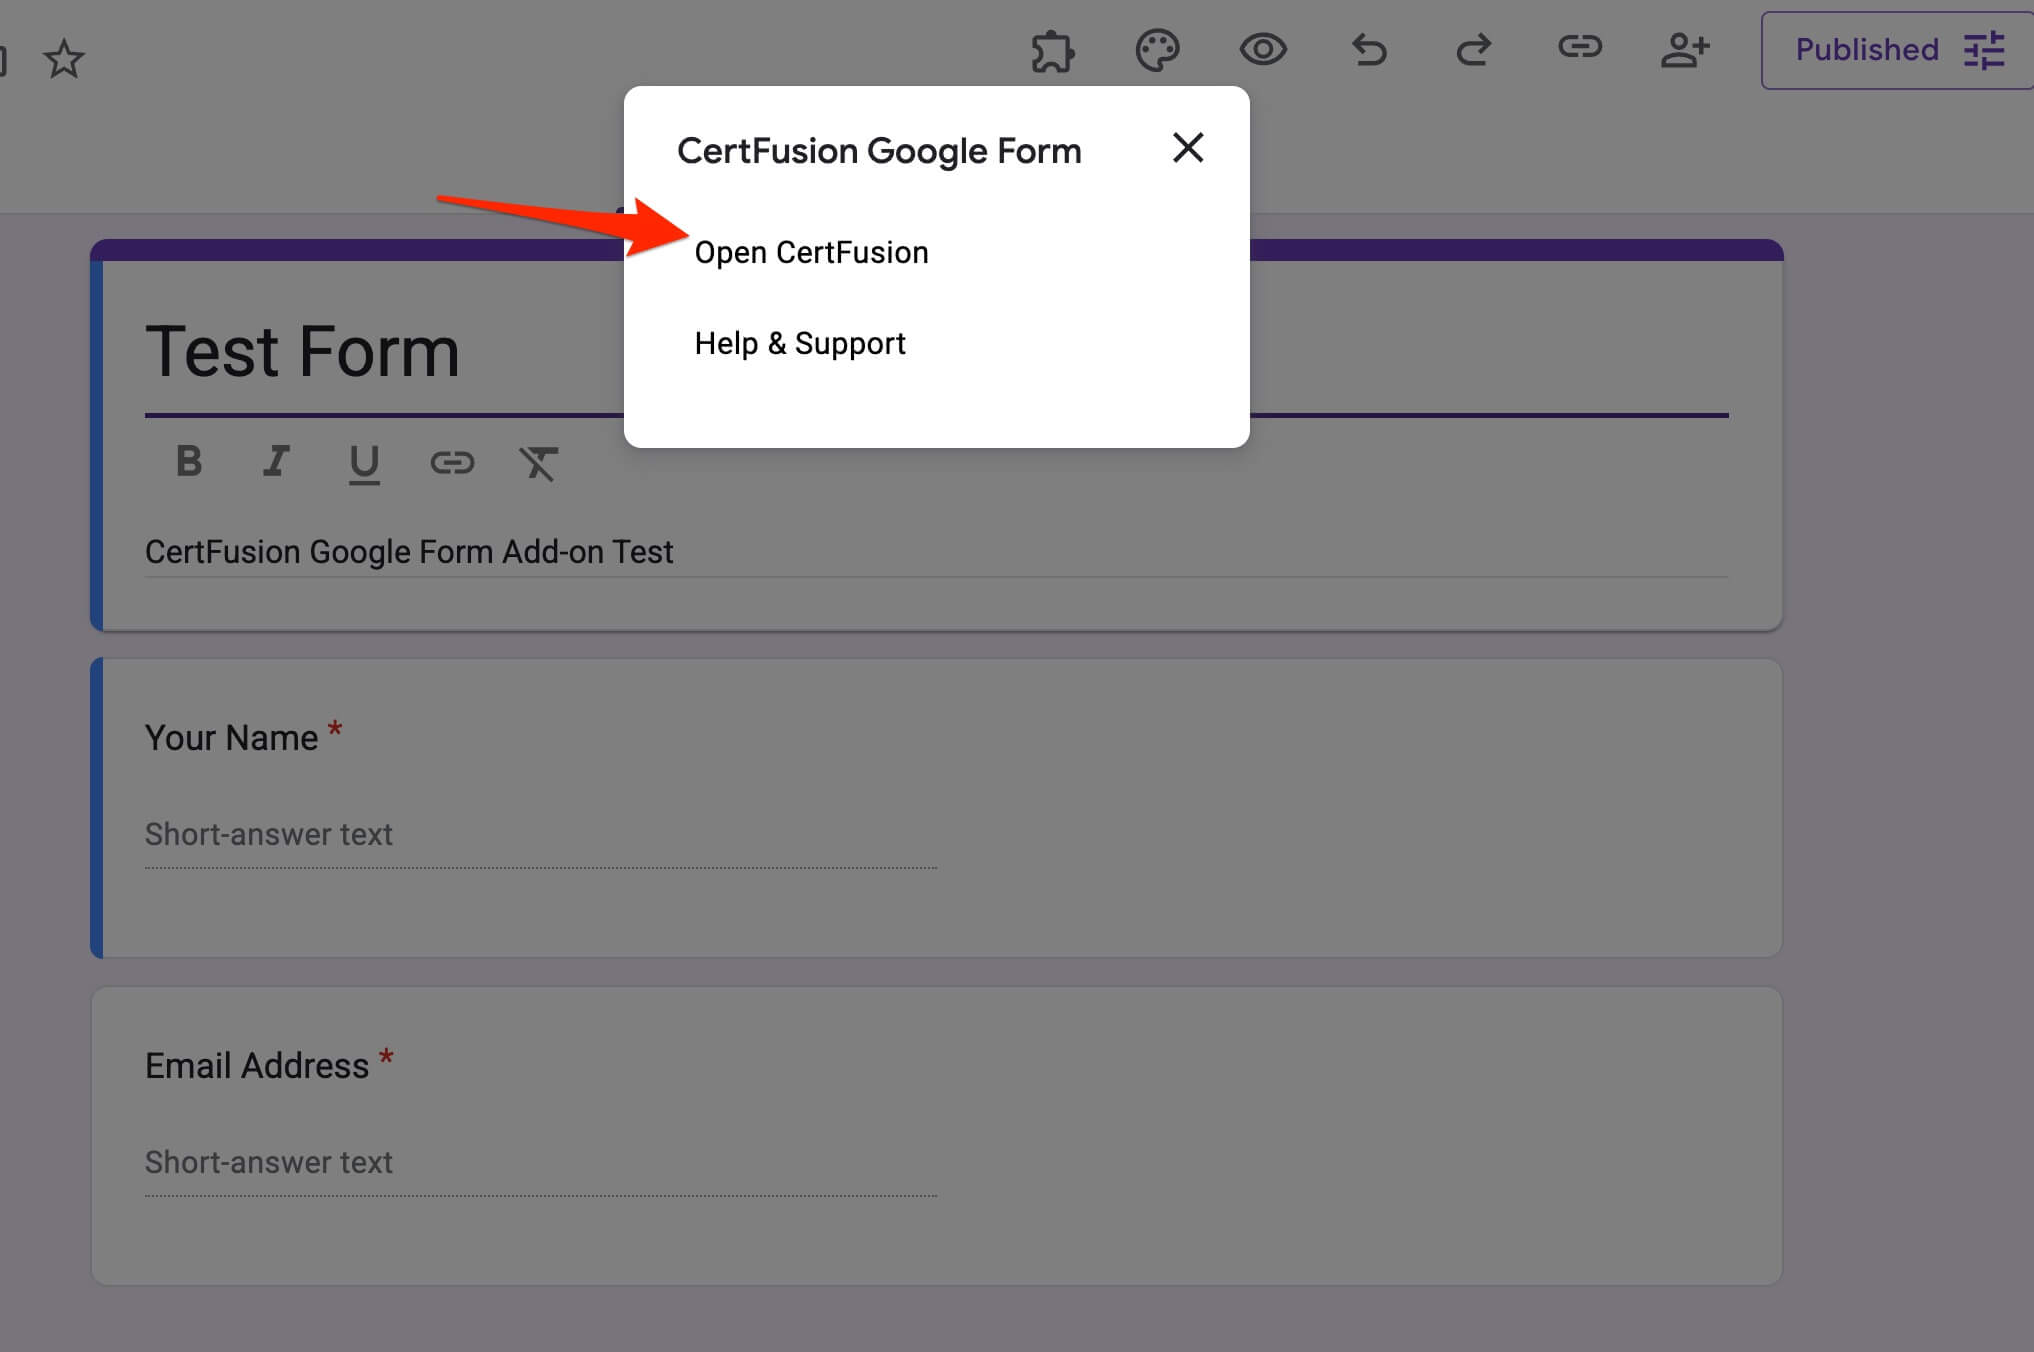
Click CertFusion → Open CertFusion in the Google Form toolbar.
-
Enter your CertFusion API key (found in your CertFusion dashboard) and click Save API Key.
-
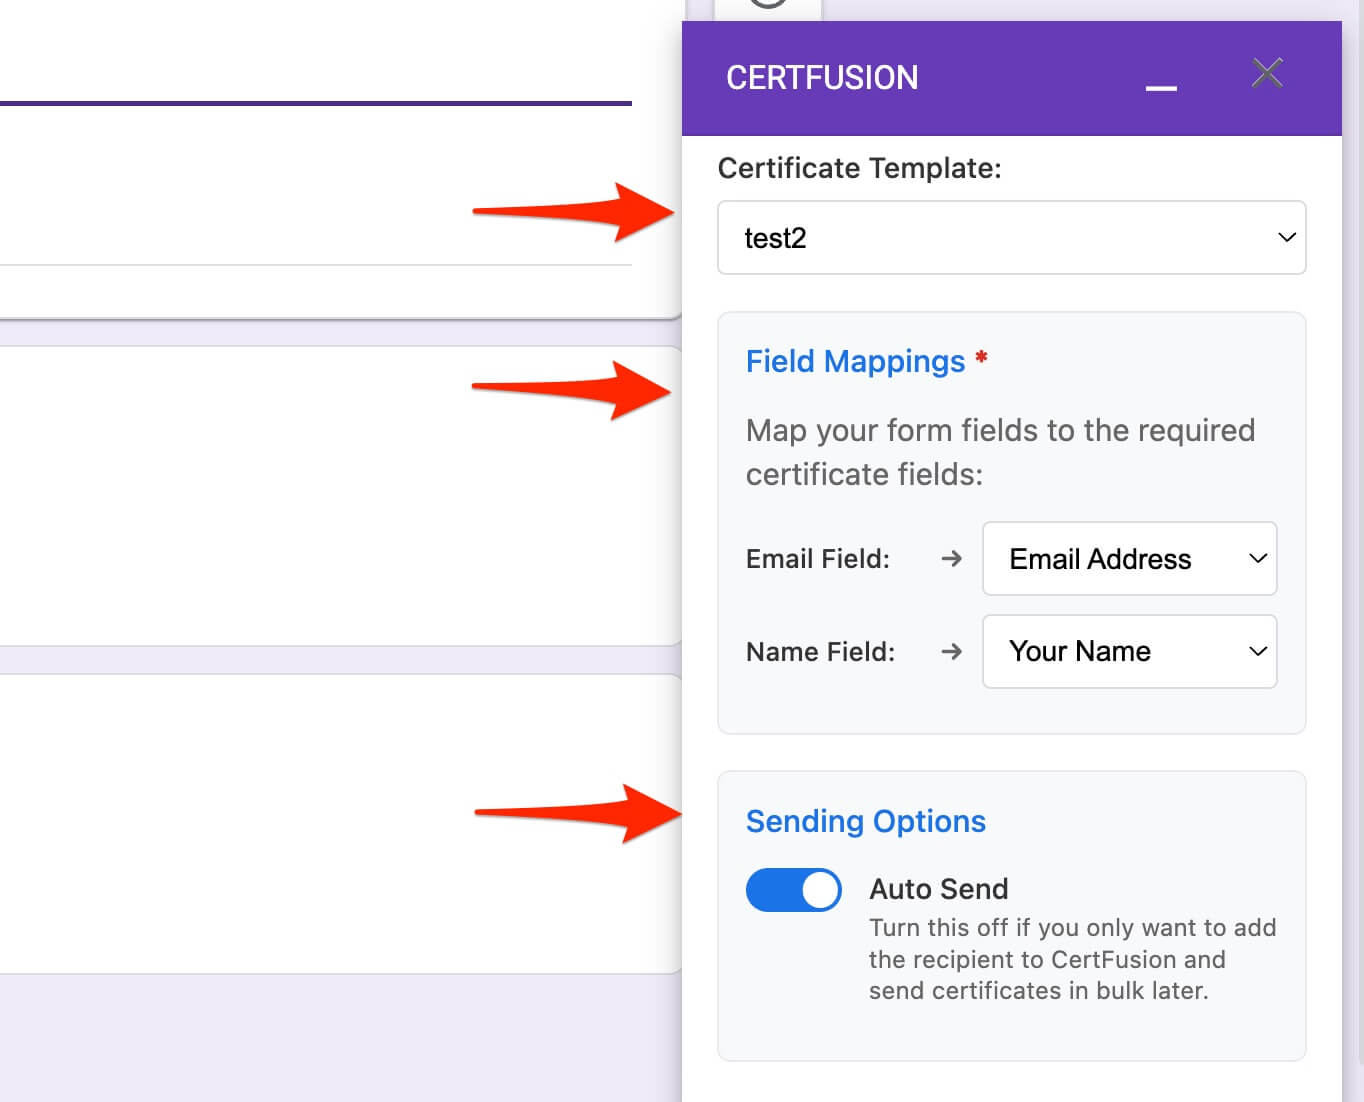
Select a certificate template from the dropdown — this is the design that will be issued.
-
Map your form fields to certificate fields:
- Email Field: Map to the question collecting participant emails.
- Name Field: Map to the question collecting participant names.
-
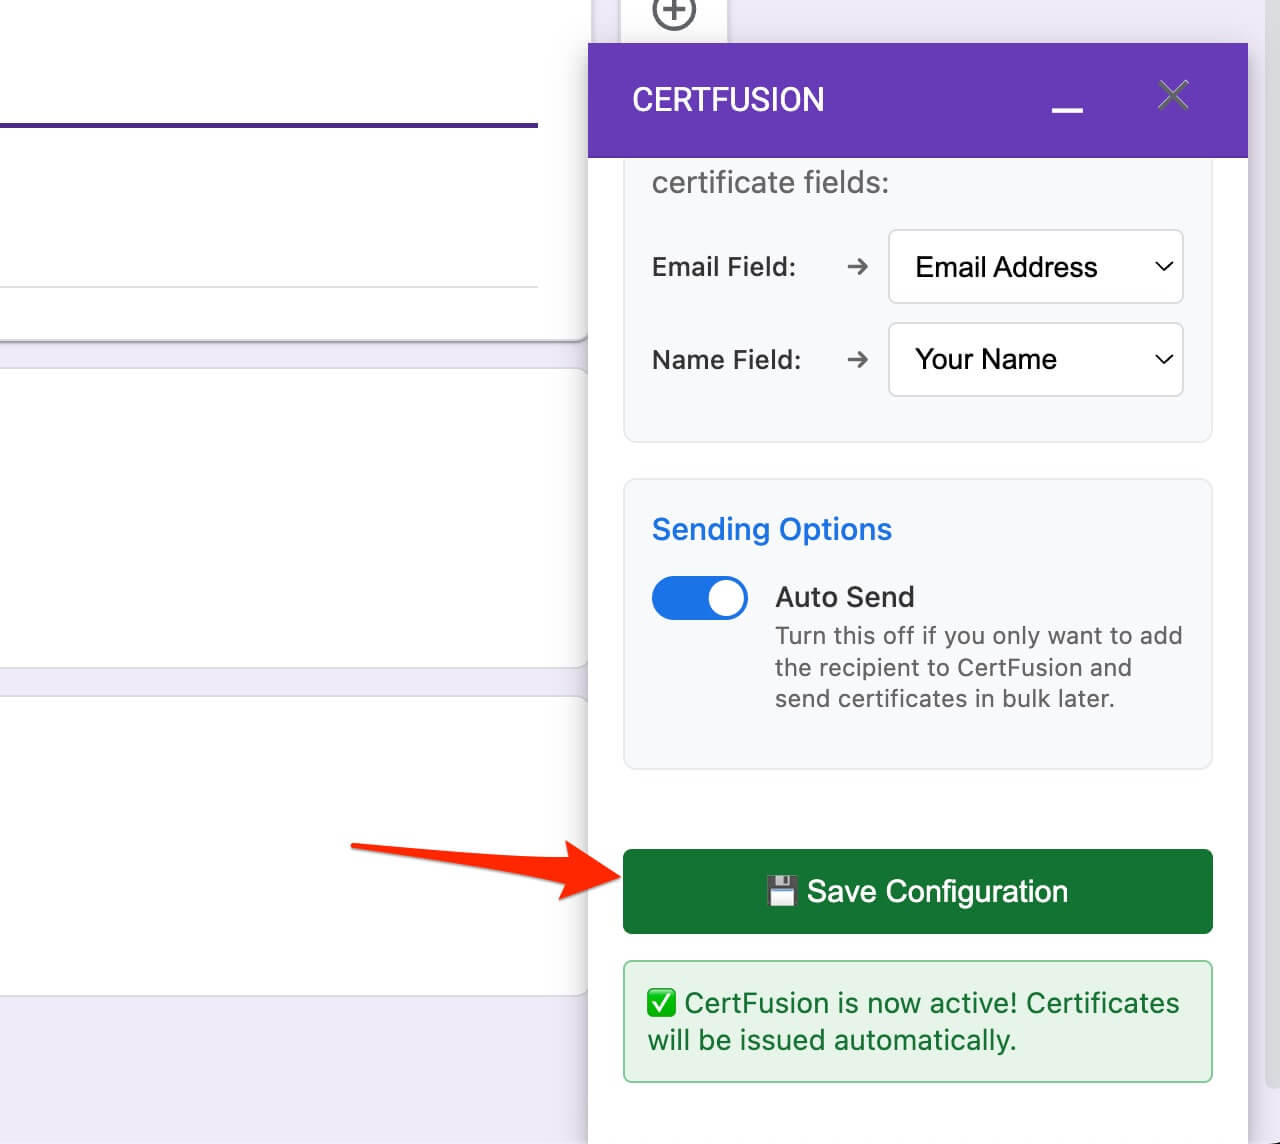
Configure sending options:
- Auto Send: Toggle on to automatically issue certificates when someone submits a response.
- Toggle off if you prefer to issue certificates manually later.
-
Click Save Configuration to activate the integration.
Step 3: Test Your Integration
- Submit a test response to your form.
- Verify that a new recipient appears in your CertFusion dashboard.
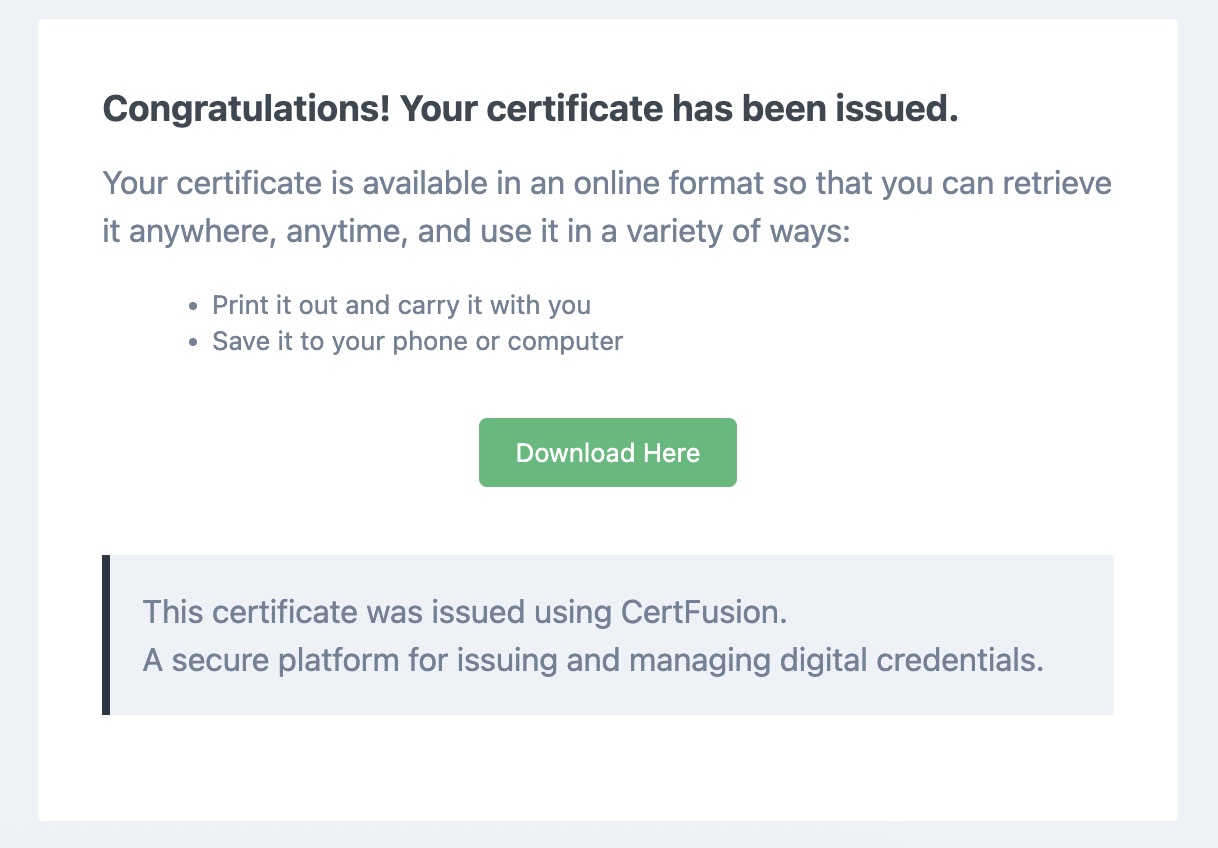
- If Auto Send is enabled, confirm that a certificate is automatically issued.
- Test recipients should receive an email containing a unique certificate link.
Step 4: Issue Certificates for Webinars
When running a webinar:
- Share your Google Form with participants to collect their attendance or registration details.
- CertFusion can automatically issue webinar completion certificates as soon as a participant submits the form.
- Each certificate will include:
- Recipient Name (from form submission)
- Issued Date (auto-filled)
- Certificate UUID (unique for verification)
Tip: Ensure that Name and Email fields are required to avoid missing certificates.
Step 5: Manage Your Integration
- Modify field mappings, template selection, or auto-send settings via CertFusion → Open CertFusion.
- Check your dashboard to monitor issued certificates.
- Resend certificates if necessary.
For more details on this integration, see the full Google Forms integration guide.
Why Use CertFusion with Google Forms
- Fully Automated: Issue certificates instantly without manual effort.
- Dynamic Fields: Name, Issued Date, and Certificate UUID are automatically included.
- Customizable: Map extra Google Form fields to custom certificate fields.
- Perfect for Webinars: Certificates are generated as soon as participants register or complete a form.
Next Steps
Now you know how to auto generate e-certificate from Google Form and how to generate e-certificate from Google Form for webinar participants.
📌 Pro Tip: Test your form integration with a dummy submission before your live event to ensure correct field mapping and auto-issuance.
👉 Get started with CertFusion and automate your Google Form certificates today.
Table of Contents
Related Articles
Discover more insights and stories that might interest you