3 Simple Methods to Split First and Last Names in Excel
If you have a list of full names in Excel and want to split them into first and last names, follow these simple steps:
Method 1: Using Excel's Text to Columns Feature
This is the quickest way to separate names.
Steps:
-
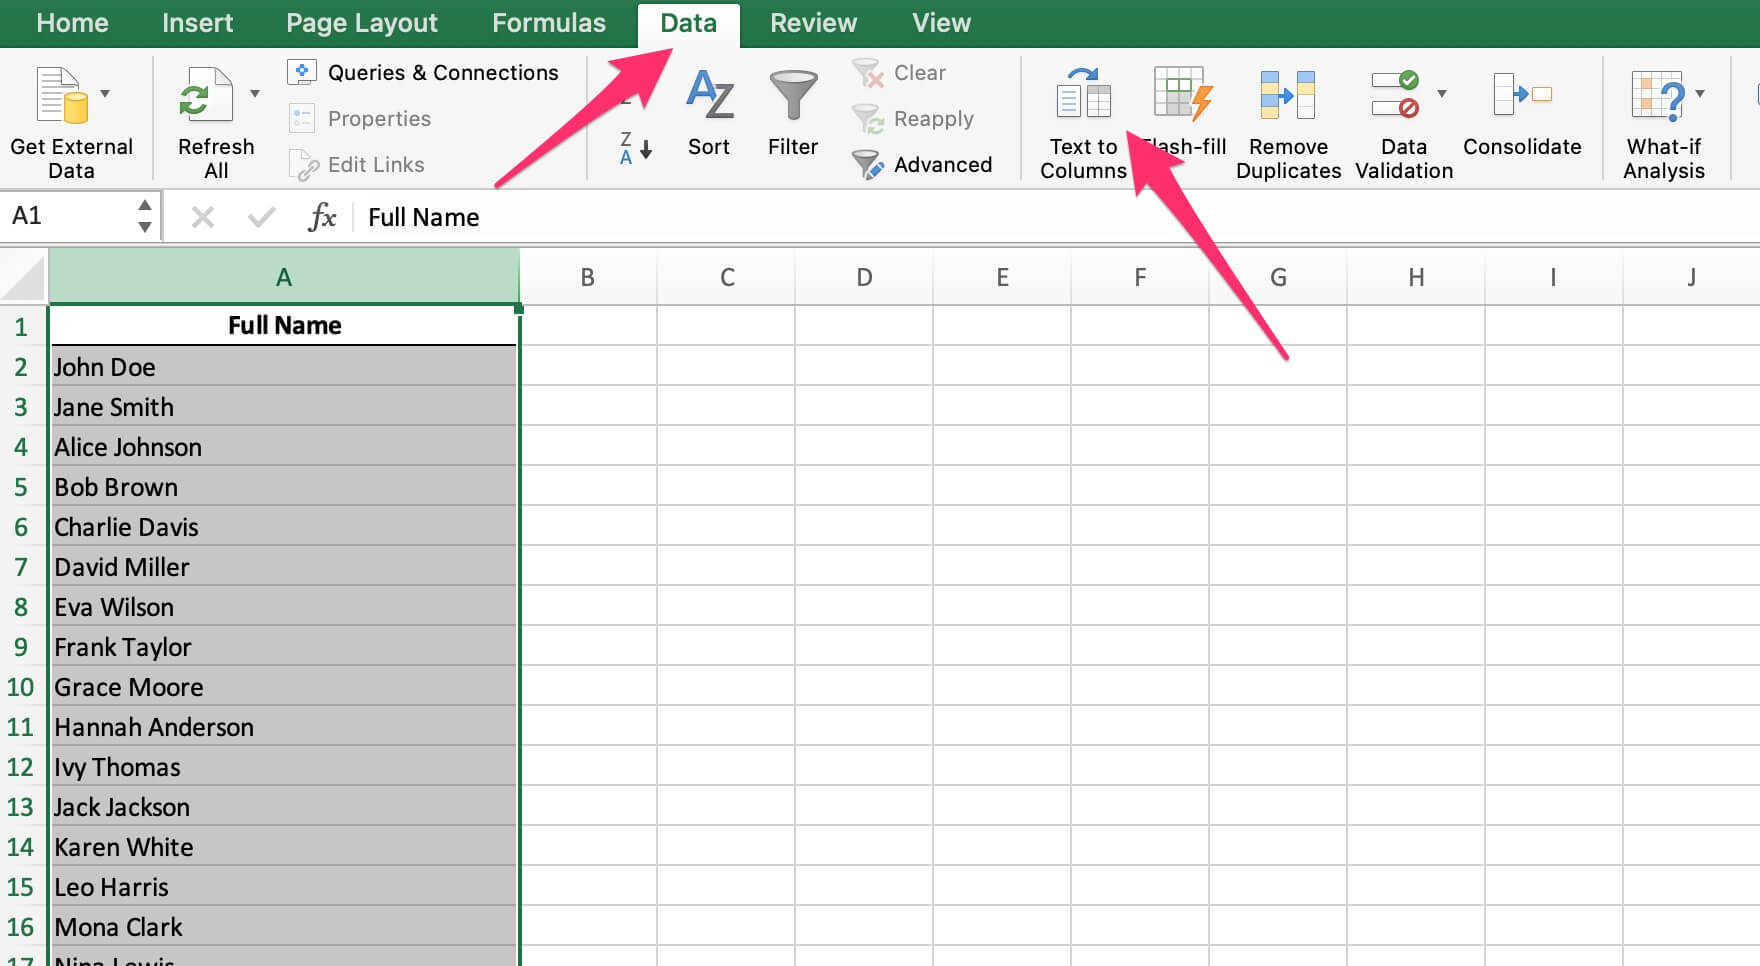
Select the Column with Full Names:
- Highlight the column containing the full names.

-
Open the Text to Columns Wizard:
- Go to the Data tab in the ribbon.
- Click on Text to Columns.
-
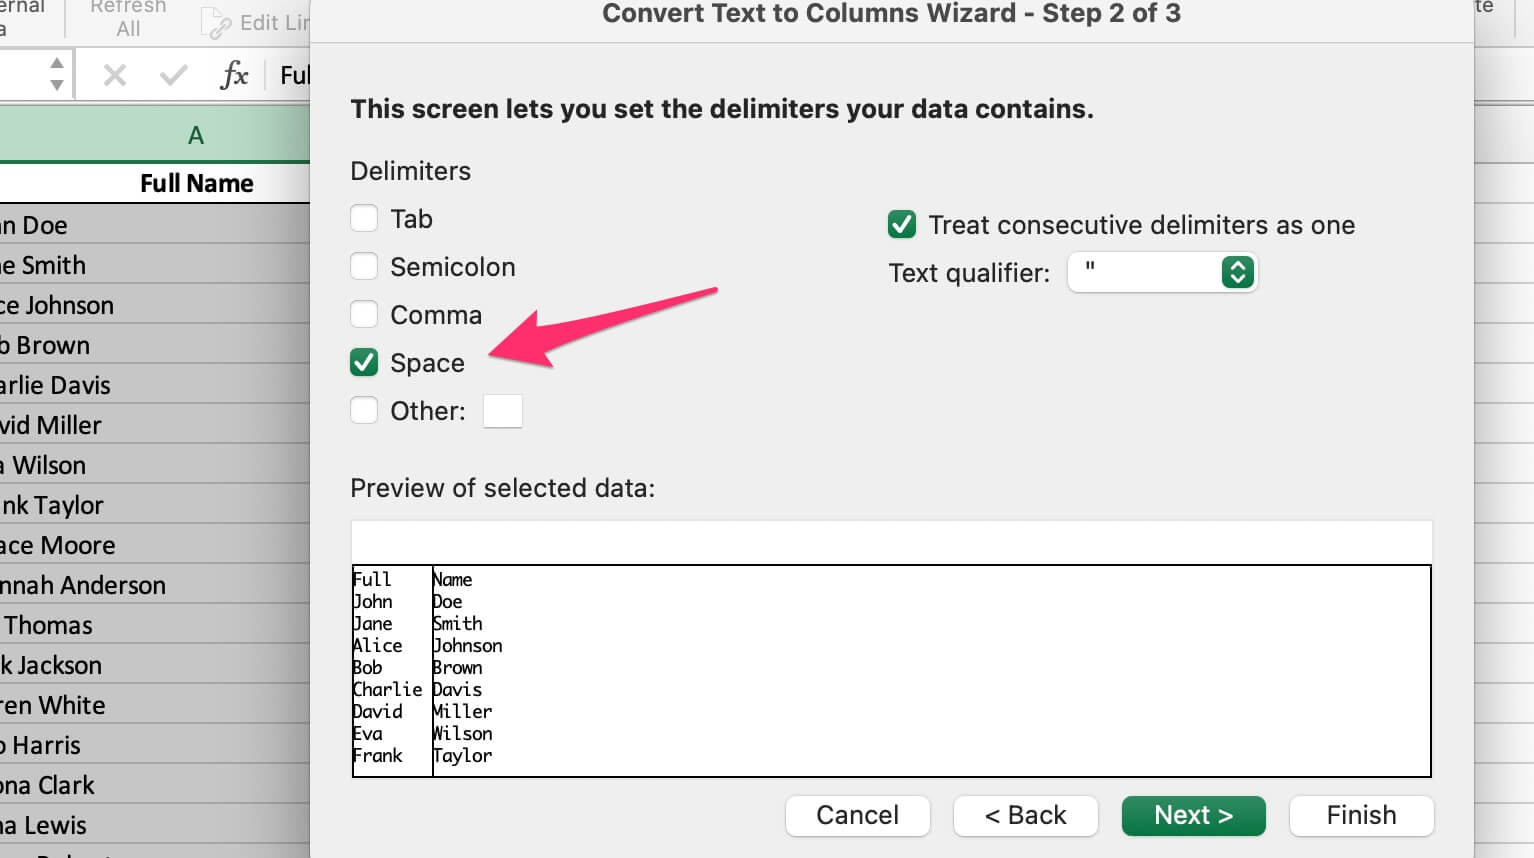
Choose the Delimiter:
- In the wizard, select Delimited and click Next.
- Check the box for Space (or any other delimiter separating the names).
- Click Next.
-
Choose the Output Location:
- Select where you want the separated names to appear. By default, it will overwrite the original column. To avoid this, specify a new column.

-
Finish:
- Click Finish, and Excel will split the names into two columns.

Method 2: Using Excel Formulas
If you prefer to keep the original data intact, use formulas to split the names.
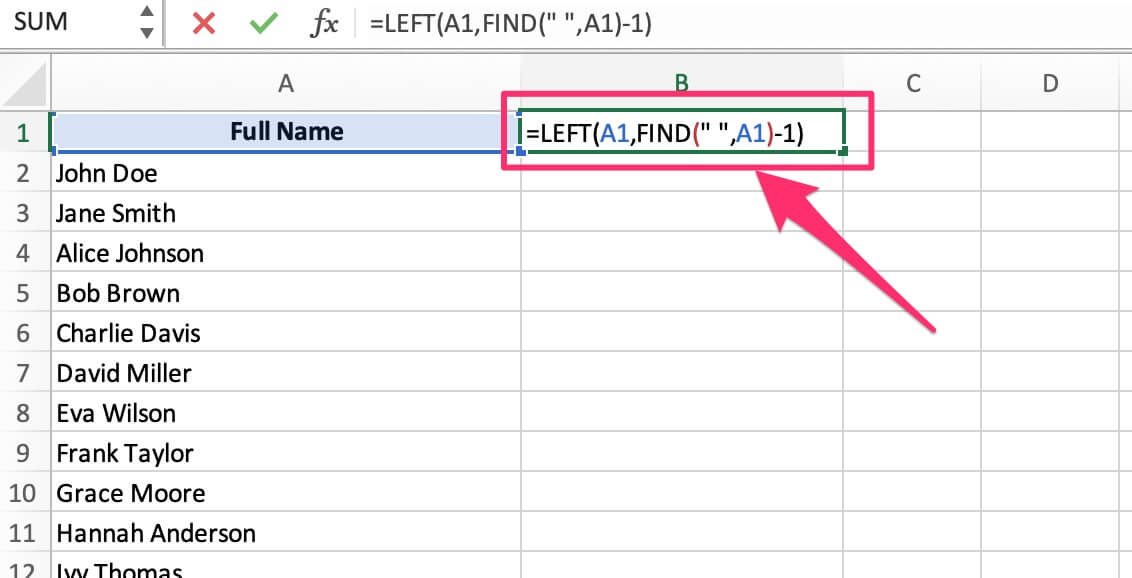
Formula for First Name:
-
Insert a New Column for First Names:
- In the first cell of the new column, type:
=LEFT(A1,FIND(" ",A1)-1) - Replace
A1with the cell containing the full name.
- In the first cell of the new column, type:
-
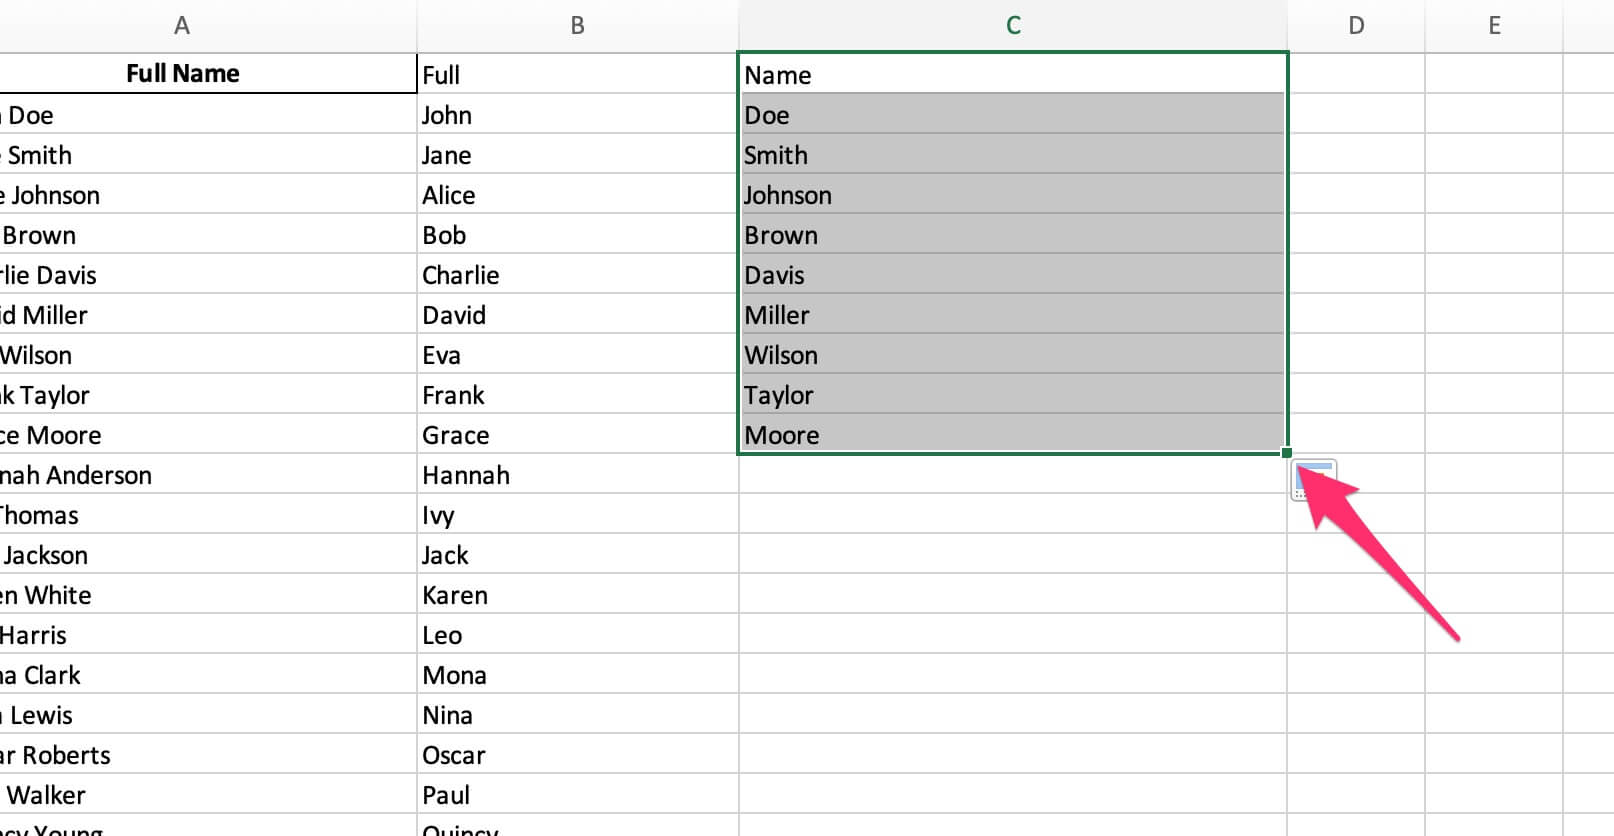
Copy the Formula Down:
- Drag the fill handle to apply the formula to the rest of the column.

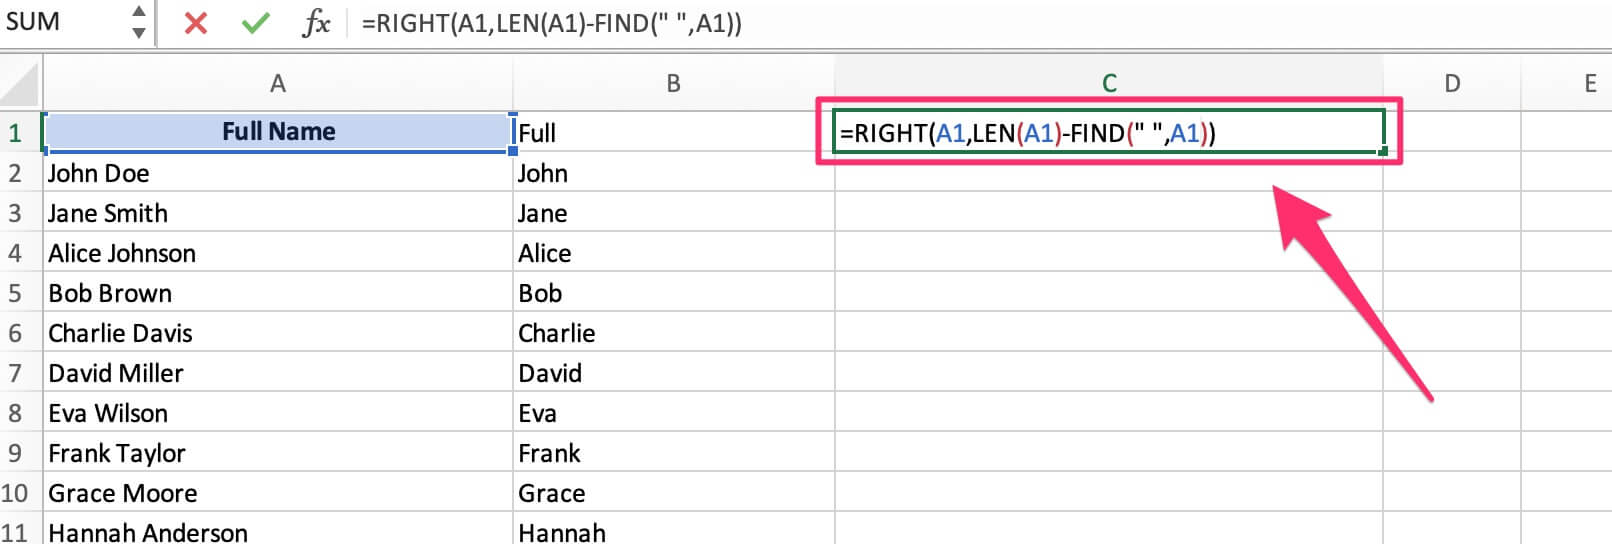
Formula for Last Name:
-
Insert Another Column for Last Names:
- In the first cell of the new column, type:
=RIGHT(A1,LEN(A1)-FIND(" ",A1)) - Replace
A1with the cell containing the full name.
- In the first cell of the new column, type:
-
Copy the Formula Down:
- Drag the fill handle to apply the formula to the rest of the column.
Method 3: Using CertFusion’s Name Splitter
If you want an online tool to simplify the process, you can use CertFusion’s Name Splitter. This is ideal for splitting names without relying on Excel’s built-in features.
Steps:
-
Access the Tool:
- Visit CertFusion Name Splitter.

-
Upload Your Excel File:
- Upload the file containing the full names. Make sure your data is in a clean column format.

- Upload the file containing the full names. Make sure your data is in a clean column format.
-
Configure the Split:
- Specify the options (e.g., handle middle names and initials) to separate the names.
- The tool will automatically detect and split the names into first and last name columns.

-
Download the Result:
- Once the split is complete, download the processed file.
Tips:
- If some names have middle names or multiple spaces, use CertFusion for better control.
- Always make a backup of your data before applying changes.
Table of Contents
Related Articles
Discover more insights and stories that might interest you